How to connect to wireless network by using built-in Utility/Client on Windows 7
Step 1
Right click "My computer" and select "Manage".
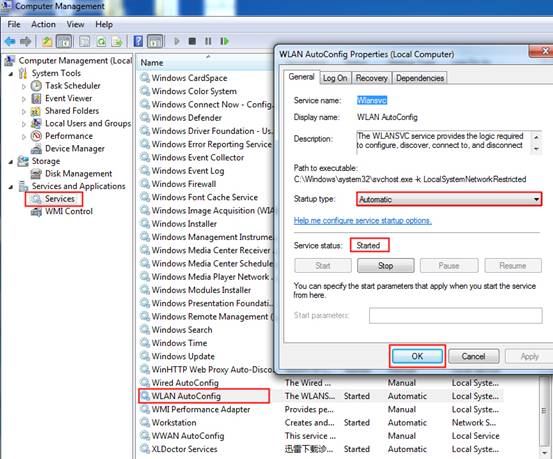
Step 2
Select "Services" in the left menu and find/enable "WLAN AutoConfig".
Step 3
Click Start -> Control Panel, Select and click Network and Sharing Center or Network and Internet-> View network status and tasks, then click Change adapter settings.

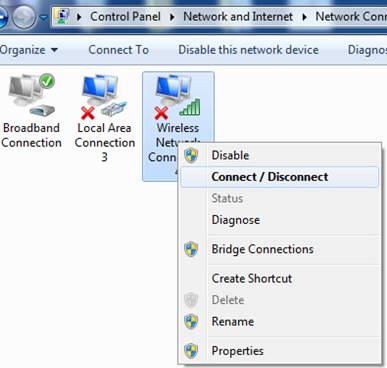
Step 4
Select the wireless connection, right click it and select Connect/Disconnect.
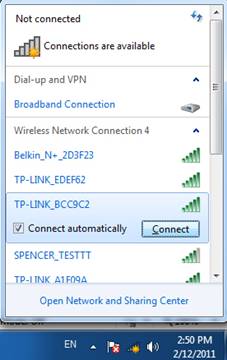
Step 5
At the right side corner, a small popup show the wireless networks. Click Refresh button to view the wireless network. Select the correct one, then double click it or click Connect.
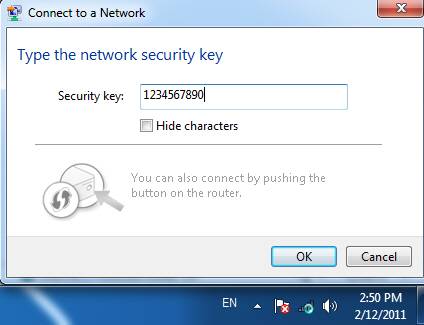
Step 6
If the wireless network is secured, you will be requested to enter the password to connect to it, then click OK.
After a few minutes, it will connect to the wireless network.

Is this faq useful?
Your feedback helps improve this site.
TP-Link Community
Still need help? Search for answers, ask questions, and get help from TP-Link experts and other users around the world.