How to use the TD-W8961ND Wireless Bridge (WDS) Function with another TD-W8961ND
This Article Applies to:
(For TD-W8901G,WDS will only be available on V6 and subsequent version.)
A Wireless Distribution System (WDS) is a system that enables the wireless interconnection of access points in an IEEE 802.11 network. It allows a wireless network to be expanded using multiple access points without the need for a wired backbone to link them. The following is a simple SOHO solution guide about WDS.
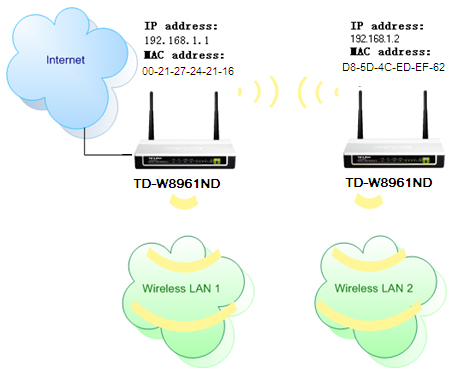
As an example, we define the TD-W8961ND that connecting to the Internet as the main TD-W8961ND, and the other one as secondary TD-W8961ND. The two TD-W8961NDs have their own SSID and security.
Note: The two TD-W8961NDs have the security keys for their own wireless networks, they can be different. And they use the same WDS key to make the WDS connection.
If you choose WEP as the security type of the wireless signal, the two TD-W8961ND should have the same WEP key. And you don´t need to set a key special for WDS connection.
Please follow the instructions to configure them.
Part 1: configure the Main TD-W8961ND
Step 1 Log into TD-W8961ND’s management page. If you are not sure about how to do this, please click here.
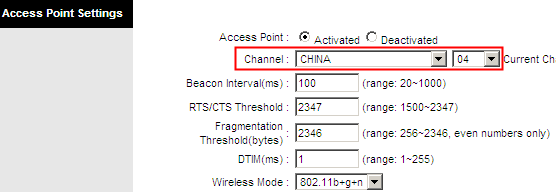
Step 2 On the top-side menu, click Interface Setup->Wireless, change the channel to a fixed one, like 4.
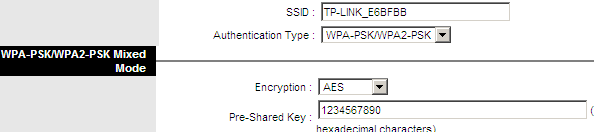
Step 3 Check the SSID of the main TD-W8961ND, and set the wireless security for it. As only AES/TKIP is available for WDS, please choose WPA-PSK/WPA2-PSK as the Authentication Type, Encryption is AES. Then type in the Pre-Shared Key.
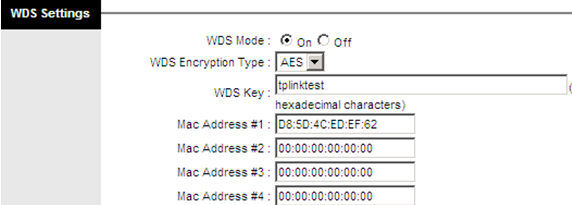
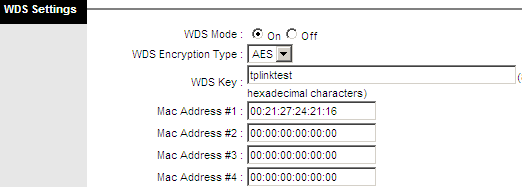
Step 4 Switch on the WDS Mode. Create a Key special for the WDS connection. You need to find out what the MAC address is of the Secondary TD-W8961ND and type it in the box like “xx:xx:xx:xx:xx:xx”. You can go to Status->Device Info page to check the MAC address.
Step 5 Click Save button.
Part 2: Configure the Secondary TD-W8961ND
Step 1 to Step 5, please refer to the part 1. The key special for WDS connection must be correct, it should be the same with the first device.


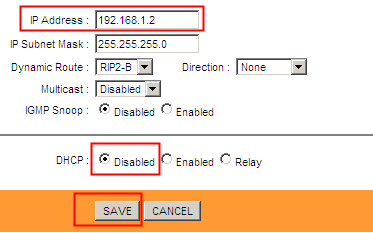
Step 5 On the top-side menu, click Interface Setup -> LAN, please change the LAN IP to 192.168.1.2, and Disable the DHCP Server function. Click Save button.
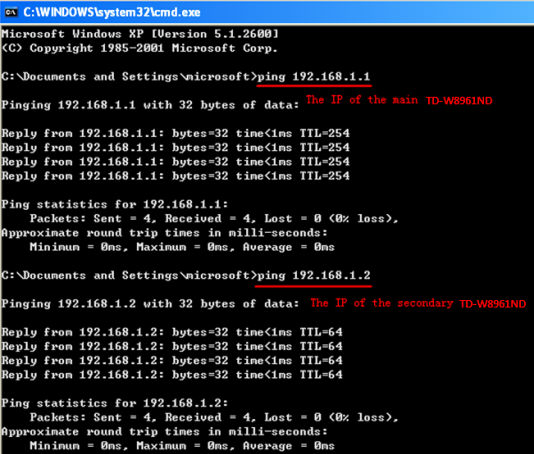
Here until, all settings required by WDS function is completed. You can make a simple check by the Ping utility. If the ping proceeds successfully (which means the WDS performs properly), you will see the similar screen as below:
Get to know more details of each function and configuration please go to Download Center to download the manual of your product.
Is this faq useful?
Your feedback helps improve this site.
3.0-F1_1529482239075s.jpg)
TP-Link Community
Still need help? Search for answers, ask questions, and get help from TP-Link experts and other users around the world.