How to add VIGI devices on VIGI Cloud VMS
Contents
Camera-Side Binding to VIGI Cloud VMS
NVR-Side Binding to VIGI Cloud VMS
Objective
VIGI Cloud VMS provides centralized cloud management for VIGI Cameras, VIGI NVRs, and VIGI Solar Panels. This article describes how to add VIGI devices to VIGI Cloud VMS.
Requirements
- VIGI Cloud VMS
- VIGI Camera/VIGI NVR
Introduction
By hosting the server in the cloud, VIGI Cloud VMS can help achieve centralized cloud management for VIGI devices across multiple sites. Devices can be added from the VMS platform through three methods:
Auto Discover: Automatically scan and add VIGI devices in the same subnet when the management PC and VIGI devices are in the same network.
Manually Add: Add devices by SN or Device ID when the PC and VIGI devices are not in the same network but the devices are connected to the internet.
Import: To add devices in batches, import a list of device SNs or Device IDs into VIGI VMS for batch addition.
Alternatively, devices can also be bound to the cloud directly from the device side.
Device-Side Binding to VIGI Cloud VMS: IPCs support binding to VIGI Cloud VMS via the Web Management Interface, while NVRs support both cloud binding through the Web Management Interface and through the local GUI when connected to a monitor.
Configuration.
Auto Discover
Step 1. Log in to the VIGI Cloud VMS web portal (https://vms.tplinkcloud.com/), select the site and go to the Devices page.
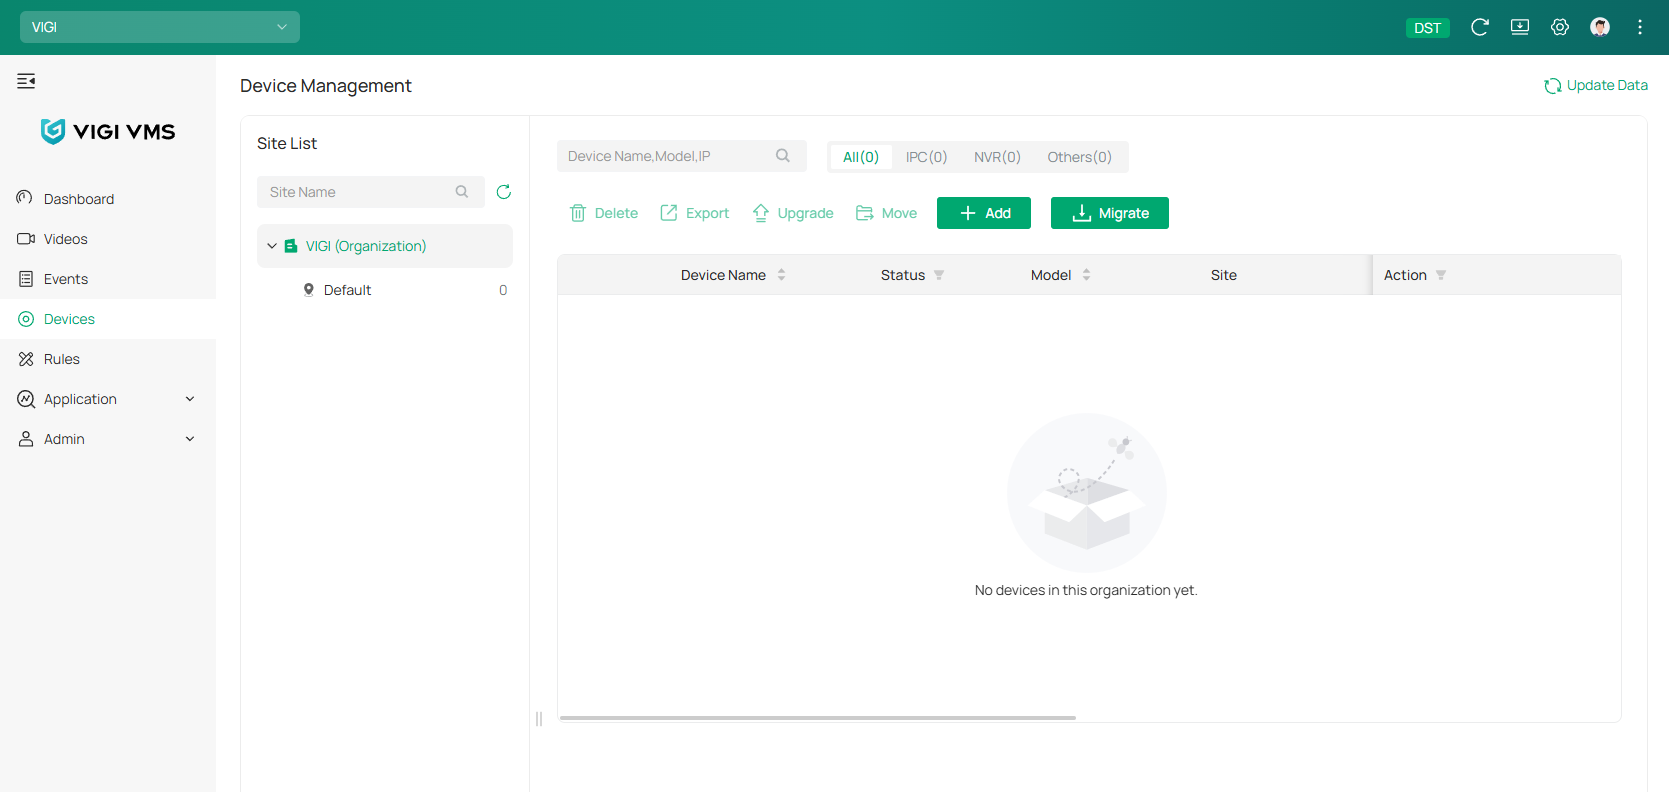
Step 2. Click Add and select the Auto Discover mode. With VIGI VMS Web Player installed, the system will automatically scan VIGI devices in the same subnet as the PC.
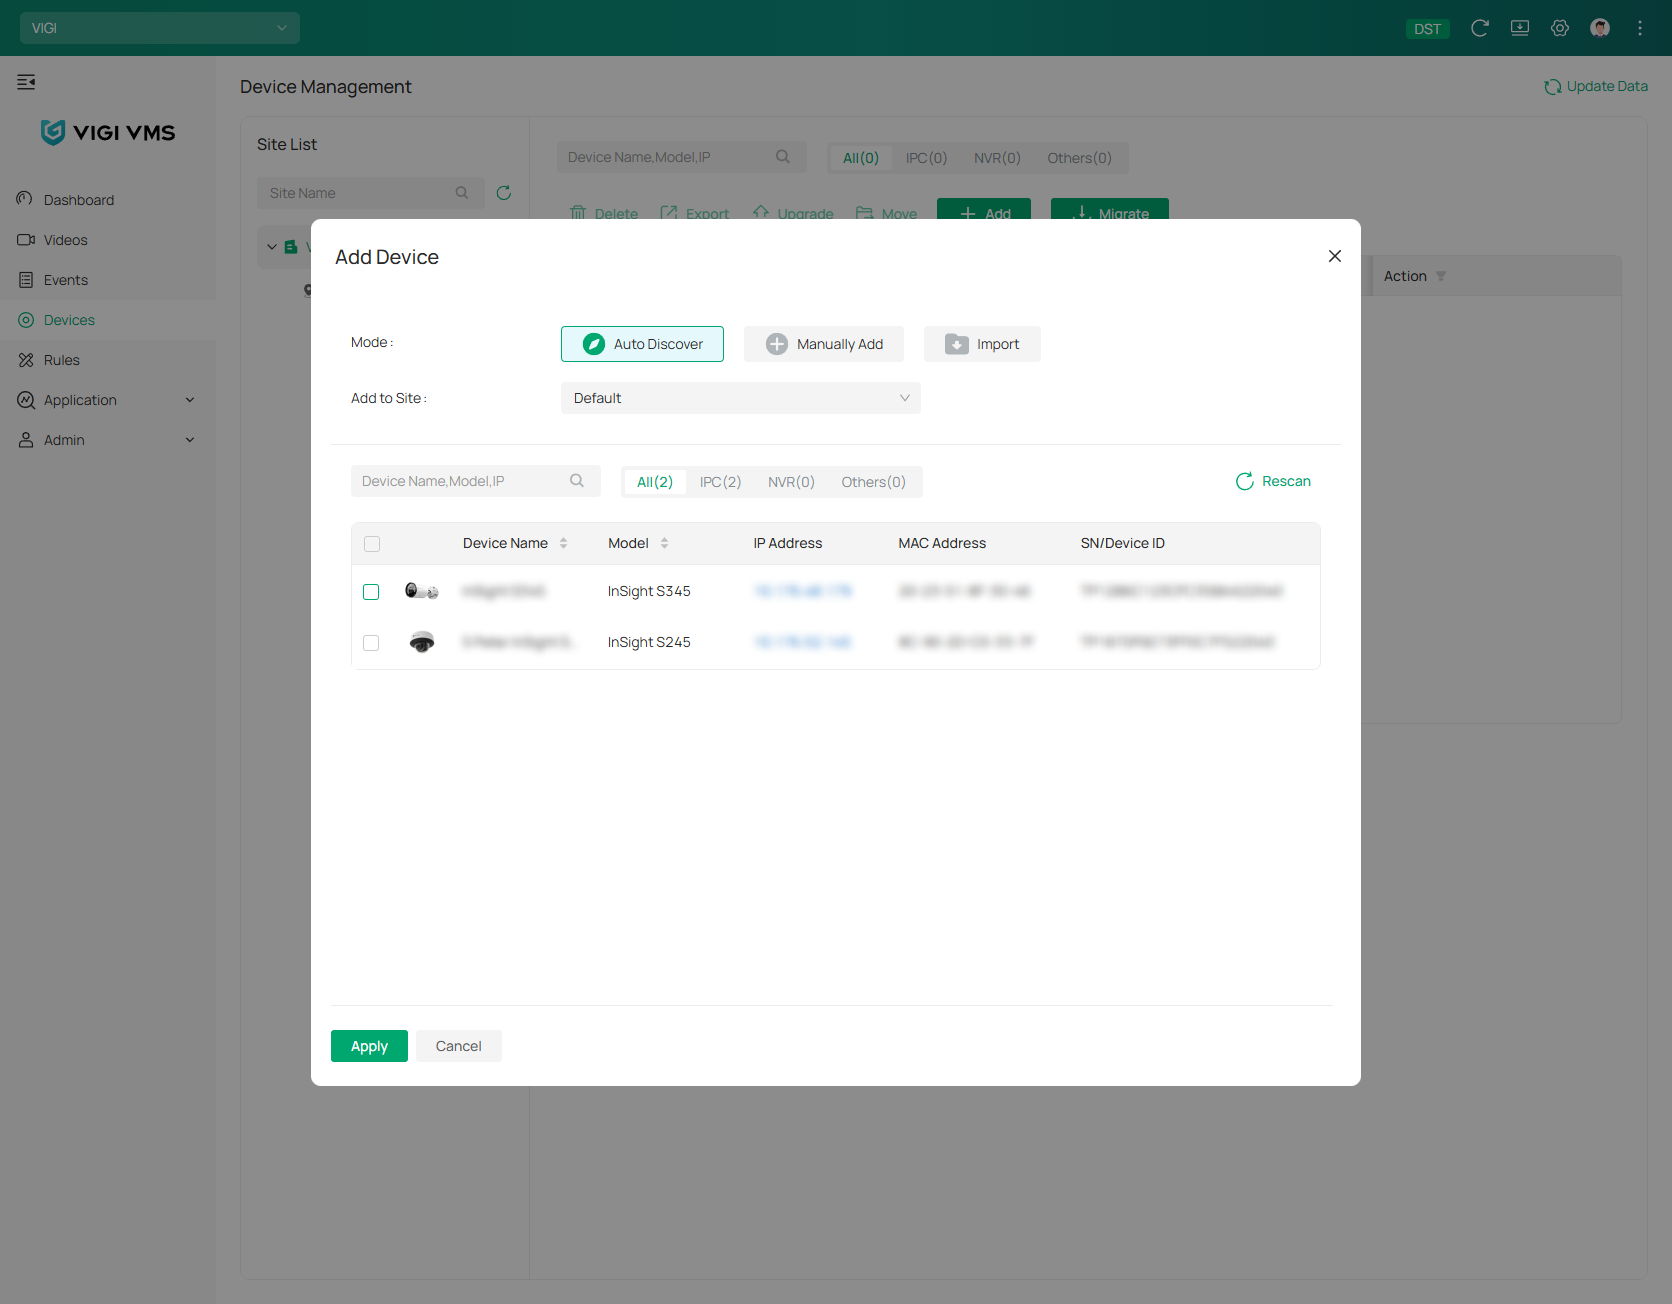
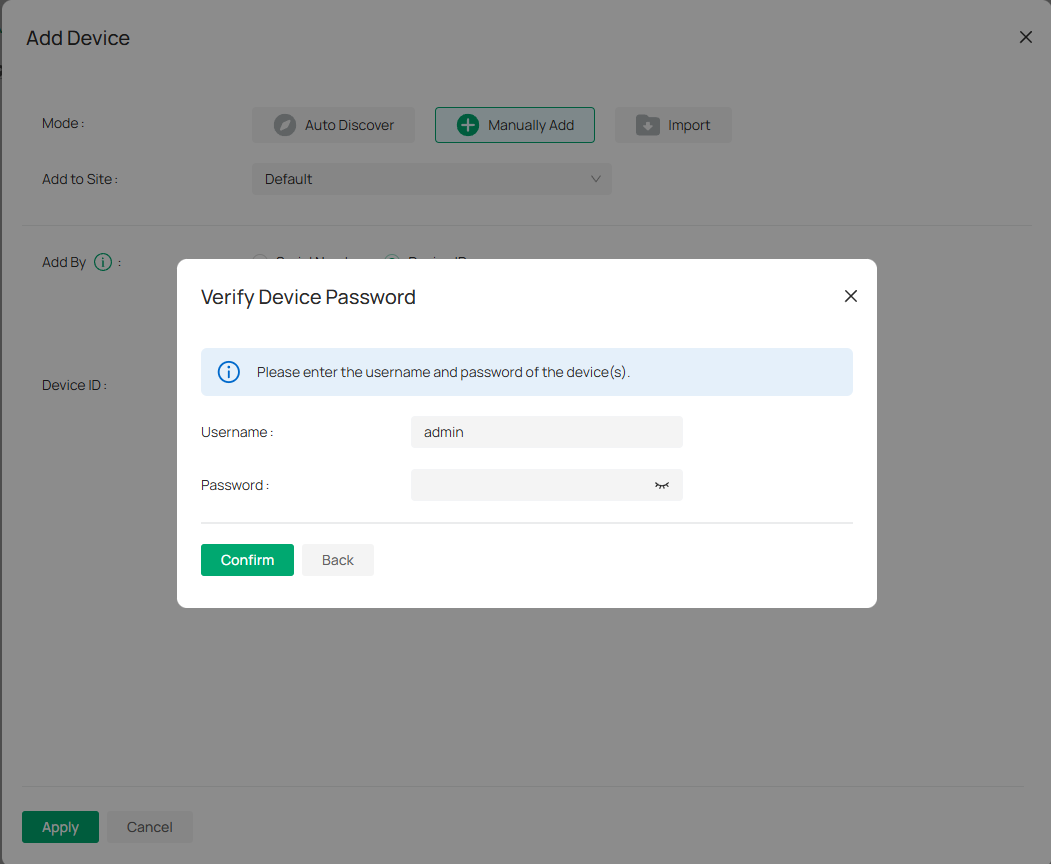
Step 3. Select the site and devices, and click Apply. Enter the device’s username and password.
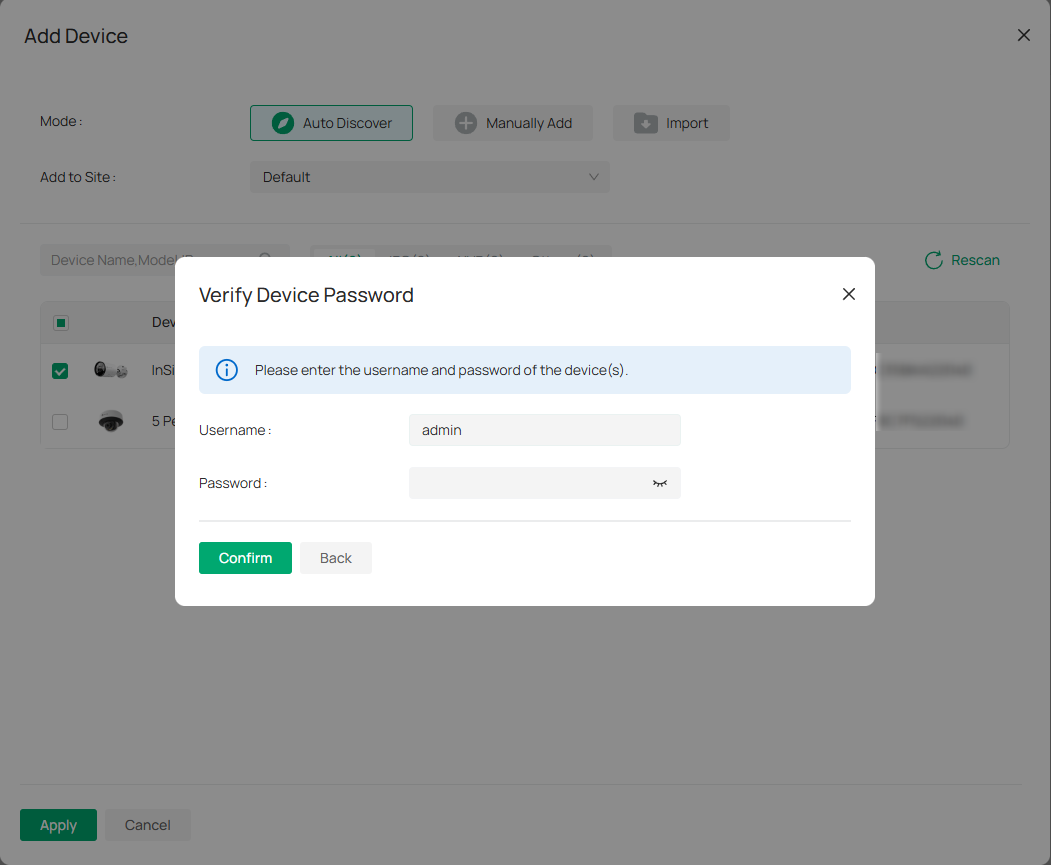
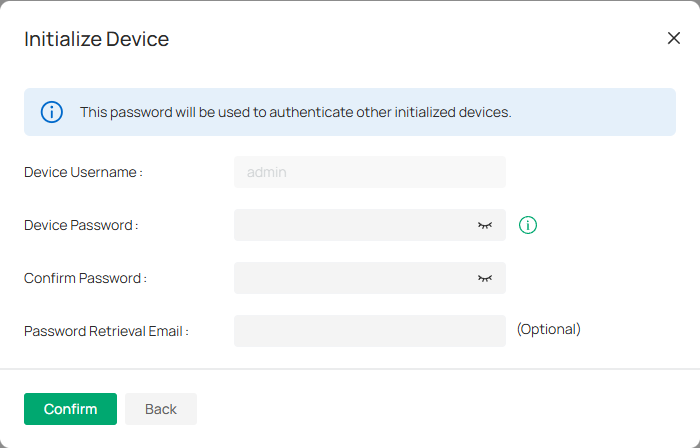
Step 4. If the device is not initialized, continue the step to complete the initialization. If the device is already initialized, skip this step.

Step 5. Done.
Manually Add
Step 1. Log in to the VIGI Cloud VMS web portal (https://vms.tplinkcloud.com/), select the site and go to the Devices page.

Step 2. Click Add and select the Manually Add mode.
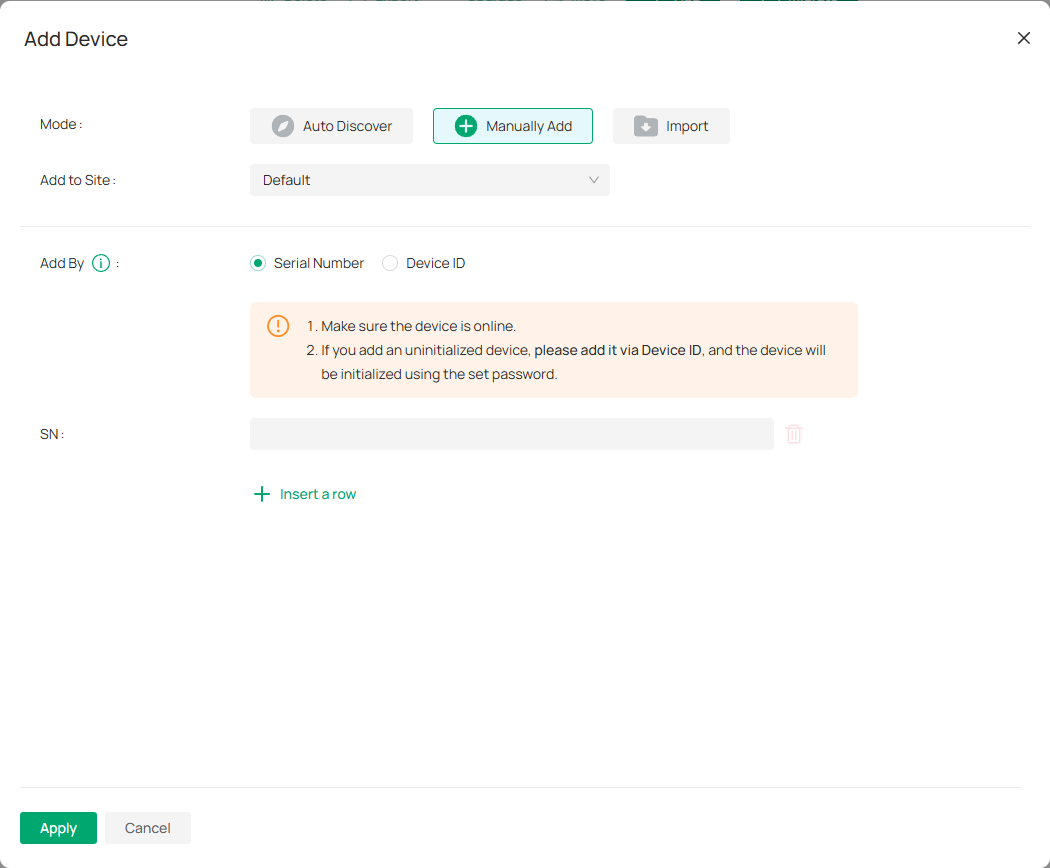
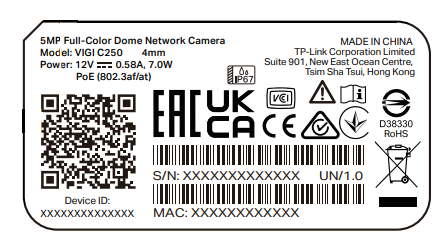
Step 3. Get the device’s SN or Device ID from the product label.

Step 4. Select SN or Device ID and enter the corresponding SN or Device ID. Select the site to add the device, and click Apply.
Step 5. If the device is not initialized, continue the step to complete the initialization. If the device is already initialized, skip this step.
Step 6. Done.
Import
Step 1. Log in to the VIGI Cloud VMS web portal (https://vms.tplinkcloud.com/), select the site and go to the Devices page.

Step 2. Click Add and select the Import mode.
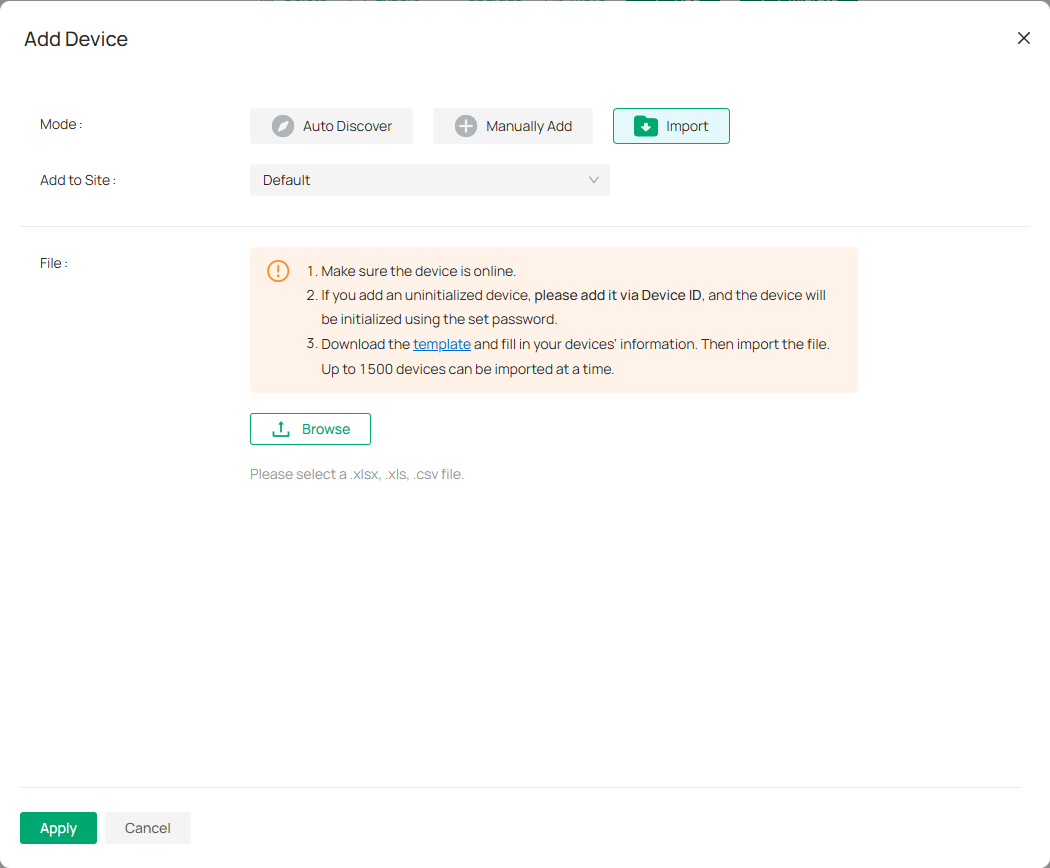
Step 3. Get the device’s SN or Device ID from the product label.
Step 4. Download the template and enter the devices’ SN or Device ID in the template. Select the site to add devices, and upload the completed template.
Step 5. If the device is not initialized, continue the step to complete the initialization. If the device is already initialized, skip this step.

Step 6. Done.
Camera-Side Binding to VIGI Cloud VMS
The following process describes how to add a device to VIGI Cloud VMS via the IPC's Web Management Interface.
Step 1: Open a web browser and access the IPC’s Web Management Interface by IP address. Log in using the device's username and password.
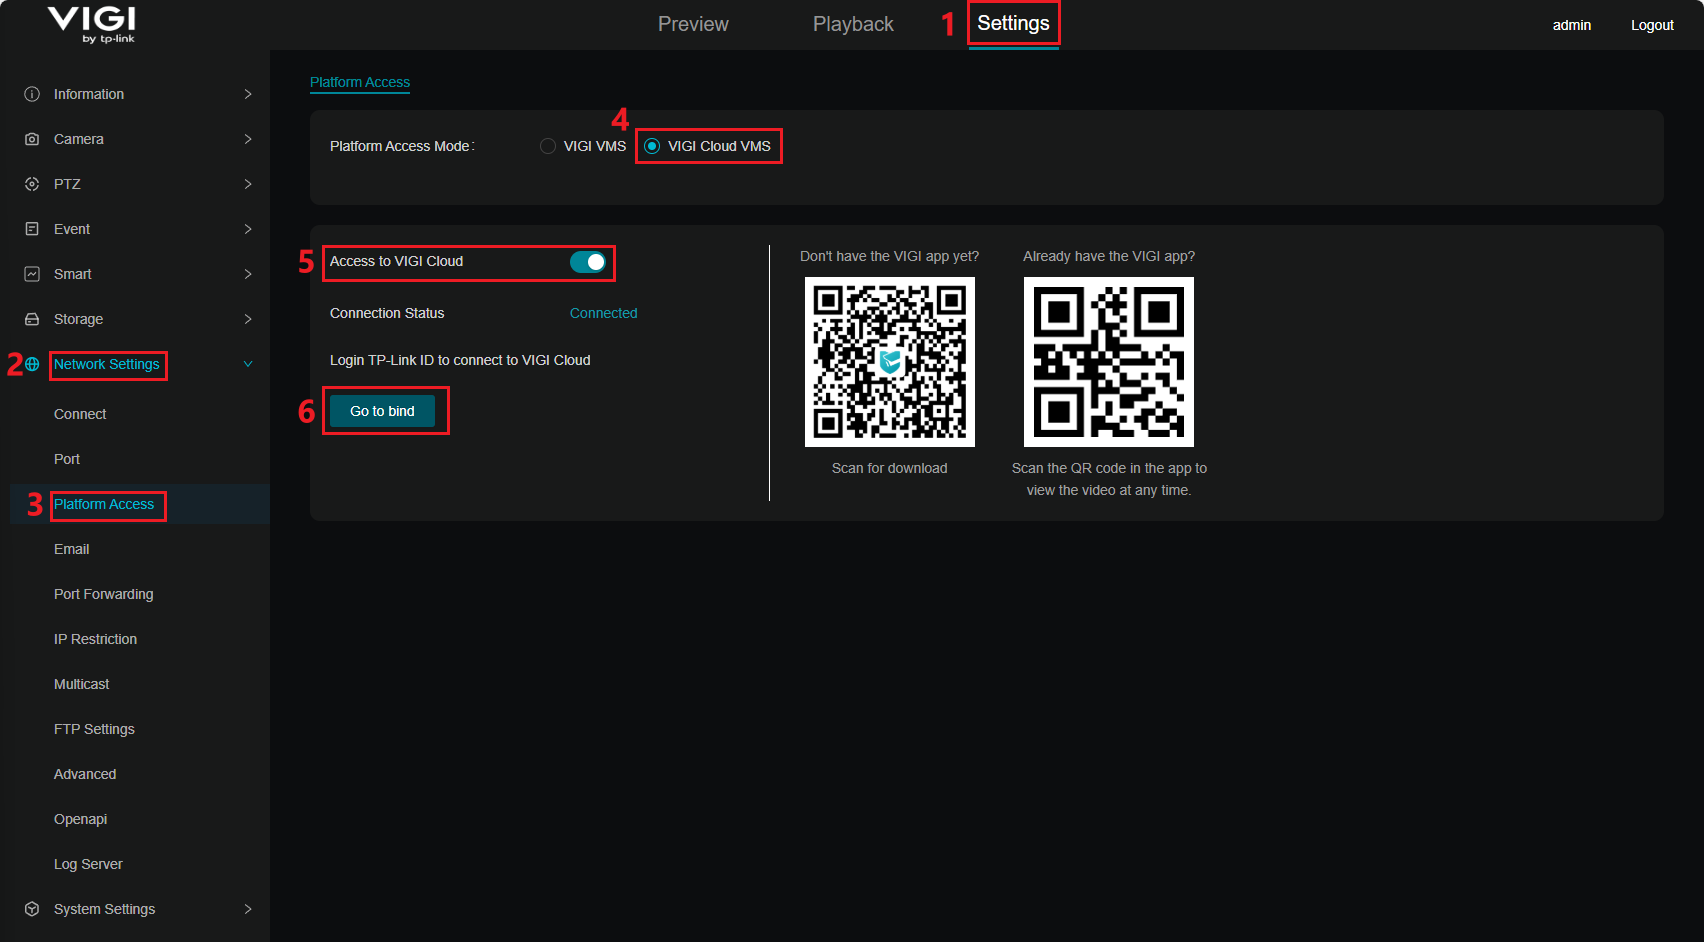
Step 2: Navigate to Settings > Network Settings > Platform Access, set Platform Access Mode to VIGI Cloud VMS, enable Access to VIGI Cloud. Confirm that the Connection Status is Connected, then click Go to Bind. If the status shows Disconnected, please verify the device-side network to ensure proper internet connectivity.
Step 3: Enter your TP-Link ID and Password.

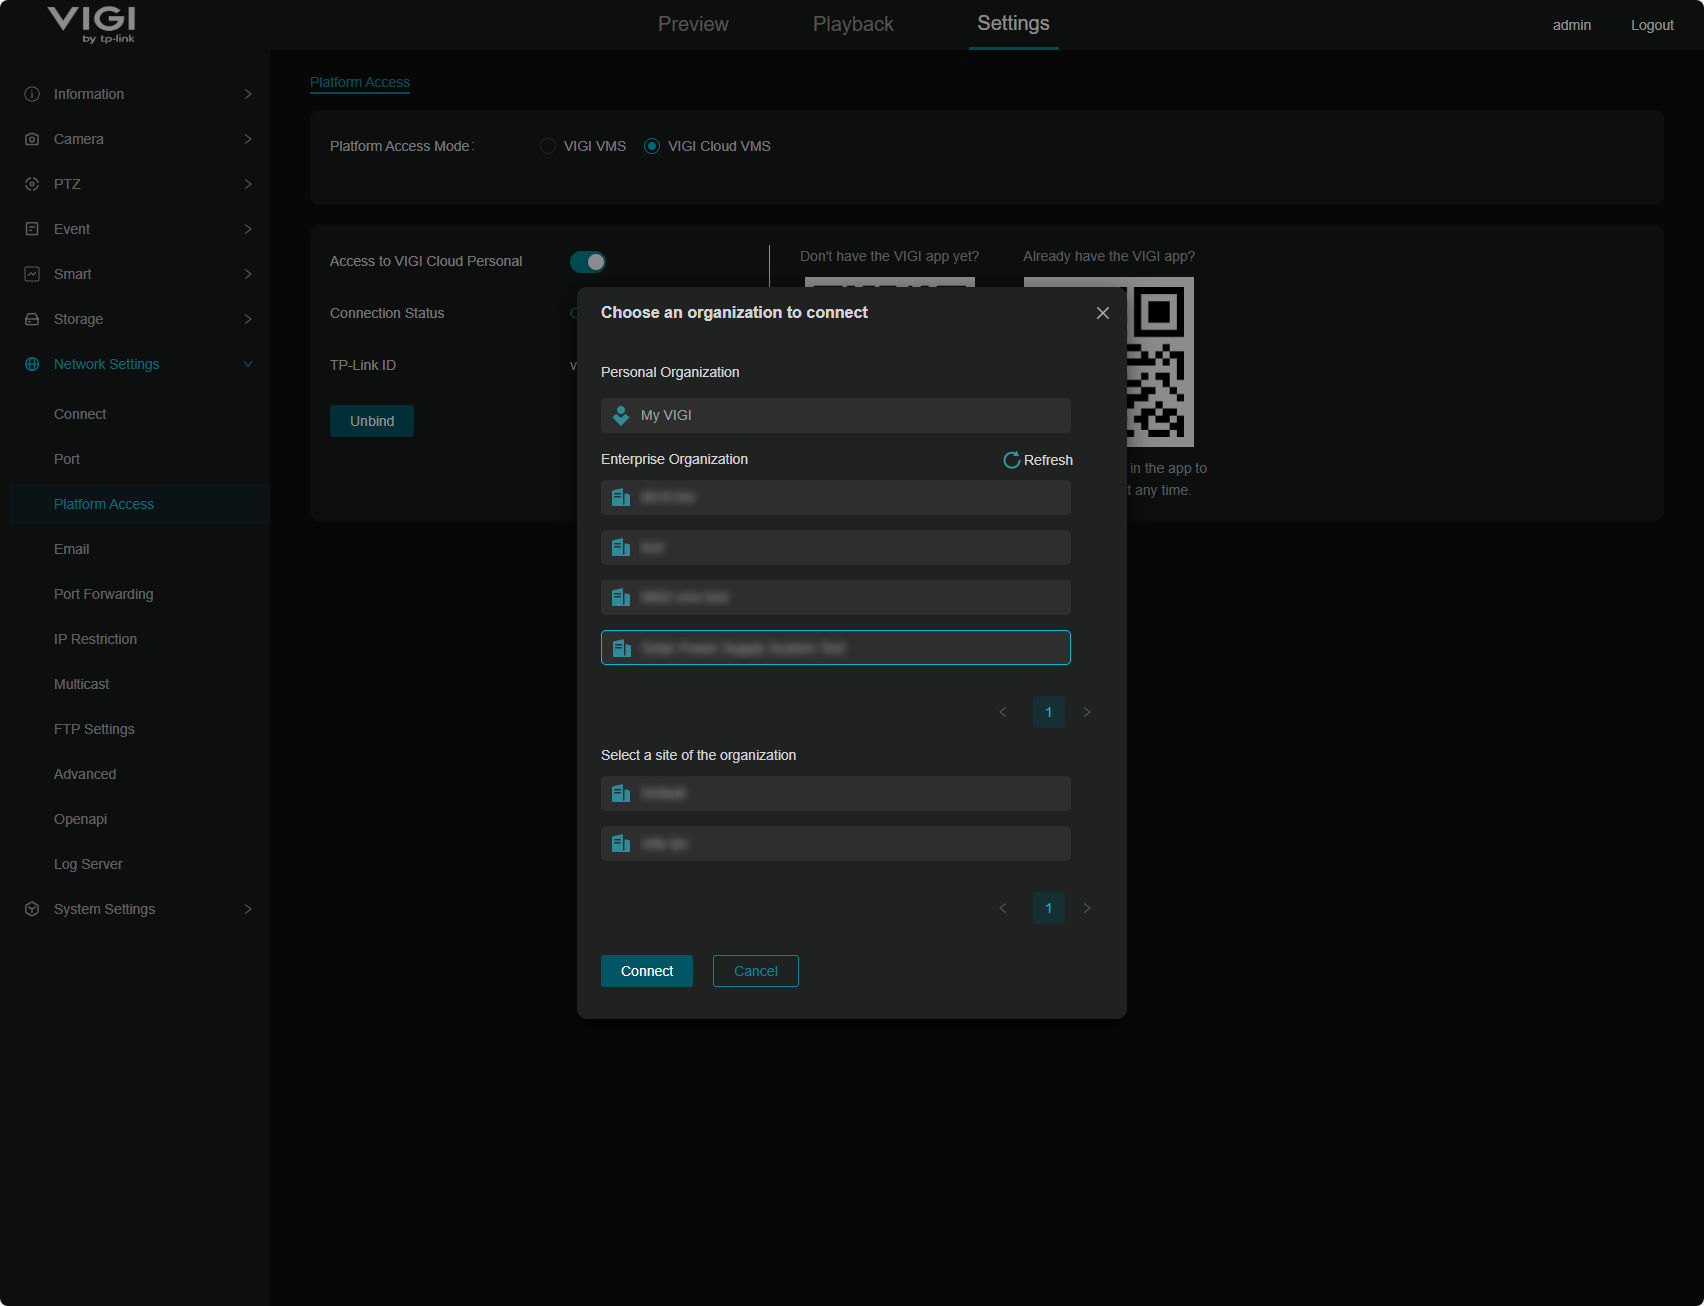
Step 4: After logging in, select the organization. The corresponding sites will expand automatically—then choose the target site for device addition and click Connect.
Step 5: Done.
NVR-Side Binding to VIGI Cloud VMS
The procedure below illustrates how to bind an NVR to VIGI Cloud VMS through its local GUI interface.
Step 1: Connect the NVR to a monitor and access the NVR’s GUI interface.
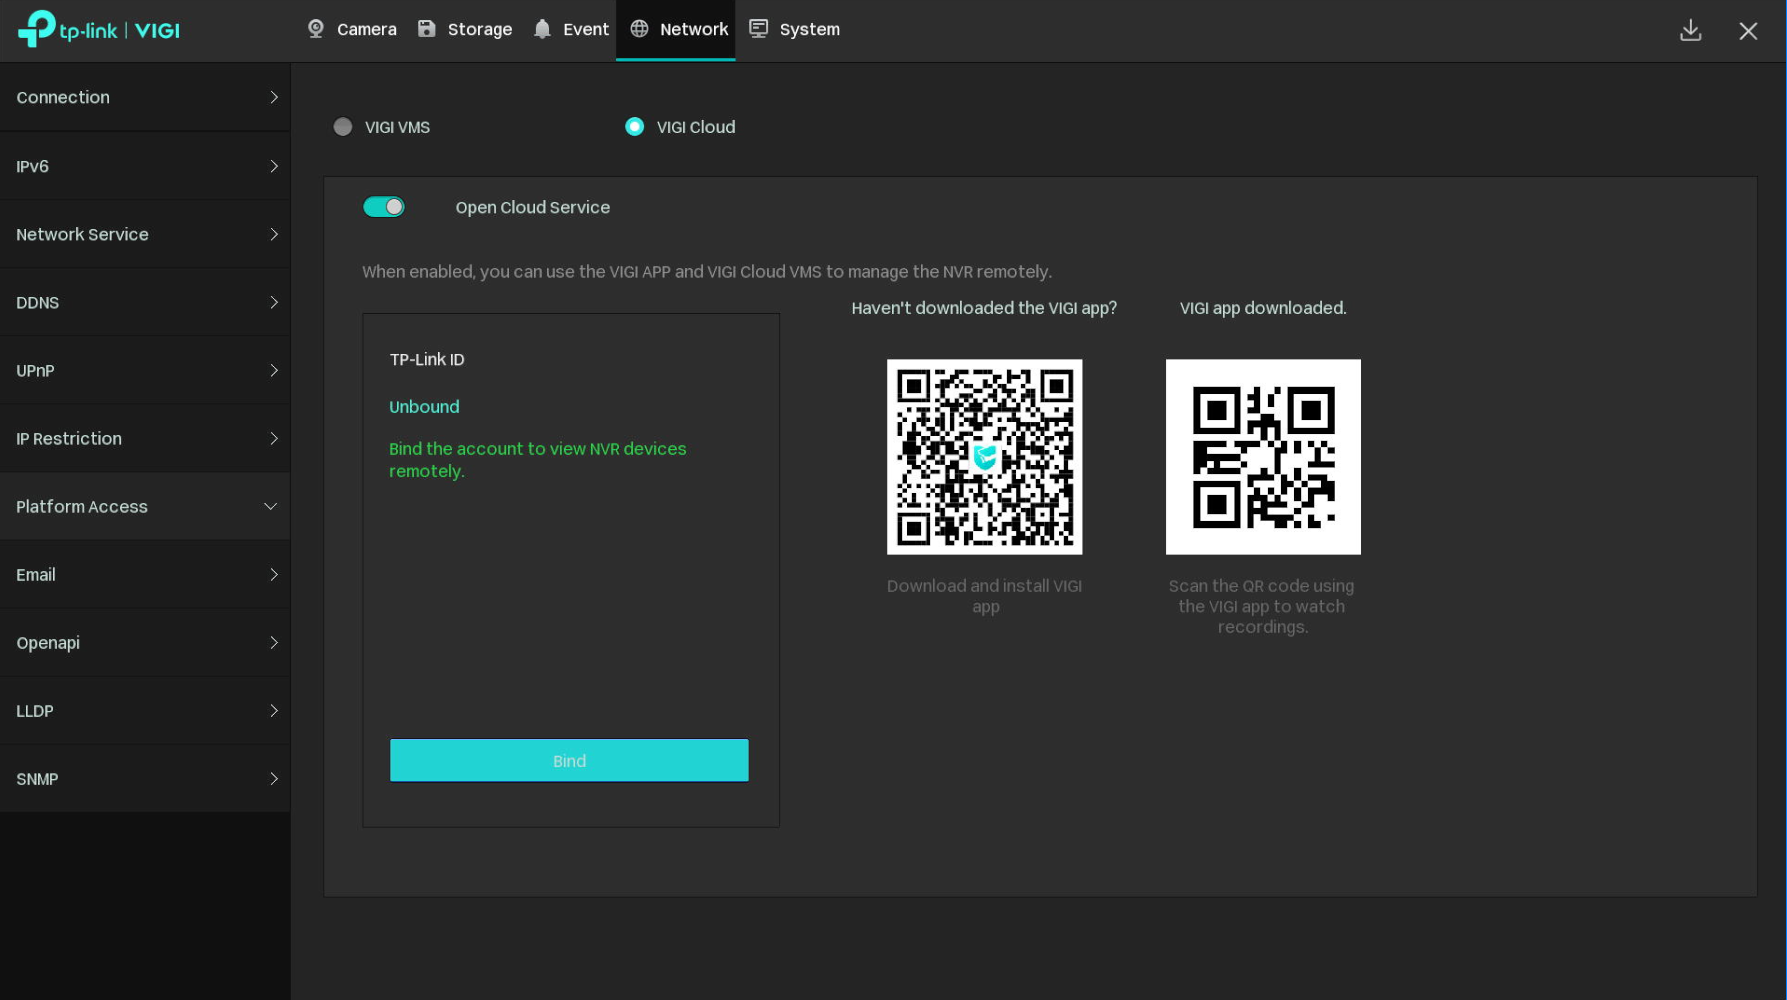
Step 2: Navigate to Settings > Network > Platform Access, set Platform Access Mode to VIGI Cloud, enable open Cloud Service, then click Bind.
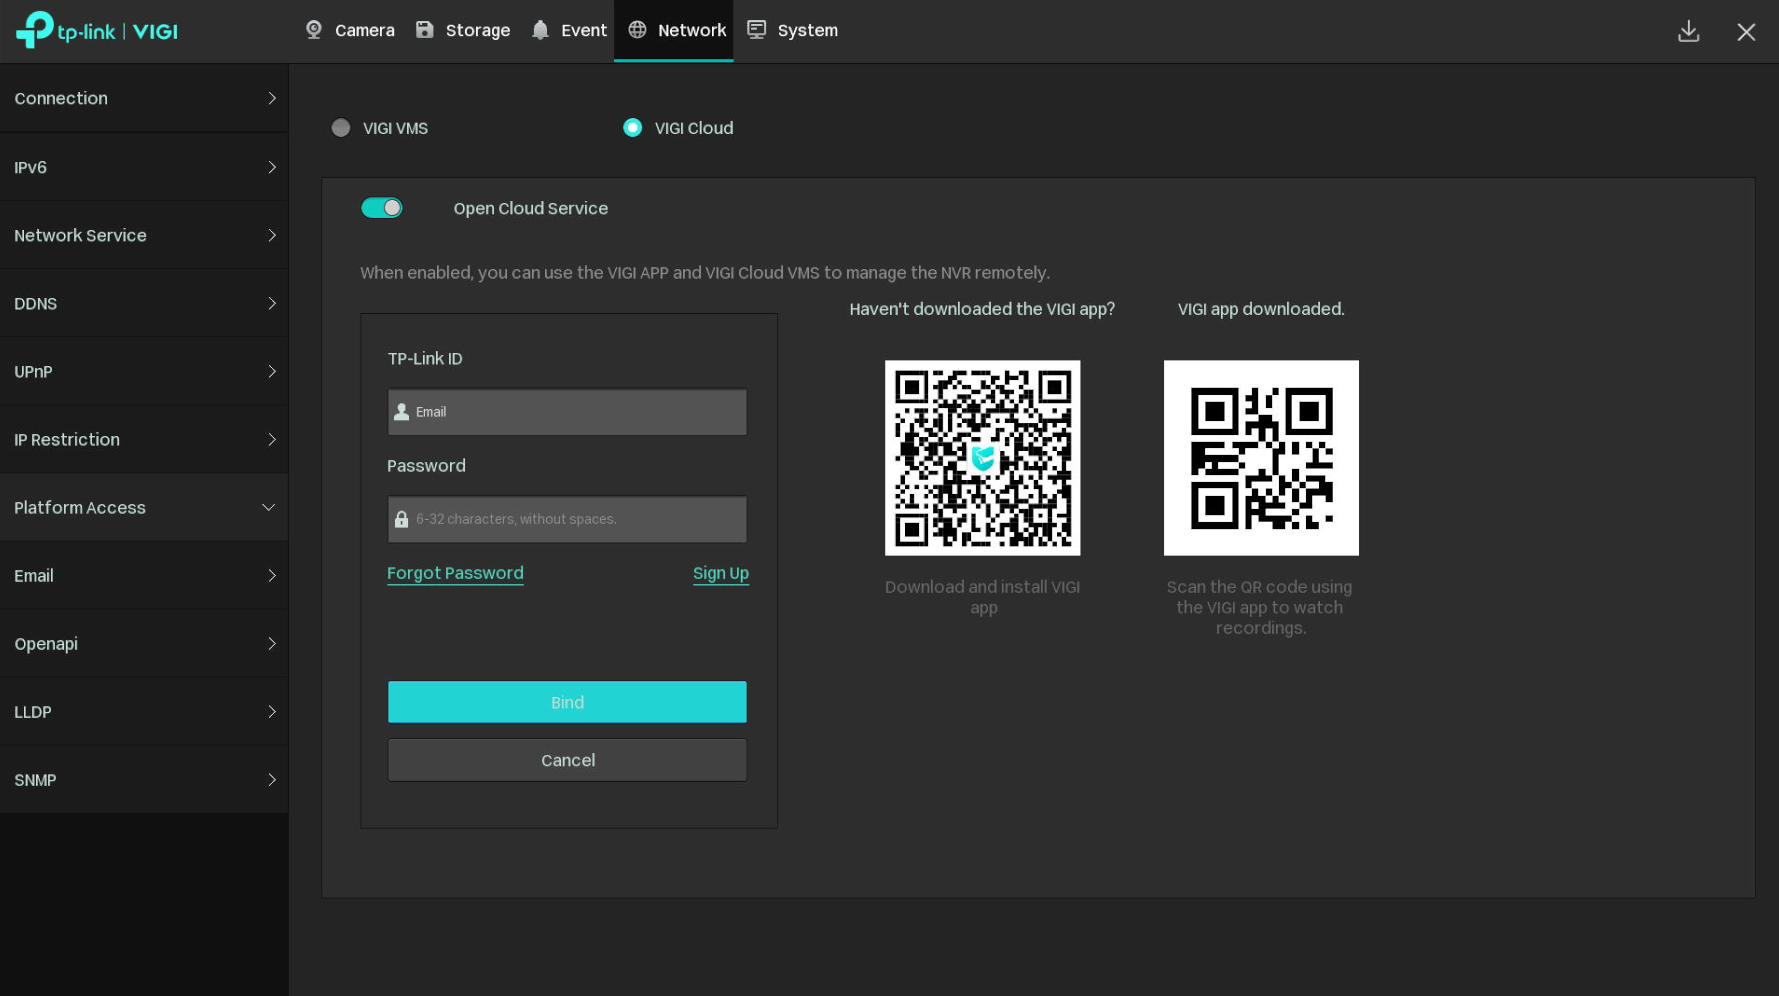
Step 3: Enter your TP-Link ID and Password.
Step 4: After logging in, select the organization you want to connect to. Then choose the target site where the device will be added, and click Bind.

Step 5: Done.
Conclusion
You have now successfully added VIGI devices to the VIGI Cloud VMS.
Get to know more details of each function and configuration please go to Download Center to download the manual of your product.
Полезен ли беше този ЧЗВ?
Вашите отзиви помагат за подобряване на този сайт.
