How to configure the TL-WPS510U working on Infrastructure mode through its web page on Windows 8/8.1?
Este Artigo se aplica a:
For better guidance, let's assume there is a following demand for the network:
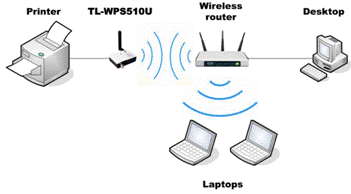
The wireless router is the center of the wireless network and every host will communicate with the TL-WPS510U through the wireless router. In this example, the router gateway is 192.168.1.254 and the local network is 192.168.1.*/255.255.255.0. (Please check the local network of your own router , contact router’s support if you are not sure.)
Here are the steps to achieve the goal:
Step 1
Power on TL-WPS510U and connect it to your USB printer. Wait for a few minutes, make sure the wireless light lit up.
If you need to reset the TL-WPS510U but don’t know how to do, please refer to the FAQ
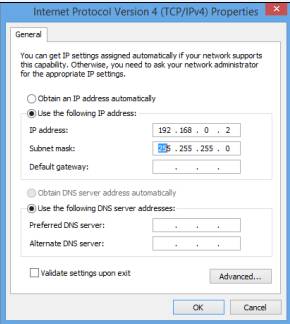
Refer to the instruction below to assign static IP for the WIFI connection of the Windows 8/Windows 8.1 laptop: IP Address 192.168.0.2; Subnet Mask 255.255.255.0.
Step 3
Connect your laptop to the TL-WPS510U’s Ad-hoc wireless network. The print server will work on Ad-Hoc mode, with the SSID WLAN-PS in factory default. So please select the wireless network WLAN-PS to connect.
The steps to connect to an Ad-hoc wireless network are different on Windows 8 and Windows 8.1.
For Windows 8, just connect the wireless network WLAN-PS like a general WiFi network:
For Windows 8.1, please follow this instruction:
Step 4
Log into the TL-WPS510U.
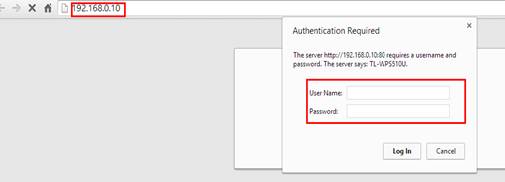
Open the browser, type in 192.168.0.10, press Enter; It will ask for Username and Password to log in, type in admin for both.
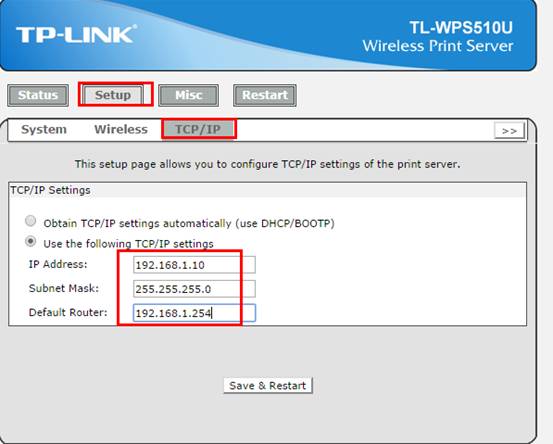
Then click Setup →TCP/IP→Use the following TCP/IP settings and type in the IP information for the Pinter server.
Note: The printer server’s IP Address is 192.168.0.10 by default, it may not be in the same network as your router’s. If so, please change the IP address to be in the same network. In the example, the router gateway is 192.168.1.254 and IP range is 192.168.1.*, so we put in 192.168.1.10 for the printer server, 255.255.255.0 for the Subnet Mask and 192.168.1.254 for Default Router.
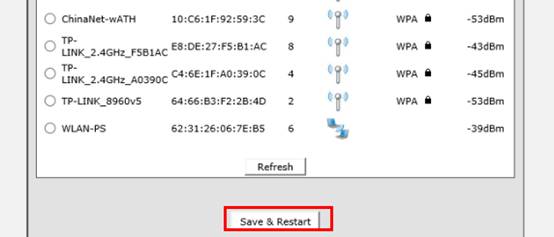
Click Save&Restart and wait for a while.
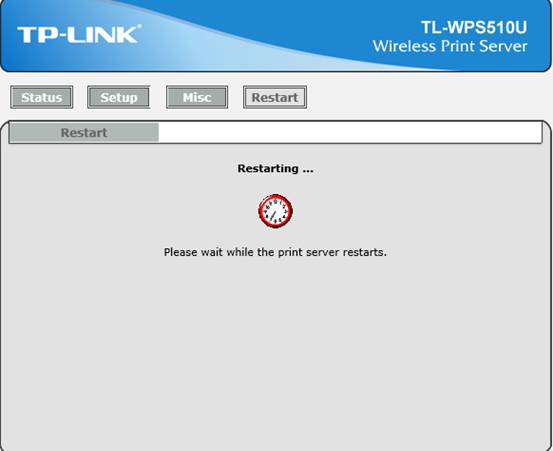
Step 5
On the laptop, change the static IP for the WIFI connection to 192.168.1.2/255.255.255.0and connect to the Ad-Hoc network WLAN-PS again.
Please refer to Step 2 if you don’t remember how to change the IP settings on the computer.
Step 6
Log into the TL-WPS510U with the new assigned address (192.168.1.10 in this example)and configure the wireless parameters according to your wireless network.
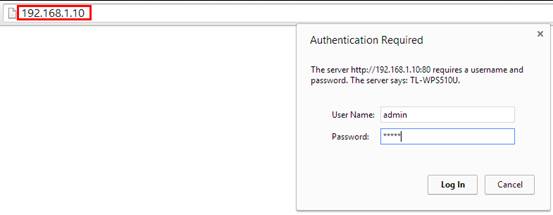
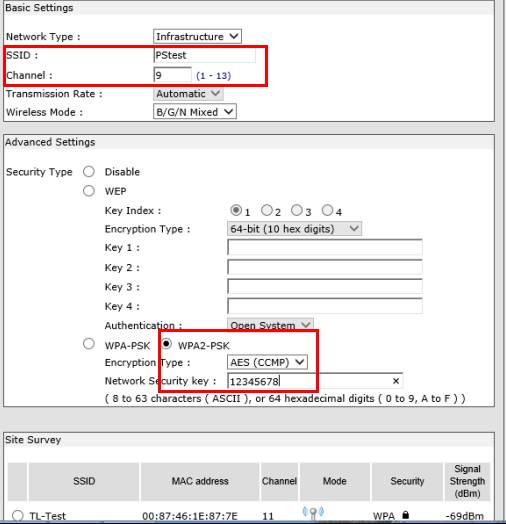
In my example, the SSID is PStest, and the security type is WPA2-PSK/AES with the password set to 12345678. After the configuration, the TL-WPS510U also need to save and reboot again.
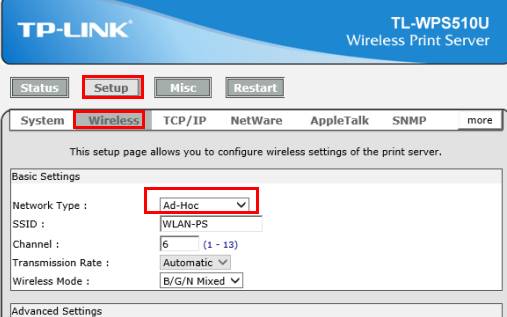
Go to Setup→Wireless→change the Network Type to Infrastructure
Scroll down to this page and find the router’s wifi in the Site Survey list,click on that wifi.
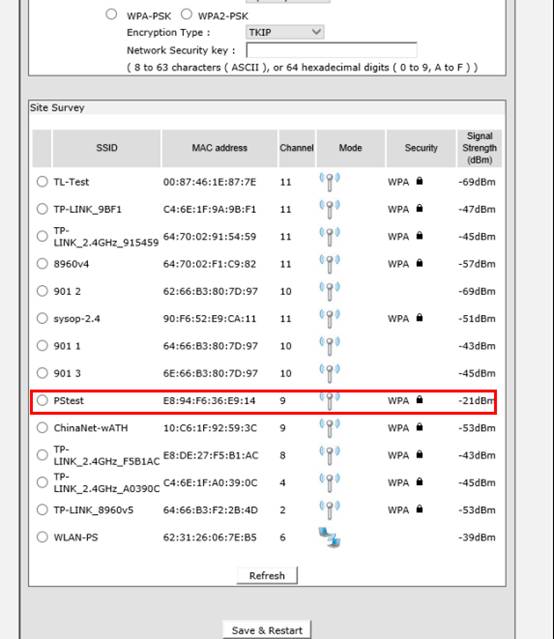
Then the SSID and Channel will automatically synchronize with the router. Choose the same Security Type and put in the same Network Security Key/Wireless password from the main router.
Click Save&Restart and wait for it to restart again.
Step 7
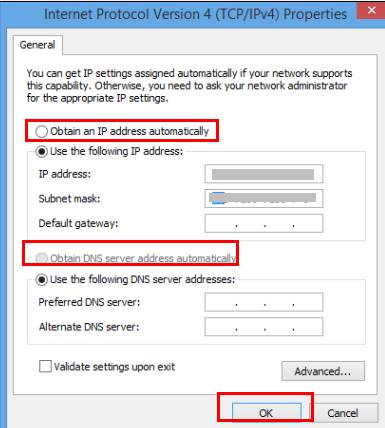
On the laptop, change the WIFI connection’s IP settings to Obtain an IP address automaticallyandObtain DNS server address automatically.
Please refer to Step 2 if you don’t remember how to change the IP settings on the computer.
Step 8
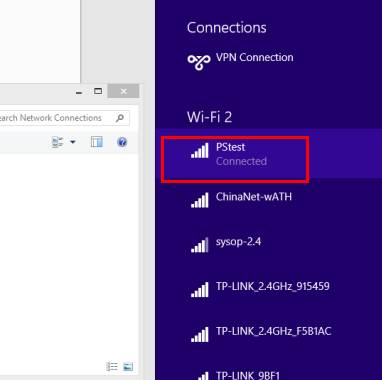
Connect to the wireless router’s Wifi on the laptop.(PStest in my example)
Step 9
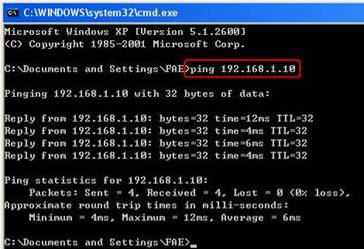
Try whether you can ping the TL-WPS510U (press WIN key + R, input cmd to launch the command line interface, input ping 192.168.1.10)
Or check whether you can see it in the wireless router’s host list.
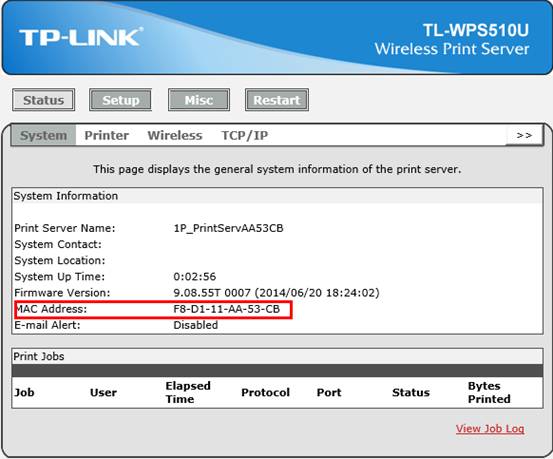

If the ping test is successful or you can see it in the list of the router’s hosts,that means the TL-WPS510U is working on Infrastructure mode and can communicate with the wireless router and the local clients.
Step 10
Add a Standard TCP/IP port for the printer.
Please refer to this FAQ to add a Standard TCP/IP port.
Esta FAQ é útil?
Seu feedback ajuda a melhorar este site.