How to configure the VPI/VCI on TD-8616
This Article Applies to:
The TD-8616 supports many popular PVCs, fit for most of the network environment around the world, such as 0/35, 8/35, 1/100, 0/32, 0/38, 1/32 etc.
If you are not sure whether the VPI/VCI provide by your ISP is not included or not, please try to check and input the VPI/VCI on the modem.
Preparation
Since the ADSL2+ modem only has a bridged mode, there is no DHCP function on the ADSL2+ modem. We have to manually assign an IP address as 192.168.1.x to the computer to match the default IP address (192.168.1.1) of the ADSL2+ modem. Please click here for detailed instruction.
Connect the DSL line to the modem and your computer to the modem by using than Ethernet cable.
Step 1
Open the web browser and type the IP address 192.168.1.1 into the address bar and then Press Enter.
Step 2
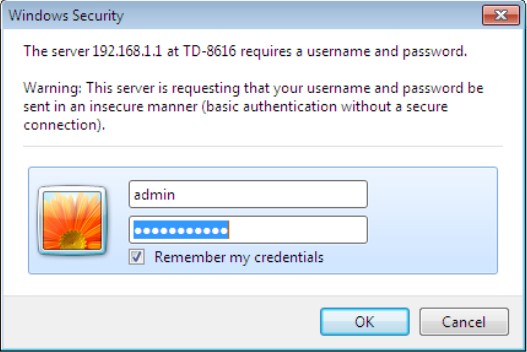
Type the username and password into the boxes of the login page, the default username and password both are admin, then press Enter.

Step 3
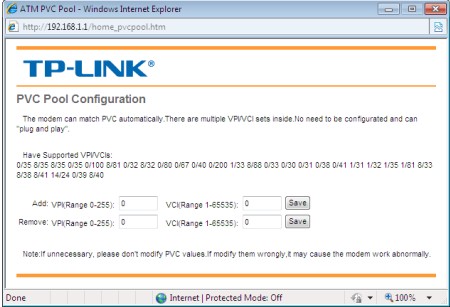
Click on Basic Setup->WAN Setting. click on PVC Pool, and you can see the VPI/VCI list. If you cannot find your VPI/VCI, please go to Step 4.

Step 4
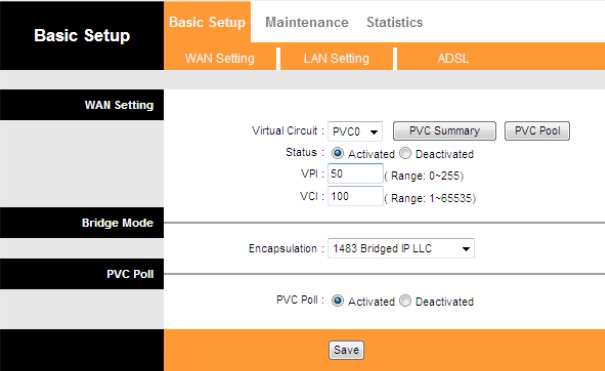
Click on Basic Setup->WAN Setting. Manually put in the VPI and VCI number which is provided by your ISP. Click on Save.

Note:
The above IP settings are for logging into the Web-based Utility of TP-Link ADSL2+ modem for configuring.
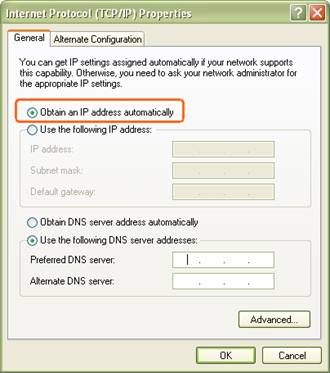
After you finish configuring, please re-configure the IP settings of your computer to Obtain an IP address automatically & Obtain DNS Server address automatically to suitable for the router in order to connect to Internet after you have done the configuration on the device.

Is this faq useful?
Your feedback helps improve this site.
TP-Link Community
Still need help? Search for answers, ask questions, and get help from TP-Link experts and other users around the world.