How to configure Wireless MAC address filter on wireless router
Este artículo se aplica a:
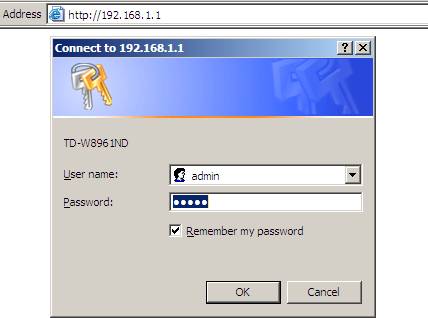
Step 1
Open the web browser and type http://tplinkwifi.net or IP address in the address bar (default is http://192.168.0.1 or http://192.168.1.1). Press Enter. The username and password are both “admin”.
Step 2
Go to IP & MAC Binding->ARP List page, you can find the MAC address of the all the devices which are connected to the router.

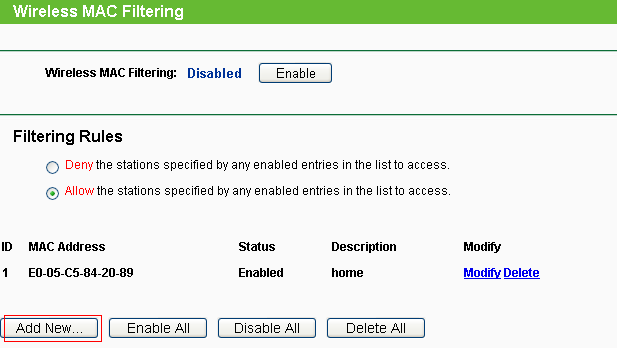
Step 3
Go to Wireless->Wireless MAC Filtering page, click the Add New button.
Step 4
Type in the MAC address you want to allow or deny to access the router, and give a description for this item. The status should be Enabled and at last, click the Save button.
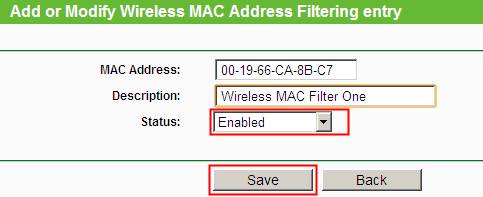
You need add items in this way one by one.
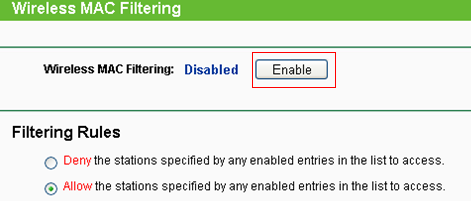
Step 5
At last, about the Filtering Rules, please choose Allow/Deny and Enable the Wireless MAC Filtering function.
Get to know more details of each function and configuration please go to Download Center to download the manual of your product.
¿Es útil este artículo?
Tus comentarios nos ayudan a mejorar esta web.
3.0-A_normal_1584497065615l.png)
14.0-A_normal_1584497163963a.png)
