How to configure VOIP Modem Router to work with Asterisk Server
Take TD-VG3631 as an example.
Some customers may face the problem that how my TD-VG3631 works with Asterisk server. Asterisk is a common VoIP server. In fact, TD-VG3631 can work with most VoIP servers. Different VoIP service providers use different servers, but the basic configuration is the same. Also the name of parameters that ISPs offer may be different in what display on TD-VG3631.
Here I take a Canada VoIP ISP: Scom as an example. Scom will offer you following parameters:
Server: asterisk.scom.ca
Proxy: asterisk.scom.ca
Port: 5060
Codecs: all
Phone number: *** (For example: 111)
Username: *** (For example: 111)
Password: *** (For example: 111)
NOTICE: Before configuring, you must confirm your device has access to the Internet!
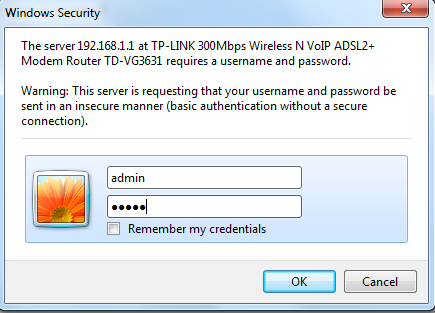
Step 1: Open the web browser and type the LAN IP address of TD-VG3631 in the address bar, the default IP address of TD-VG3631 is 192.168.1.1, and then press Enter.

Step 2: Type the username and password in the login page, the default username and password both are admin.

Step 3: In Voice--> SIP Account, click ‘Add’ button.

Step 4: The options marked with “*” are necessary items, you must fill them in. As for other options, type them if your ISP’s offered those parameters. Or you should keep it by default.
You may find some parameters which the VSPs offered are different from what’s displayed on TD-VG3631. Here is how Scom’s parameters are related in TD-VG3631.
Username --> Authentication ID
Server --> Register Address
Proxy --> SIP Proxy

If you meet a similar situation, contact your VSP to confirm what the parameters they offered mean, and then type them in properly.
Step 5: After configuration above, click “Save”. After a while, if the “Status” shows “UP”, it means your SIP account has registered successfully.

If you have any doubt, please be free to contact TP-Link Support Team.
¿Es útil este artículo?
Tus comentarios nos ayudan a mejorar esta web.