How to set a new powerline network name using tpPLC Utility
Powerline network name groups powerline devices into a network. TP-Link powerline devices use the name HomePlugAV by default, and therefore they can form a network once plugged on the same electrical circuit. You can change this name to a new one, allowing only the powerline devices using the same name to join this network.
To set a new powerline network name, follow the steps below:
Method 1: Through tpPLC Utility (For TL-WPA8630P, TL-WPA7617, TL-WPA4220 V2 or above)
Please note: If the Utility hasn’t been installed yet, please refer to How to prepare for using the tpPLC Utility (new logo)?
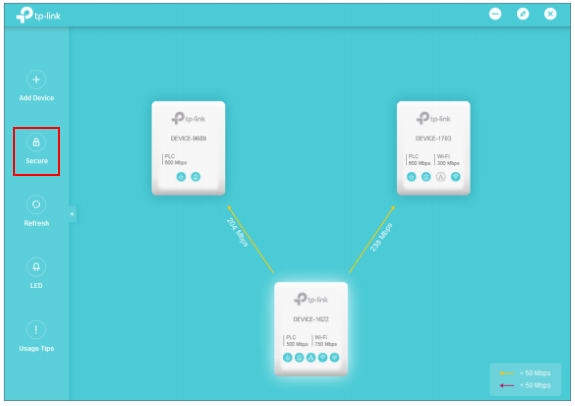
1. Open the utility, and click Secure on the left column.

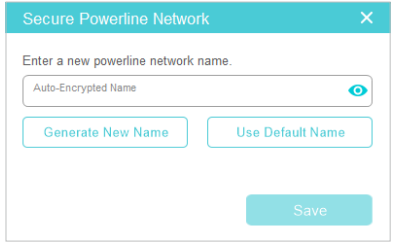
2. On the Secure Powerline Network page, enter a new name, or generate a random name. Then click Save.

Now only the powerline devices using the same name can join this network.
Method 2: Through Powerline Scan Utility (For TL-PA201, TL-PA251, TL-WPA4220 V1 or below)
Step 1: Insert the CD or click here to download on the website, then install the powerline scan utility.
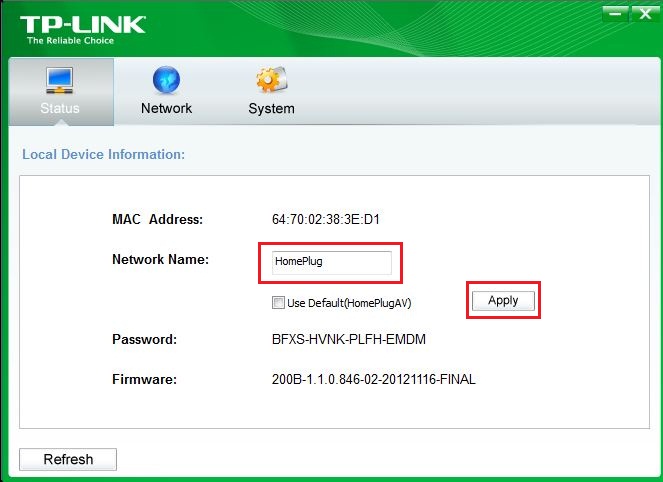
Step 2: Connect your computer directly to the adapter. Then open the Utility and go to Status page. Type in the Network Name and click Apply button. The name should be more than 4 letters.

Step 3: Connect the computer to another adapter and repeat the Step 2. The network name should be the same. In this way, all adapters will be on the same secured network.
Get to know more details of each function and configuration please go to Download Center to download the manual of your product.
هل تجد هذه الأسئلة مفيدة؟
مشاركتك تساعدنا في تحسين الموقع
TP-Link Community
Still need help? Search for answers, ask questions, and get help from TP-Link experts and other users around the world.
