How to register a TP-Link cloud account for my TP-Link wireless router to manage it remotely (New Logo)
Archer C1200 , Archer C5400 , Archer A2600 , Archer AX55 , Archer C4 , Archer C5200 , Archer AX53 , Archer C5 , Archer AX10 , Archer C2 , Archer AX51 , Archer AX96 , Archer A2200 , Archer C80 , Archer AXE95 , Archer C8 , Archer AX10000 , Archer C3150 , Archer C9 , Archer AX50 , Archer C6 , Archer C7 , Archer AX90 , Archer AX6000 , Archer C5400X , Archer C25 , Archer C24 , Archer A20 , Archer A64 , Archer C60 , Archer C2600 , Archer A1200 , Archer C21 , Archer C20 , Archer C64 , Archer AX1800 , Archer AX206 , Archer C59 , Archer C58 , Archer AX4200 , Archer C3200 , Archer C900 , Archer A2 , Archer AX75 , Archer AX4400 , Archer C3000 , Archer AX73 , Archer C50
Recent updates may have expanded access to feature(s) discussed in this FAQ. Visit your product's support page, select the correct hardware version for your device and check either the Datasheet or the firmware section for the latest improvements added to your product.
A TP-Link cloud account, which is also called a TP-Link ID, is used to bind and remotely manage TP-Link routers, cloud cameras, smart plugs and so on.
If you have already registered your email as a TP-Link ID via the kasa APP, the tpCamera APP or https://community.tp-link.com/en/register , just use your TP-Link ID to manage your TP-Link router.
There are two ways to register a TP-Link cloud account: on the web management page or on the Tether APP.
Note
1. This FAQ is suitable for TP-Link wireless router with cloud functions, such as Archer C8 V3, Archer C9 V3/V4 and so on. If your TP-Link router doesn’t support cloud functions, you can neither bind a TP-Link cloud account to it nor manage it remotely although you have signed up.
2. Currently most of the applicable models only support the online upgrade feature, and other cloud functions will be added in the future firmware.
3. As for Archer C5400 V1, only the EU version supports the online upgrade feature. Please check the hardware version on the label at the back of the router.
Method 1: Register on the Tether APP
Please confirm your model is compatible with the Tether APP: https://www.tp-link.com/en/tether/product-list/
Step 1: Download and install the Tether APP on your smartphone from APP Store or Google Play.
Step 2: Connect your smartphone to the Wi-Fi network of your TP-Link router, then run the Tether APP (make sure your smartphone can get internet). Choose “Create a TP- Link ID” to create your TP-Link ID.
Step 3: Type your mailbox in the Email box as your cloud account and create your own password, then check Agree to TP-LINK Privacy Policy & Terms of Use. Click Confirm.
Step 4: You will receive an email for verification. Check your mailbox and open the activation mail, then tap Click to Finish Registration.
Step 5: After activated, please tap Login to login with your registered TP-Link ID and password.
Step 6: Go to More> Manager or go to tools> TP-Link ID
Step 7: Tap Confirm to combine your TP-Link router and TP-Link cloud account together. After that, you will find your TP-Link router showed as a cloud device on the Device page, which means that you can enjoy the cloud functions of your TP-Link router on the Tether APP.
Method 2: register on the web management page
Here takes Archer C8 V3 as an example:
Step 1: Connect your device to Archer C8 wired or wirelessly and make sure your device can get internet. Then open a web browser, type http://tplinkwifi.net in the address bar and login the management page of the router. The password is ‘admin’ by default.
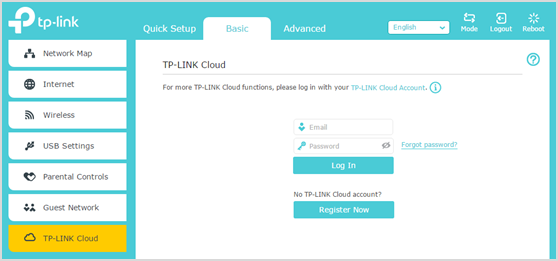
Step 2: Go to Basic, choose TP-LINK Cloud, and click Register Now.
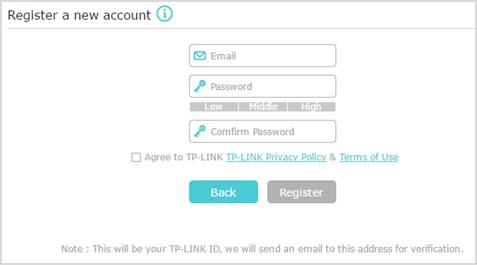
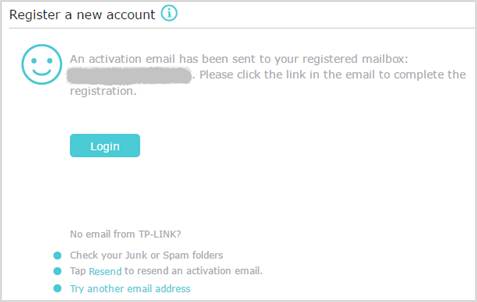
Step 3: Type your mailbox in the Email box as your cloud account and create your own password, then check Agree to TP-LINK Privacy Policy & Terms of Use. After that, just click Register and you will receive an email for verification.
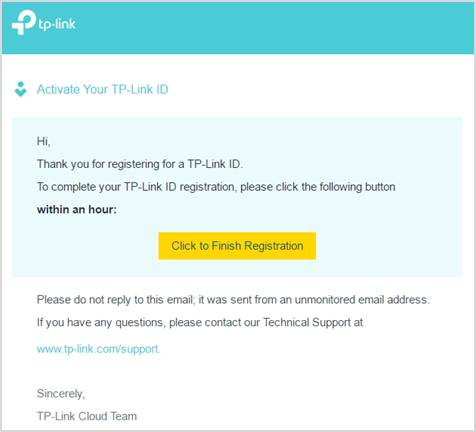
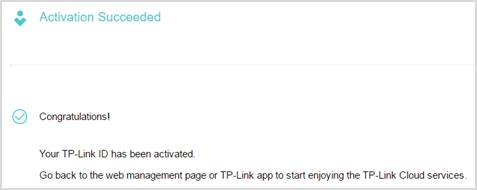
Step 4: Check your mailbox and open the activation mail, then tap Click to Finish Registration.
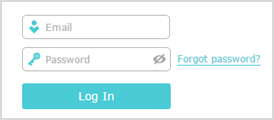
Step 5: Now your cloud account has been successfully registered. Just go back to the management page of the router and login with your TP-Link ID and password to enjoy the cloud services.
Note
The TP-Link ID will be automatically bound to your router after your login.
Get to know more details of each function and configuration please go to Download Center to download the manual of your product.
Preguntas Frecuentes Relacionadas
- ¿Cómo puedo acceder a la utilidad basada en web (página de Administración) del Router inalámbrico TP-Link?
- ¿Qué puedo hacer si olvido la contraseña de inicio de sesión del enrutador inalámbrico TP-Link?
- Breve introducción de las funciones de la nube en el enrutador inalámbrico TP-Link (Nuevo logotipo)
- What are the differences between Admin & User cloud accounts on TP-Link wireless router?
- ¿Qué puedo hacer si olvido la contraseña de mi cuenta en la nube vinculada al enrutador inalámbrico TP-Link?
- Solución de problemas del servicio en la nube de TP-Link
¿Es útil esta faq?
Sus comentarios nos ayudan a mejorar este sitio.
¿Cuál es tu preocupación con este artículo?
- Insatisfech@ con el producto
- Demasiado complicado
- Título confuso
- No me aplica
- Poco claro
- Otro
¿Cómo podemos mejorar?
Gracias
Agradecemos los comentarios.
Pulsar aquí para comunicarse con el soporte técnico de TP-Link.
Este sitio web utiliza cookies para mejorar la navegación por el sitio web, analizar las actividades en línea y ofrecer la mejor experiencia de usuario posible en nuestro sitio web. Puedes oponerte al uso de cookies en cualquier momento. Encontrarás más información en nuestra política de privacidad .
Cookies Básicas
Estas cookies son necesarias para el funcionamiento del sitio web y no pueden desactivarse en tu sistema.
TP-Link
accepted_local_switcher, tp_privacy_base, tp_privacy_marketing, tp_smb-select-product_scence, tp_smb-select-product_scenceSimple, tp_smb-select-product_userChoice, tp_smb-select-product_userChoiceSimple, tp_smb-select-product_userInfo, tp_smb-select-product_userInfoSimple, tp_top-banner, tp_popup-bottom, tp_popup-center, tp_popup-right-middle, tp_popup-right-bottom, tp_productCategoryType
Livechat
__livechat, __lc2_cid, __lc2_cst, __lc_cid, __lc_cst, CASID
Youtube
id, VISITOR_INFO1_LIVE, LOGIN_INFO, SIDCC, SAPISID, APISID, SSID, SID, YSC, __Secure-1PSID, __Secure-1PAPISID, __Secure-1PSIDCC, __Secure-3PSID, __Secure-3PAPISID, __Secure-3PSIDCC, 1P_JAR, AEC, NID, OTZ
Cookies de Análisis y de Marketing
Las cookies de análisis nos permiten analizar tus actividades en nuestro sitio web con el fin de mejorar y adaptar la funcionalidad del mismo.
Las cookies de marketing pueden ser instaladas a través de nuestro sitio web por nuestros socios publicitarios con el fin de crear un perfil de tus intereses y mostrarte anuncios relevantes en otros sitios web.
Google Analytics & Google Tag Manager
_gid, _ga_<container-id>, _ga, _gat_gtag_<container-id>
Google Ads & DoubleClick
test_cookie, _gcl_au
Meta Pixel
_fbp
Crazy Egg
cebsp_, _ce.s, _ce.clock_data, _ce.clock_event, cebs
lidc, AnalyticsSyncHistory, UserMatchHistory, bcookie, li_sugr, ln_or