How do I install TP-Link wireless router to work with a Cable Modem (Dynamic & Static IP)?
Ce document concerne les modèles suivants :
This FAQ is for the users who already have a Cable Modem and want to share the Internet connection. If you are using DSL Modem, please ignore the article, and refer to How do I configure my TP-Link router to work with a ADSL Modem
Step 1: Preparation
Before the beginning, refer to this article: What do I need to prepare before begin to install TP-Link Wireless Router
Step 2: Connect your Network
(1) Turn off your Cable modem, router and computer.
(2) Connect the WAN port of the router to the Cable modem with Ethernet cable.
(3) Connect your computer to any of the LAN ports (yellow one) of TP-Link router.
(4) Power on your router and computer. Don’t power on the modem before logging into the router.
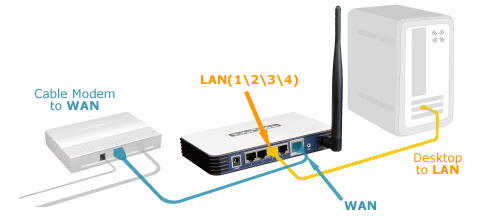
Step 3: Log into the router (web-based Interface)
(1) Power on your router and computer, open the web browser and in the address bar type in: http://192.168.1.1 or http://192.168.0.1 or http://tplinklogin.net. Then press Enter.

Note:
The LAN IP changes by model. Please find it on the bottom label of the product.
(2) Type the username and password in the login window (both admin by default), then click OK.
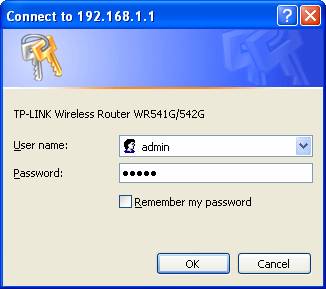
Step 4
After logging into the router, Click Network->MAC Clone on the left side.
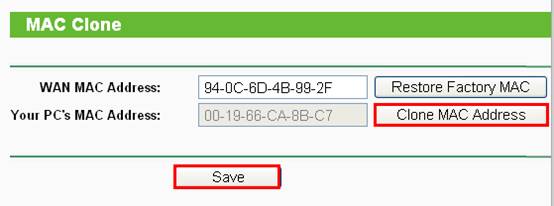
Step 5
Click Clone MAC Address to clone your PC’s MAC address to WAN MAC Address of the router.
Step 6
Click Save to save the settings.
Step 7: Configure WAN Connection Type
Click Network > WAN on the left of the web page:
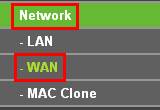
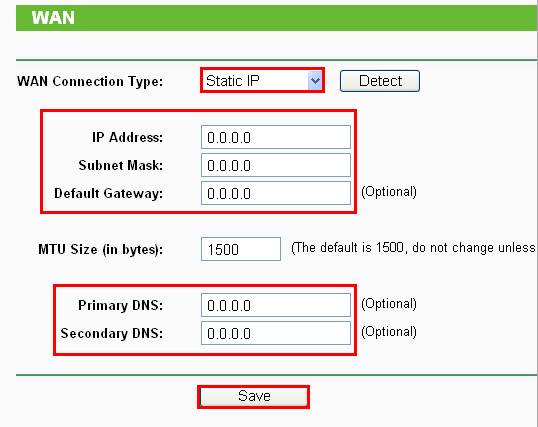
If your ISP provides static IP address for you, please select Static IP as the WAN Connection Type. Otherwise please select Dynamic IP to get IP address automatically from your ISP.
Static IP:
Enter the IP information provided by your ISP into the boxes shown as below, then click Save button. Wait about 2 minutes, if you can’t connect to the Internet, please skip to the Step 9.
Dynamic IP:
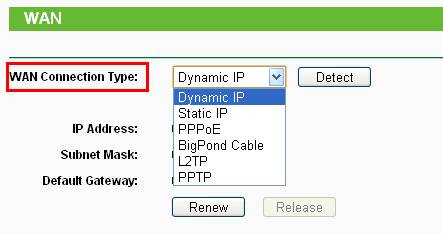
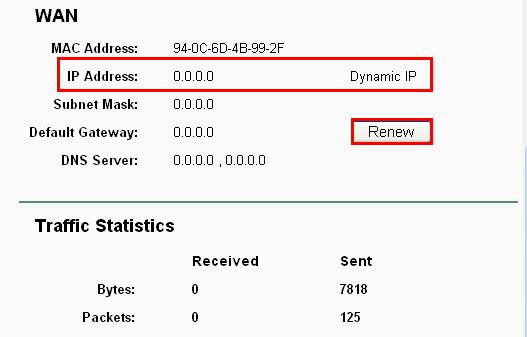
Click Status on the left side. Under WAN section, click Renew button. Wait about 2 minutes, then an IP address will be assigned. If it doesn’t get an IP address or time out, skip to Step 9.
Step 8: Wireless Setting
If your router is a wireless router, you need to configure the basic wireless settings for your wireless network. Then continue settings with Step 9.
Step 9: Power cycle the cable modem and router
After the configurations, powering cycle your network can make your network work more stable.
(1) Turn the cable modem off firstly, then turn your router and computer off, and leave them off for about 2 minutes;
(2) Turn the cable modem on firstly, and wait till the modem works stable (All LED lights work normally).
(3) Turn the router on and wait about 1 minute, and then power on your computer.
(4) Repeat the steps 1-3 above until you connect to the Internet.
Note:
In some cases, we need to change the LAN IP address of TP-Link Router to avoid the IP collision with the Cable modem.
Get to know more details of each function and configuration please go to Download Center to download the manual of your product.
Est-ce que ce FAQ a été utile ?
Vos commentaires nous aideront à améliorer ce site.

6.0-A-2000px_normal_1584497323008l.png)
