Configuration Guide on Dynamic VLAN with the VLAN Assignment function of RADIUS
With the VLAN Assignment feature of RADIUS, the Omada SDN solution can put clients authenticated by different accounts to the corresponding VLANs. In this way, clients will obtain IP addresses from different VLANs, and you don't have to create many SSIDs bound with different VLANs for wireless networks, or bind the PVIDs of the switch ports to specific VLANs for wired networks.
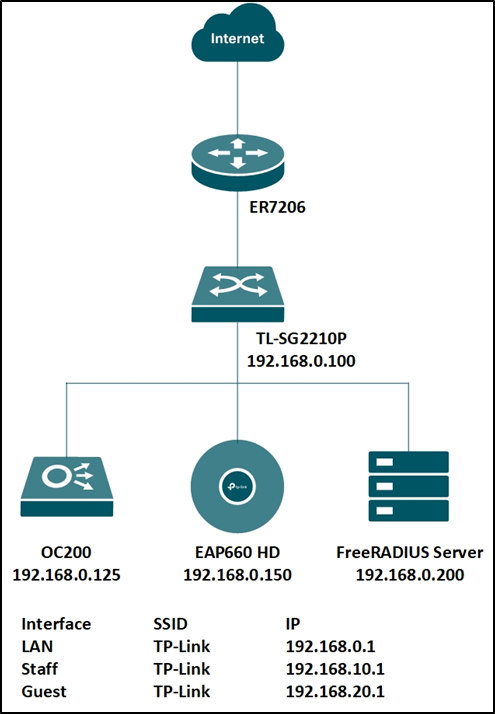
To achieve the above features, you will need the Omada SDN Controller, EAP for wireless assignment, JetStream Switch for wired assignment, and an external RADIUS server. In this article, we will share the configuration guide for below network topology.
Step 1. Set up the RADIUS server.
Here we run a FreeRADIUS® server on a Linux server. For more information on installation and configuration, please refer to the official website: https://freeradius.org/
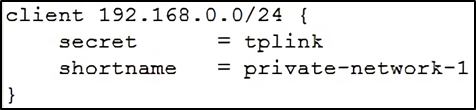
First, edit the “clients.conf” file, set the client IP address as “192.168.0.0/24” and the password as “tplink”.
Next, edit the “users” file, create two accounts “test10” and “test20” in VLAN10 and VLAN20, respectively.
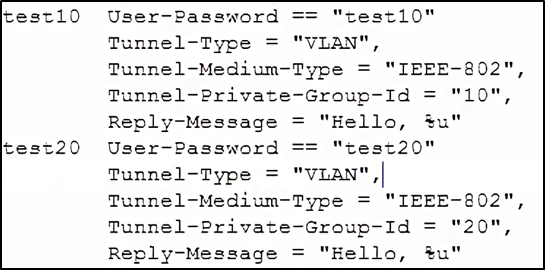
You may also edit the “eap.conf” to modify the EAP type for WPA-Enterprise. After configuration, run the RADIUS server to listen for access requests.
Step 2. Create the RADIUS profile.
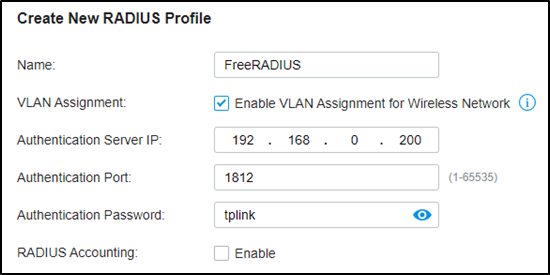
Go to Authentication --- RADIUS Profile, create a new profile bound with the RADIUS server, and check “Enable VLAN Assignment for Wireless Network” to assign VLANs for wireless clients.
Step 3. Create more VLAN for VLAN assignments.
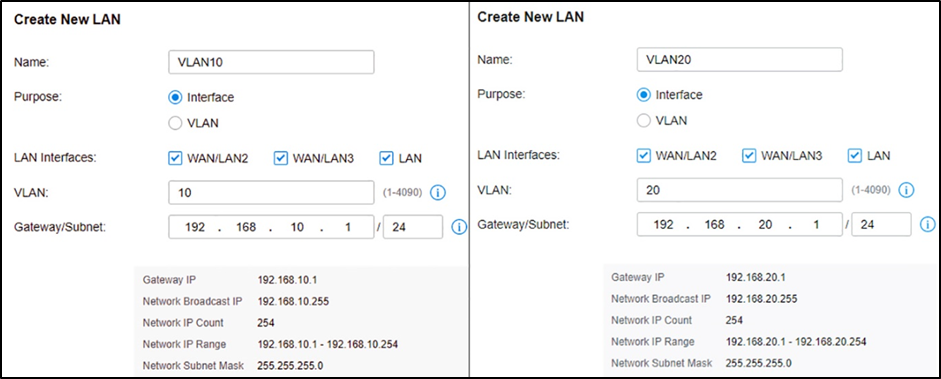
Assuming all Omada devices have been adopted by the controller, go to Settings --- Wired Networks --- LAN, and create two interfaces with VLAN10 and VLAN20.
Step 4. VLAN assignment for wireless networks.
Go to Settings – Wireless Networks, and create a new SSID with WPA-Enterprise as below. For differences between WPA-Personal and WPA-Enterprise, please refer to FAQ500.
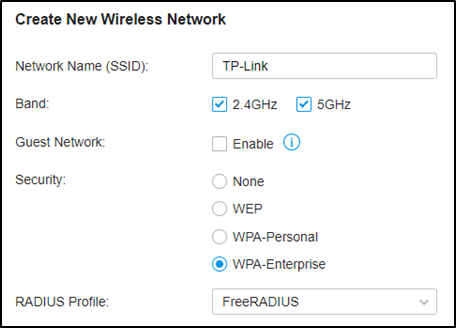
When connecting your client to the SSID, you will be asked to choose the authentication type of WPA-Enterprise, and enter the account username and password. After successfully authenticating with account “test10”, the client will obtain an IP address from VLAN10, while with account “test20”, it will get that from VLAN20.
Step 5. VLAN assignment for wired networks.
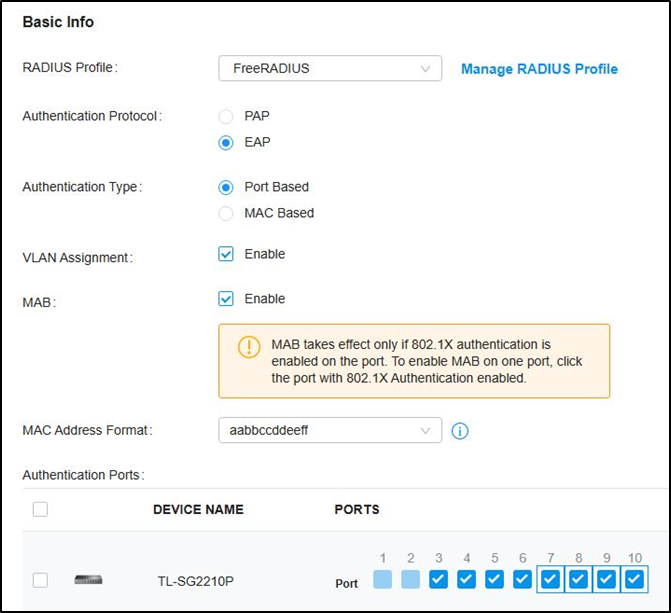
Go to Authentication --- 802.1X and enable the feature, select Authentication Type as “Port Based”, enable “VLAN Assignment” and check the Ports to be authenticated according to your requirements.
Not to click the ports twice to enable MAB for them.
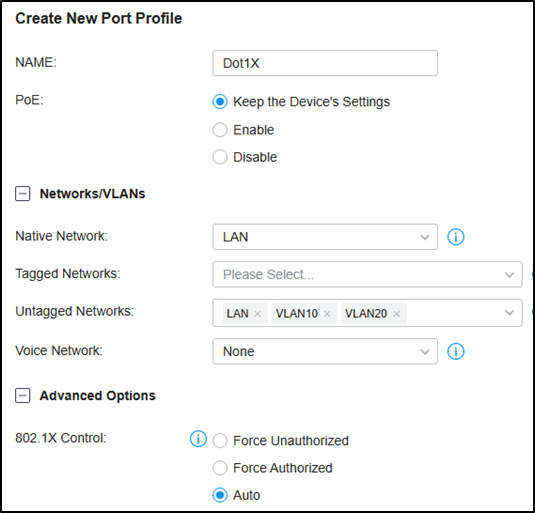
Then go to Wired Networks --- LAN --- Profile, create a new port profile, add VLAN10 and VLAN20 to untagged networks, and make sure the 802.1X Control mode is Auto.
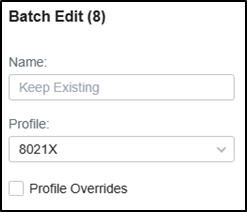
Then Go to Devices, click your switch, go to Ports, check the authentication ports, and batch edit to change the port profile to the one created just now.
For 802.1X authentication, you may need to run TP-Link 802.1X Client Software (click here to download) for authentication. Please refer to FAQ787 and Step 3. For detailed guidance.
Είναι χρήσιμο αυτό το FAQ;
Τα σχόλιά σας συμβάλλουν στη βελτίωση αυτού του ιστότοπου.
1.0_normal_1592202397383a.png)