How to remove the existing wireless network profile in Windows 7
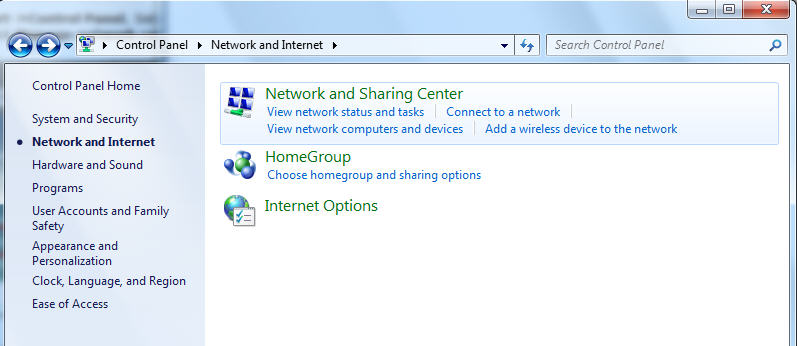
Step 1
Click Start->Control Panel, Select Network and Internet, and then click Network and Sharing Center
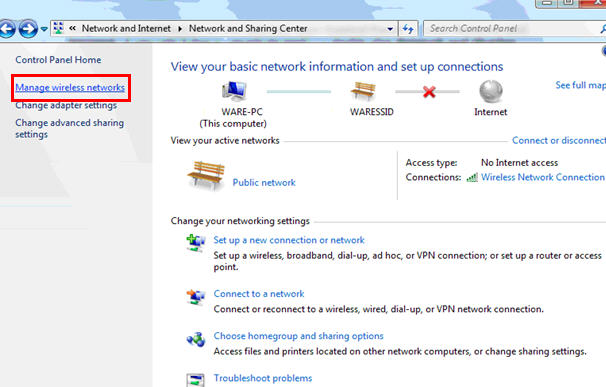
Step 2
In the task list, please choose Manage wireless networks.
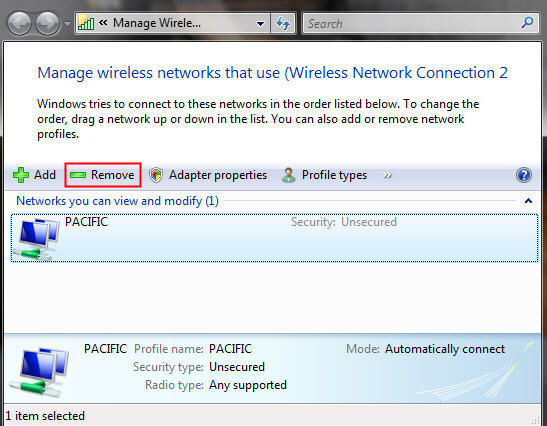
Step 3
In the Network table, please select the existing profiles and click Remove.
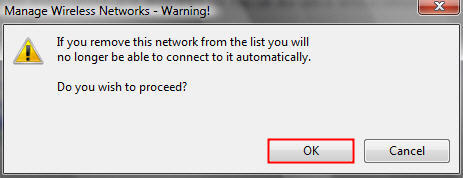
Step 4
You may see a warning dialog box, just click OK.
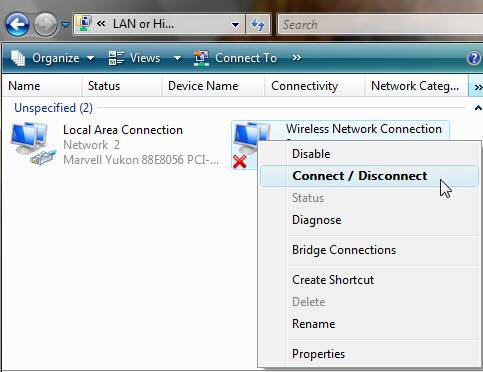
Step 5
Then please go back to Network and Sharing Center and choose Change adapter settings -> right click Wireless Network Connection -> click Connect/Disconnect.
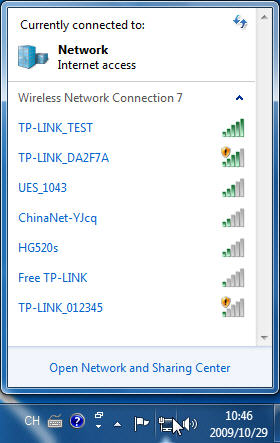
Step 6
Click the refresh button to view available wireless networks. Highlight the network which you want to connect, double click it or click Connect button.
Είναι χρήσιμο αυτό το FAQ;
Τα σχόλιά σας συμβάλλουν στη βελτίωση αυτού του ιστότοπου.