How to Build a Mesh Network via Omada EAP in Controller Mode
Note: If you want to know the difference between Omada Mesh VS Deco Mesh VS OneMesh![]() , click here to know more information
, click here to know more information
Mesh is used to establish a wireless network or expand a wired network through a wireless connection on the 5GHz radio band. We can use Omada EAP products to build a mesh network for indoor and outdoor places together.
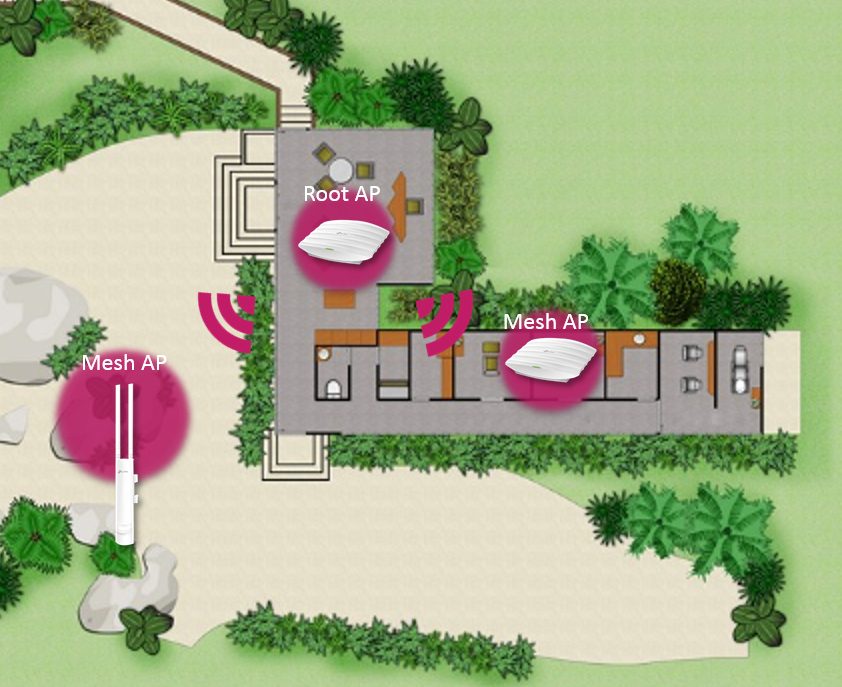
Here is an example of how to build a Mesh Network in a home scenario via indoor and outdoor Mesh EAP.
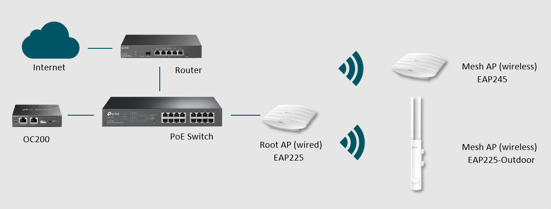
Network Topology
We are using EAP225, EAP245, and EAP225-Outdoor to build the Mesh network. The EAP225 connect with PoE Switch works as the Root AP. The EAP245 and EAP225-Outdoor connect with EAP225 (Root AP) wirelessly as the Mesh AP.


Configuration steps
- Following the topology to connect the devices. Power on the EAPs and OC200 (you can also use a software controller) via PoE adapter or PoE switch.
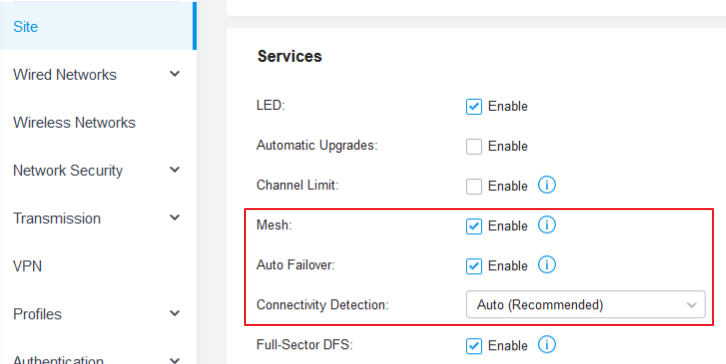
- Use the IP address of OC200 to log in to the management page. Go to Settings-> Site to enable the Mesh function. (It enables by default)

- Go to Device page. And you can find the EAP225 (Root AP) in the pending list. Click the “adopt” button to adopt the EAP225.

- After adopting the EAP225, the Controller will find other wireless EAPs automatically. Click the “adopt” button to adopt the EAP245 and EAP225-Outdoor.

Note: If your EAP225-Outdoor(Canada) isn't detected by Controller, please check the 5G channel on the root AP and ensure it works on Band4. More details can be found here.
- After 3-5 minutes, the EAP245 and EAP225-Outdoor will get an IP address from DHCP Server and connect with Omada Controller automatically. Just enjoy your Mesh network!

Note: You need to use Omada Controller to configure the Mesh function. The Omada EAP will disable the Mesh function by default if it works in the standalone mode.
Ez a GY.I.K. hasznos volt?
Véleménye segíti az oldal fejlesztését


