How to configure Repeater/Bridge Mode of High Power Wireless N Router (new logo)
This mode boosts your home wireless coverage.
Here we take TL-WR941HP for demonstration.
Step 1: Configure
Tips: Using WPS Button is an easy way to extend your host network. We recommend you to use this way if your host router has a WPS button. The button might look like one of these: 
![]()
• Option One: Using the RE Button
1) Press the WPS button on the host router.
2) Press and hold the  (RE button) on the top panel of the router for about 3 seconds within 1 minute. The router will start to reboot.
3) Once rebooted, the RE LED should change from blinking to a solid state, indicating successful connection.
• Option Two: Using a Web Browser
1) Log into the router. If you don’t know how to do that, please refer to
How do I log into the web-based Utility (Management Page) of TP-Link wireless router?
After successful login, follow the step-by-step instructions to complete the initial configuration.
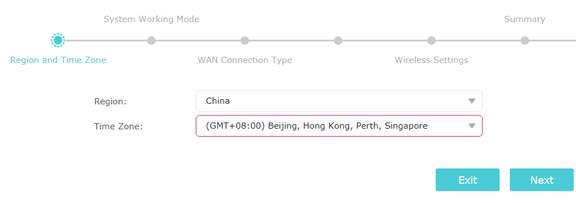
2. Choose Region and Time Zone. Click Next.
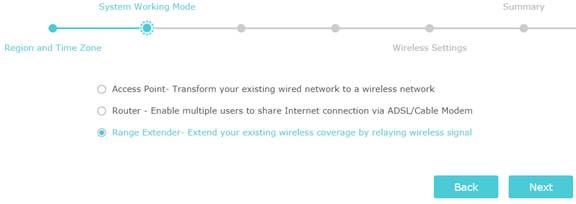
3. Select Range Extender. Click Next.
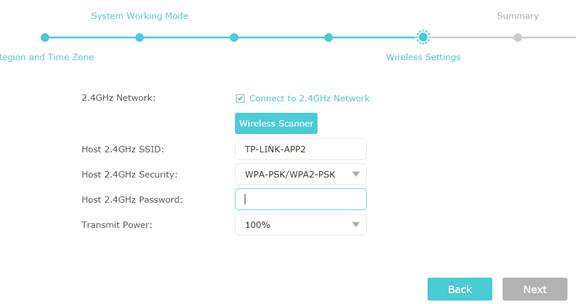
4. Tick Connect to 2.4GHz Network. Hit Wireless Scanner. Choose your host network from the prompt window and enter its wireless password. Click Next.
5. Confirm your settings. Click Save.
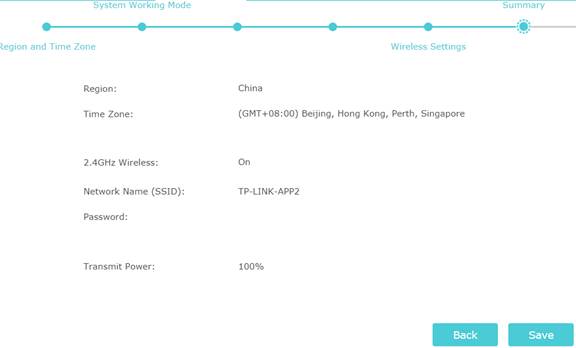
Wait for the router to reboot.
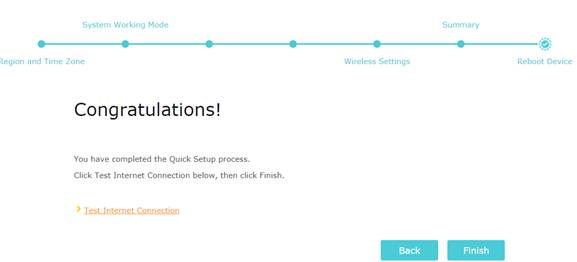
6. Finish the setup.
Step 2: Relocate:
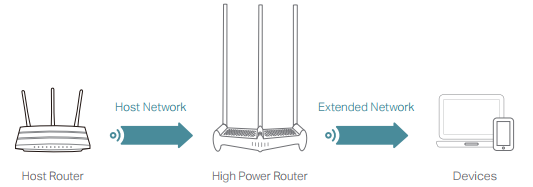
Disconnect the Ethernet cord between the TP-Link router and your host router. Place the TP-Link router between your host router and the Wi-Fi dead zone. The location you choose must be within the range of your existing host network.
Step 3: Enjoy!
The extended network shares the same wireless network name and password as that of your host network.
Get to know more details of each function and configuration please go to Download Center to download the manual of your product.
Is this faq useful?
Your feedback helps improve this site.