How to add an extender to an EasyMesh network as a satellite device
EasyMesh routers and extenders can work together to form one unified Wi-Fi network. Walk through your home and stay connected with the fastest possible speeds thanks to EasyMesh’s seamless coverage.
Note:
Routers and extenders must be compatible with EasyMesh or OneMesh™. Firmware upgrades may be required.
TP-Link OneMesh extenders can only build a mesh network with TP-Link EasyMesh/OneMesh Archer Wireless Routers.
Visit https://www.tp-link.com/easymesh/product-list/ for a complete list of EasyMesh-compatible devices.
Here are two methods to add the satellite extender:
Method 1: Using WPS button
This method allows you to add a TP-Link Extender to an EasyMesh network with TP-Link wireless router, modem router or a router from another vendor.
- Log into the web management page of the Main Router. Here, we take a TP-Link Archer Wireless Router as an example. Visit http://tplinkwifi.net, and log in with your TP-Link ID or the password you set for the main router. Please refer to this FAQ to log in.
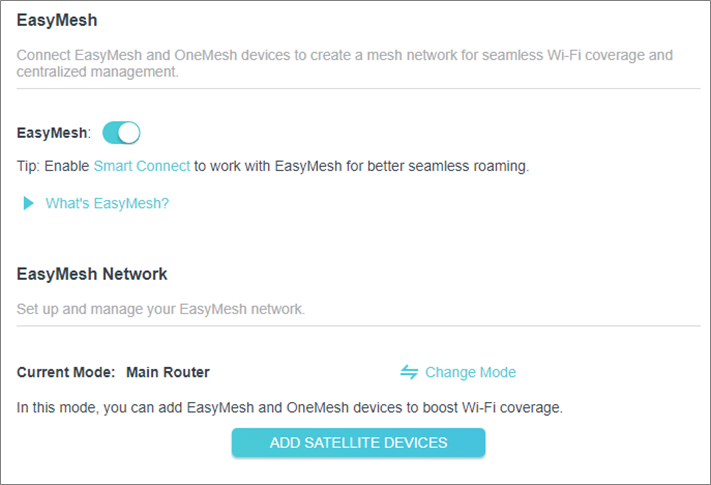
- Go to Advanced > EasyMesh, and enable EasyMesh on the main router.
- Plug in the extender next to the main router.
- Within 2 minutes, press the WPS button on the main router and the extender. Wait until the WPS process is complete.
- Done! You can check the mesh device on the router’s web page, too.
Method 2: Via Scanning
This method is only used to add a TP-Link Extender to an EasyMesh network with TP-Link Wireless Routers, as follows: https://www.tp-link.com/easymesh/product-list/#wi-fi-routers
1. Visit http://tplinkwifi.net and log in with your TP-Link ID or the password you set for the main router. Please refer to here to log in.
- Go to Advanced > EasyMesh, and enable EasyMesh on the main router.
3. Put the Range Extender close to the main router. Connect to the Range Extender’s Wi-Fi and launch a web browser, then enter http://tplinkrepeater.net into the URL field, then log into the range extender’s Web UI using the admin credentials. Please refer to this FAQ to log in.
4. Click Quick Setup of Range Extender and go through the whole process. An EasyMesh/Mesh icon will appear under its SSID if the main router supports EasyMesh. If the icon is not displayed, ensure the main router’s firmware is up to date and EasyMesh is enabled.
Note: In the Tether APP, you may see the OneMesh instead of EasyMesh, even if the extender already supports EasyMesh. It would be optimized with the newly released firmware.

5. After finishing the Quick Setup configuration, you can check the mesh device on the router’s web page.

Is this faq useful?
Your feedback helps improve this site.


TP-Link Community
Still need help? Search for answers, ask questions, and get help from TP-Link experts and other users around the world.