How to install TP-Link Print Server by using Standard TCP/IP port on Windows computer
Since Windows supports TCP/IP printing, it is compatible with our Print Servers, like TL-PS110U/TL-PS110P/TL-PS310U/TL-WPS510U. Here is the configuration guide.
Note: Before the installation, please make sure the printer works fine if it is connected to computer directly.
Choose the operating system of your computer
http://www.tp-link.com/en/faq-181.html
Step 1 Click Star->Printers and Faxes-> Printers.
Step 2 Double click on Add Printer.
Step 3 Click Next on the Welcome screen.
Step 4 The Local or Network Printer screen will open. Select Local printer. Uncheck Automatically detect and install my Plug and Play printer.
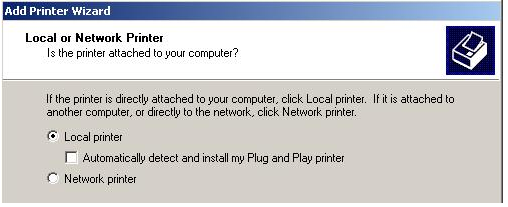
Step 5 Click Next.
Step 6 The screen of Select a Printer Port will open. Select Create a new port and Standard TCP/IP Port.

Step 7 Click Next.
Step 8 Click Next again on the welcome screen.
Step 9 The Add Standard TCP/IP Printer Port screen will open. Enter the IP address of the printer server. For Port Name, it will be entered automatically.
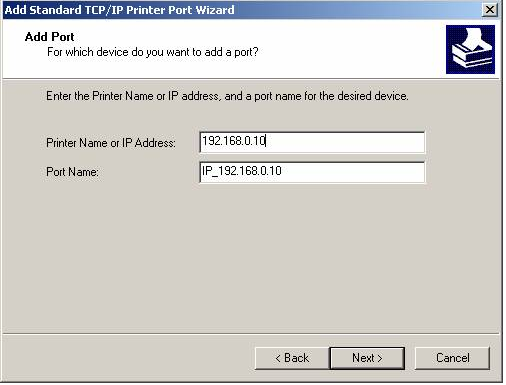
Step 10 Click Next.
Step 11 The Additional Port Information Required screen will open. Select Custom. Click Settings.

Step 12 The Configure Standard TCP/IP Port Monitor screen will open.
By using LPR protocol
Select LPR for Protocol. Enter lp1 in the Queue Name field. Click on the LPR Byte Counting Enabled checkbox (Due to a flaw in Windows LPR, some print servers will not accept jobs unless Byte Counting is enabled).
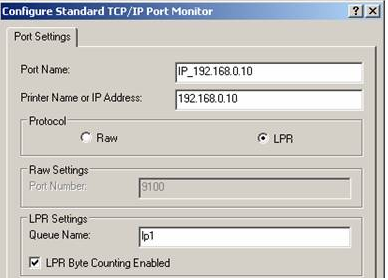
By using Raw protocol
In the Protocol section, select Raw
In the Port Number field, enter 9100
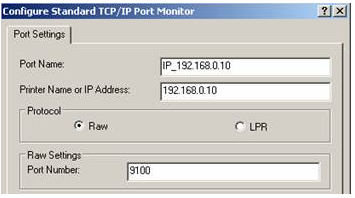
Step 13 Click OK, then Next and Finish.
Step 14 A window will show all of the drivers, select the appropriate one.
a. In the window, select an appropriate name (Use the Queue name for clarity when making multiple printer definitions).
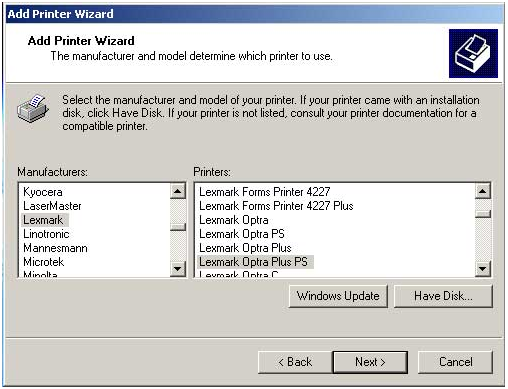
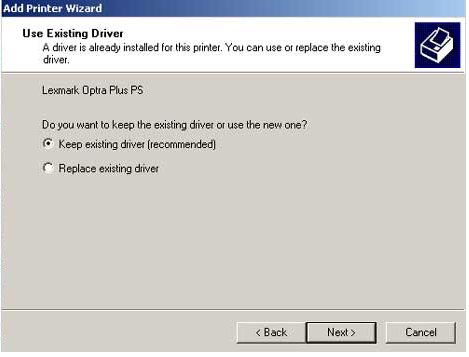
b. Keep existing driver if necessary.
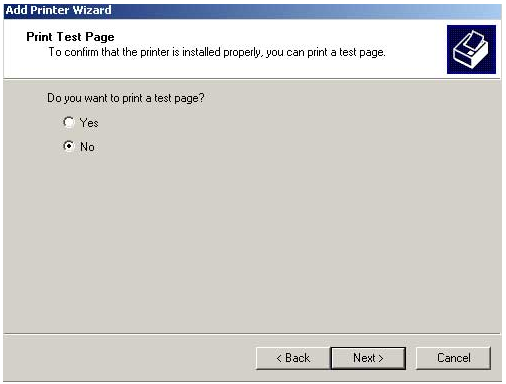
c. In the Print Test Page window, you may test as needed if necessary.
d. Click Next.
e. Click Finish.
Situation 1
http://www.tp-link.com/en/faq-240.html
You never use the printer on your computer before but also want to share printing; you just need to add a printer, follow the steps to create a Standard TCP/IP port, and then install the printer driver.
Step 1 Click Start-> Control Panel, and select Devices and Printers.
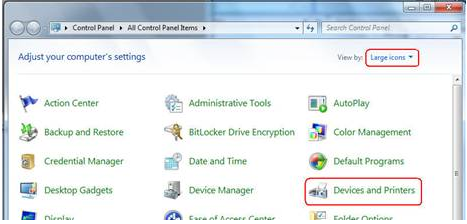
Step 2 Click Add a printer.

Step 3 Select Add a local printer.
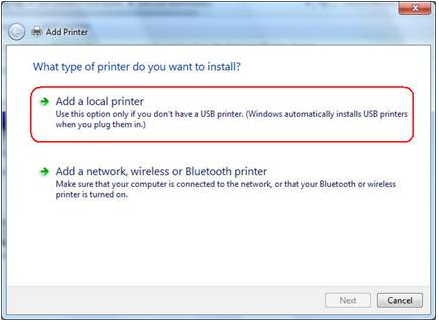
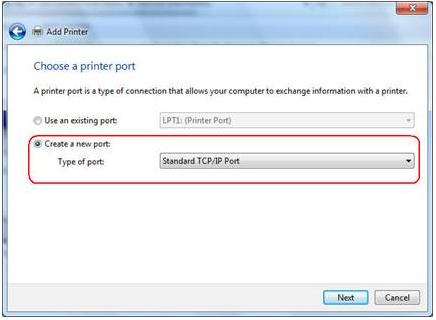
Step 4 Select Create a new port, and the type of port is Standard TCP/IP Port.
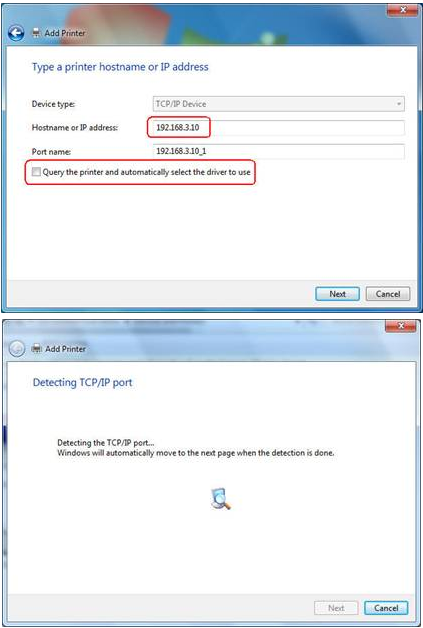
Step 5 Input the IP address of the print server and click Next. The windows will detect the TCP/IP Port. Please wait for the next page.
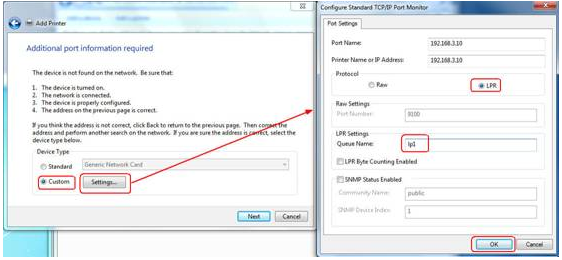
Step 6 Select Custom and click Settings. And then on the next page, please select LPR as the Protocol and the Queue Name is lp1.
Step 7 It will ask you to install the driver of the printer. You can select one in the list or click Have Disk to install other drivers. Please follow the steps to finish the installation.
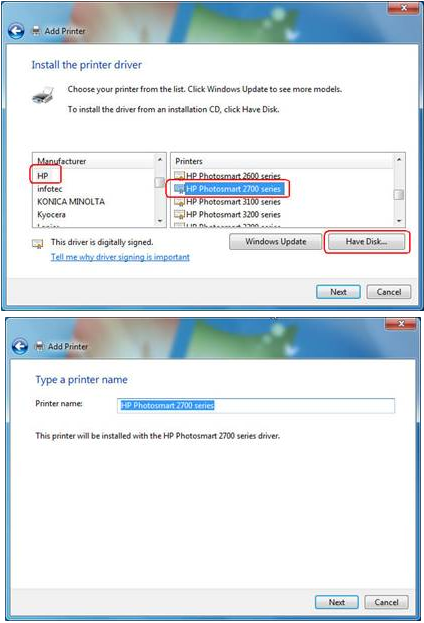
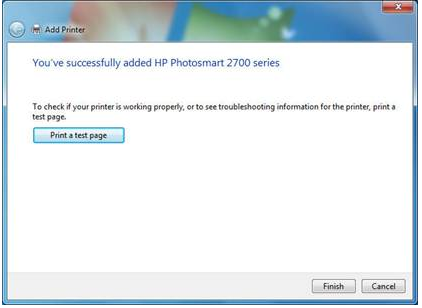
Step 8 After that, the new printer is in the list. And you can enjoy the sharing.
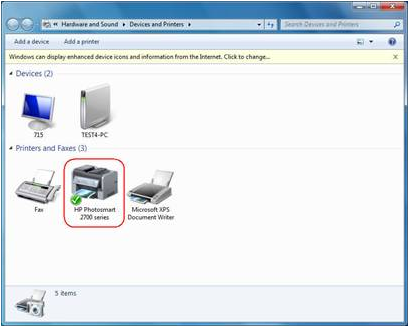
Situation 2
http://www.tp-link.com/en/faq-239.html
You ever connected directly a printer to your computer by a USB cable or a parallel cable, and installed the printer driver. Now you want to use a print server to share the printer through your network. You need to change the printer port to Standard TCP/IP port.
Step 1 Click Start-> Control Panel -> Classic View -> Printers.
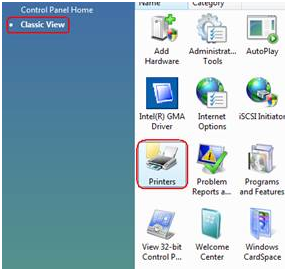
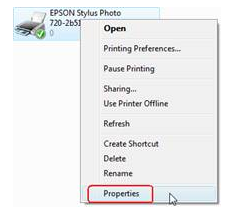
Step 2 Find your installed printer icon, right-click, select Properties.
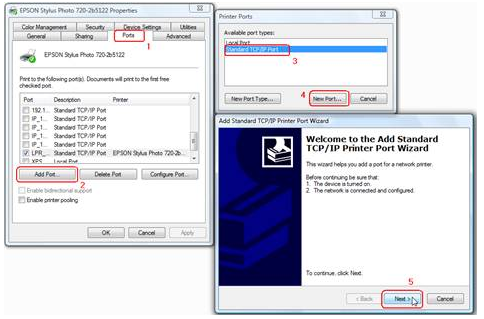
Step 3 Click Ports -> Add Port -> Standard TCP/IP Port -> New Port -> Next.
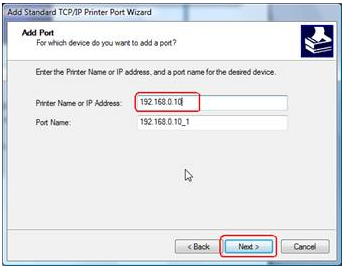
Step 4 Input the exact IP address of print server that you configured it. Click Next.
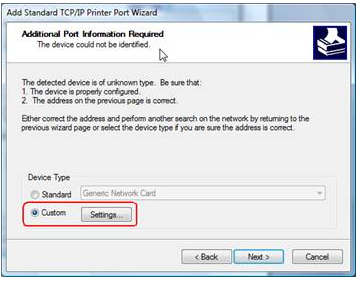
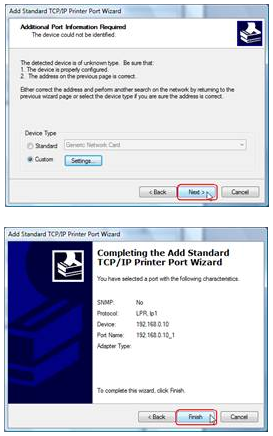
Step 5 Select Custom, and click Settings.
Step 6 Choose LPR, and input the queue name as lp1. Click OK.
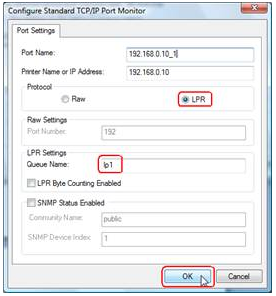
Step 7 Click Next, Finish, to complete the wizard.
Step 8 Click Close and Apply.
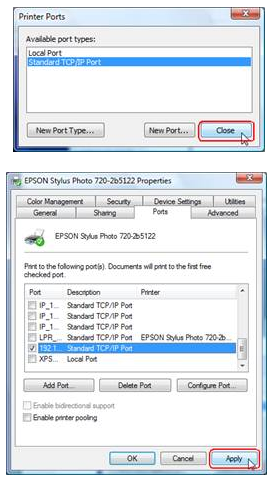
Now, the printer port has been created.
http://www.tp-link.com/en/faq-459.html
Windows 8 is a new operating system of Microsoft, it changed greatly compared with the former versions. Since it also supports TCP/IP printing, it is compatible with our Print Servers, like TL-PS110U/TL-PS110P/TL-PS310U/TL-WPS510U. Here is the configuration guide.
Note: Before the installation, please make sure the printer works fine if it is connected to computer directly.
Step 1 Please move your mouse to the right corner and you will see Search. Click it and search Control Panel.
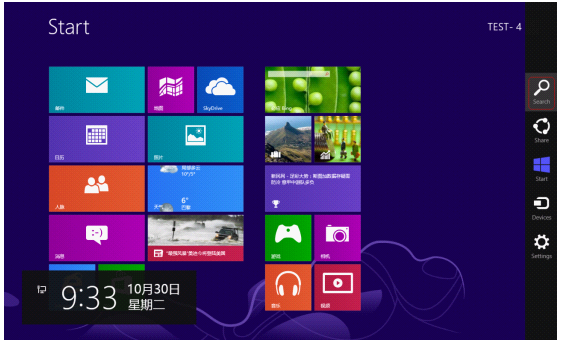
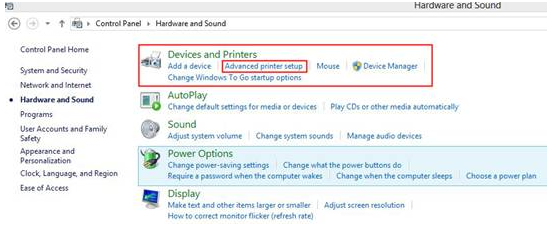
Step 2 Go to Control Panel->Hardware and Sound page, and click Advanced printer setup.
Step 3
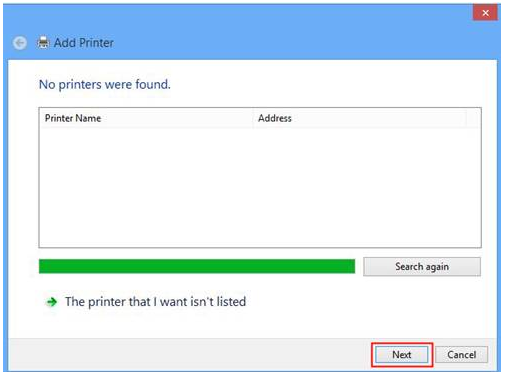
A window will pop out to search the printers automatically, please ignore it and click Next button.
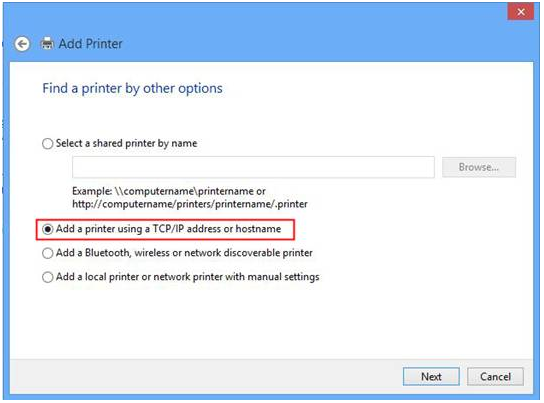
Step 4 Please Select Add a Printer using a TCP/IP address or hostname, click Next.
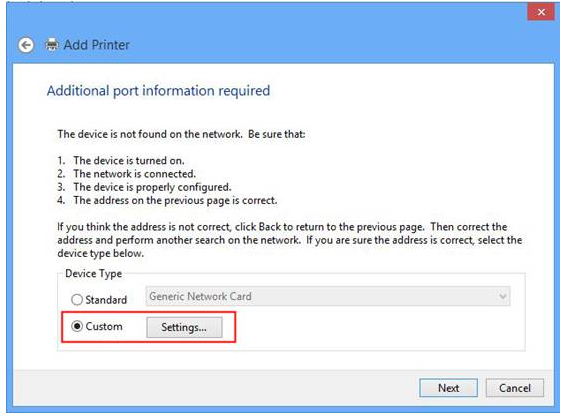
Step 5 Please select Custom and click Settings.
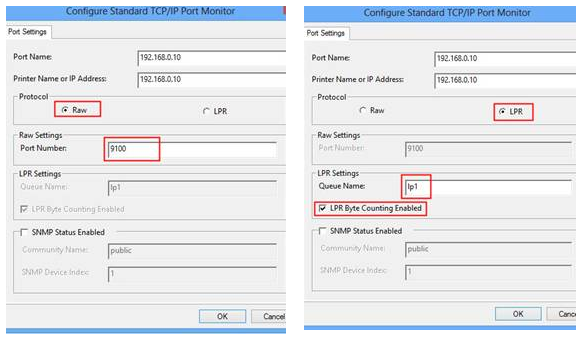
Step 6 Please type the IP address of your Print Server in Hostname or IP address. The print server’s IP should in same subnet with your router. As default, the Protocol is Raw. You can keep it still or select LPR. The two protocols support different printing languages. You can try one first, if can’t print, delete it and try another one.
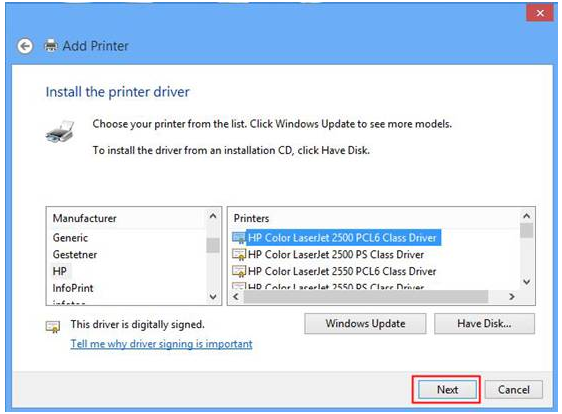
Step 7 Select the correct driver for your printer. If you can’t find the model of your printer, please connect your printer to PC with USB cable and install the driver first. Click Next.
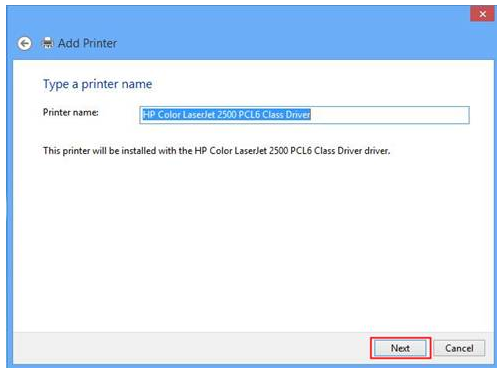
Step 8 Click Next.
Step 9 Click Finish.
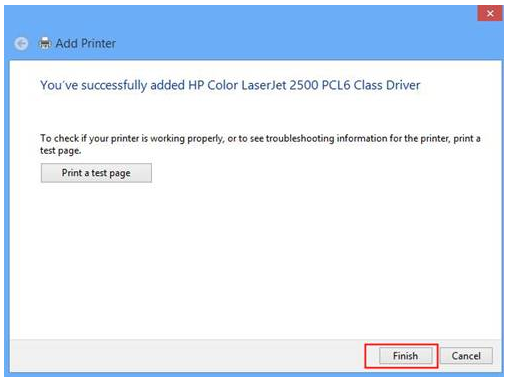
Until now, you have finished the installation. You can find the newly added Printer on Control Panel-> Hardware and Sound-> Devices and Printers page.
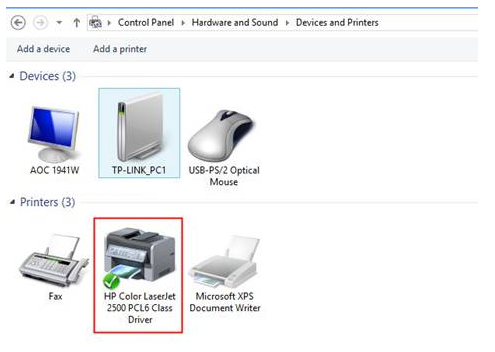
http://www.tp-link.com/en/faq-929.html
Since Windows 10 supports TCP/IP printing, it is compatible with our Print Servers, like TL-PS110U/TL-PS110P/TL-PS310U/TL-WPS510U. Here is the configuration guide.
Before the installation, please make sure the printer works fine if it is connected to computer directly.
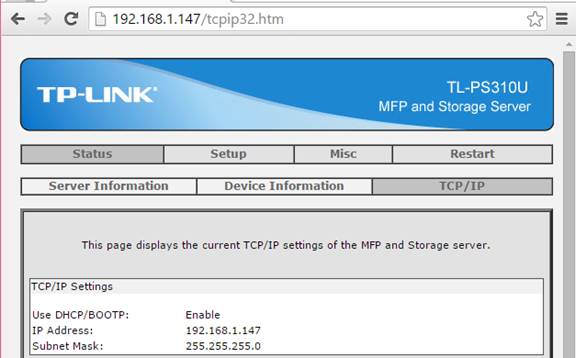
Step 1 Configure the print server as usual. Example looks below (sample is using IP 192.168.1.147).
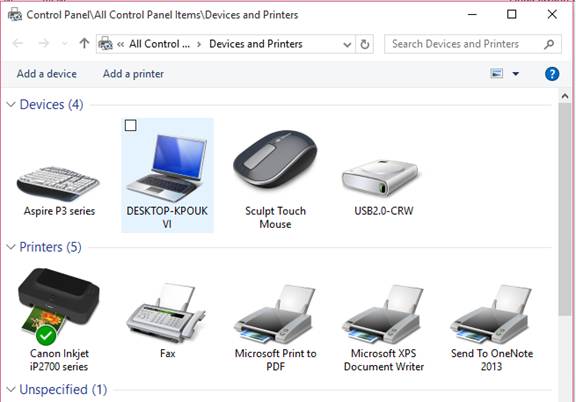
Step 2 Open Device & Printers on Control Panel, or Press Window Button, then type “Printer” then Enter.
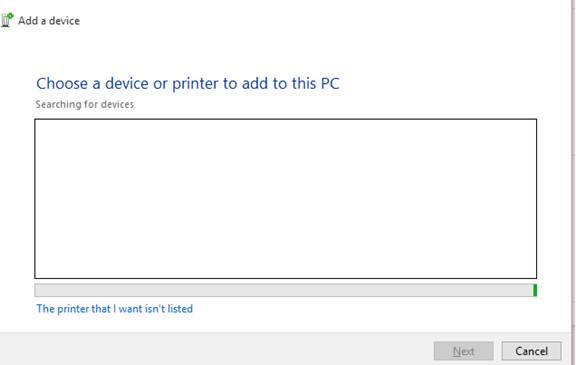
Step 3 Click “Add a printer”. Then it will automatically search for devices. Instead, click “The Printer that I want isn’t listed”.
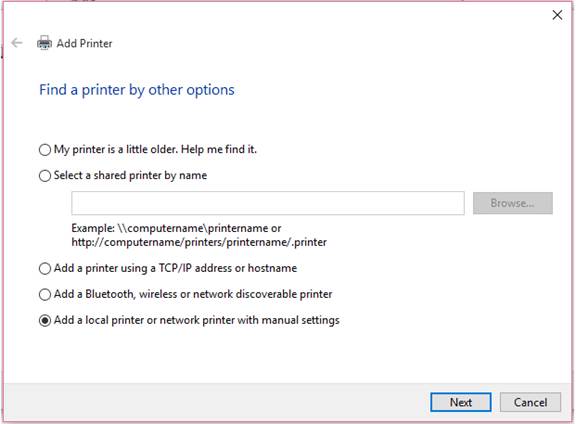
Step 4 Then it will show Add Printer page. Select “Add a local printer or network printer with manual settings”. Then next.
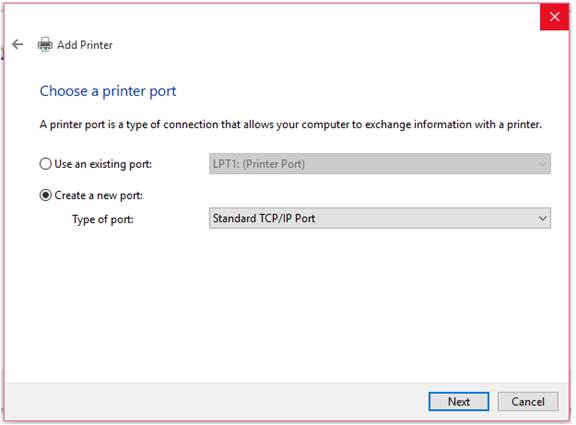
Step 5 On the next page, you will be asked for printer port. In this case, select “Create a new port”, and then select “Standard TCP/IP Port”. Then next.
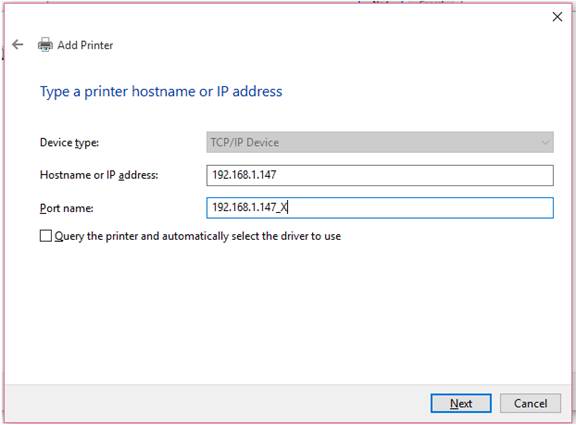
Step 6 Next page you will be asked for IP address of your device. Put in the print server’s IP Address and on the Port Name, add some text. For example, 192.168.1.147_X. Also remember NOT to tick the “Query the printer and automatically select the driver to use”.
Step 7 You then will be shown a page with Detecting TCP/IP Port. Wait a few minutes depends on your network configuration. It will show you that the system cannot find any devices. Don’t worry, this is as expected. Then you will be shown the page like next page.
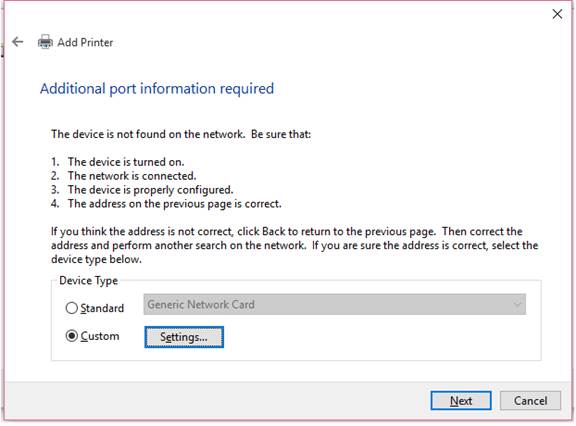
Select “Custom” then click “Settings…”
Step 8 Please type the IP address of your Print Server in Hostname or IP address. The print server’s IP should in the same subnet with your router. As default, the Protocol is Raw. You can keep it still or select LPR. The two protocols support different printing languages. You can try one first, if can’t print, delete it and try another one.
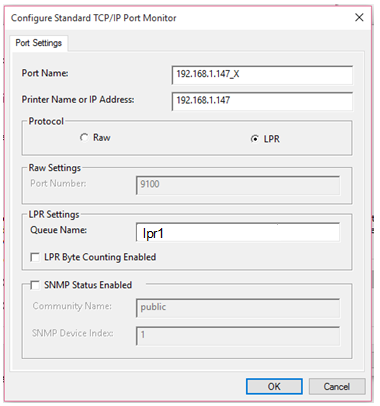
Step 9 Click Next.
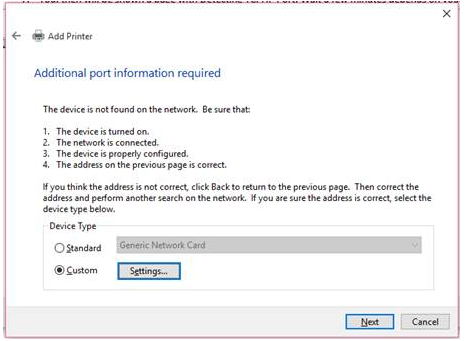
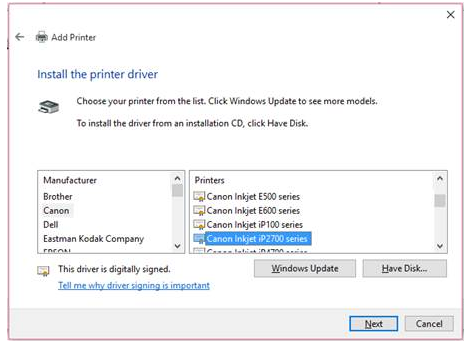
Step 10 You will be asked to select your printer driver. Select based on your printer model and type from Windows standard drivers. Or you can use from your printer CD/DVD setup kit. After that, click Next.
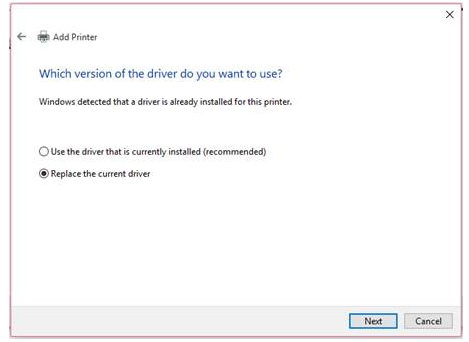
Step 11 Then you will be asked whether you would like to use current driver or replace it. This is only happen when you already have printer driver before. I assume that you have installed previously. So, select to replace.
Step 12 Then put the name of your printer here.
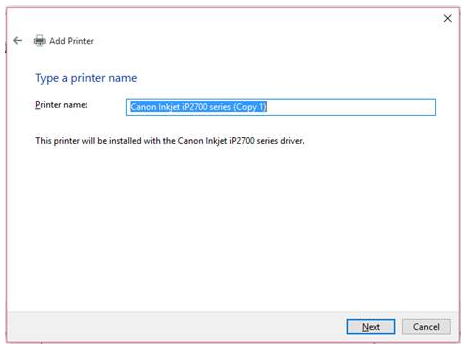
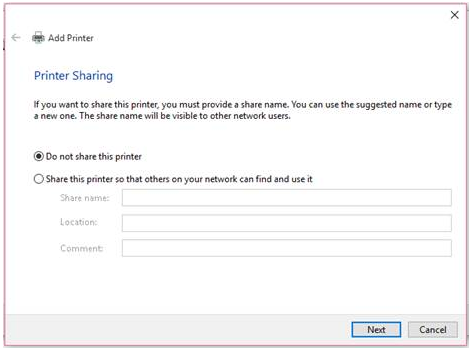
Step 13 Click “do not share this printer”.
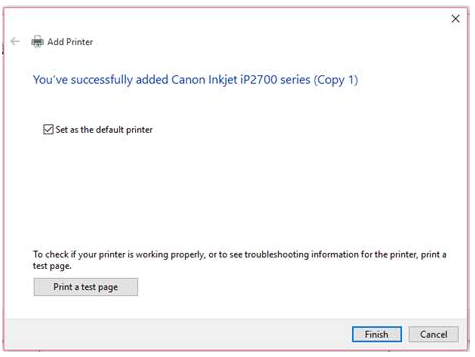
Step 14 Set this printer as default by ticking the selection “Set as the default printer” or not. Also if you want to do Print test, just press the button “Print a test page”.
Questa faq è utile?
Your feedback helps improve this site.


