How to configure TL-WR802N TL-WR810N working on Router Mode
Scenario
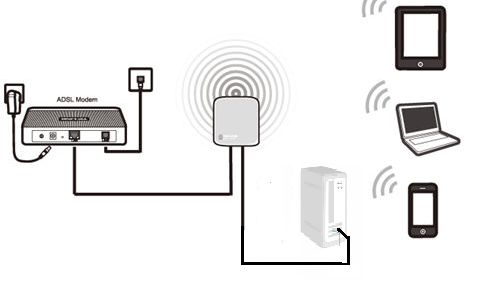
Here takes TL-WR802N as the example:
Definition: The TL-WR802N is connected to a DSL or cable modem and works as a regular wireless router.
Application: Internet access from DSL or cable modem is available for one user but more users need to share the Internet.
Physical Connection
Step 1:
Connect the DSL/Cable modem to the LAN/WAN port of TL-WR802N; connect your computer to the Wi-Fi of TL-WR802N. The default wireless network name and password are printed on the label of this TP-Link router itself.
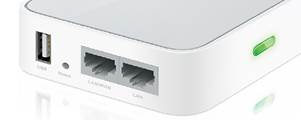
Step 2:
Power on the TL-WR802N
Access the Management Page
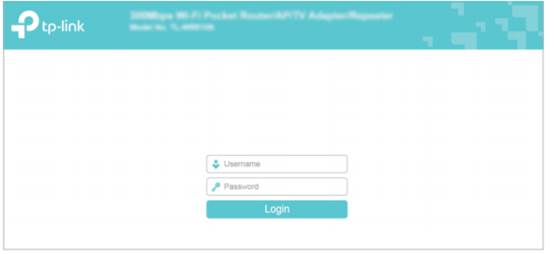
Open a Web Browser -> Type http://tplinkwifi.net or 192.168.0.254 in the address bar -> Press Enter

Enter the default User Name: admin
Enter the default Password: admin
Click OK
Step 1:
Go to Quick Setup-> Click Next
Step 2:
Select Wireless Router-> Click Next.

Step 3:
Choose the WAN Connection your ISP is using. For most DSL and cable ISP, they use Dynamic IP.
If you’re not sure, please consult with your ISP customer service or refer to the link below:
Application Requirement Choose WAN Connection Type on my TP-LINK router
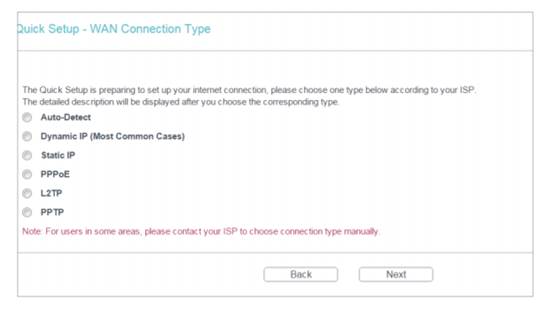
Procedures are different according to the Connection Type you choose.
1) Select Dynamic IP, and click Next;
2) Select PPPoE, input the Username and Password provided by ISP and then click Next;
3) Select Static IP, input the IP parameters provided by ISP and then click Next;
Step 4:
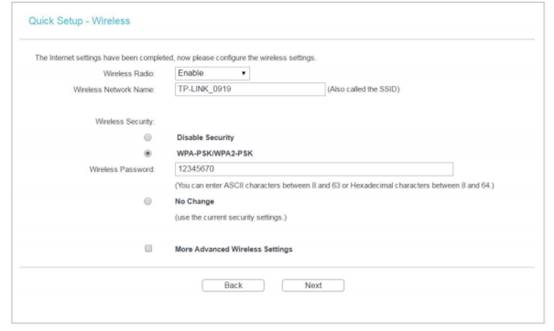
Customize your wireless name (SSID) and password
Wireless Radio: Enable
Wireless Network Name: (Rename Your Wireless Name)
Wireless Security: WPA-PSK/WPA2-PSK
Wireless Password: (Create a Private Password)
Click Next
Step 5:
Click: Finish, and wait until it goes to 100%

At the same time please power cycle your modem.
Get to know more details of each function and configuration please go to Download Center to download the manual of your product.
해당 FAQ가 유용했나요?
여러분의 의견은 사이트 개선을 위해 소중하게 사용됩니다.
3.0-L-D-2000px_normal_1584496942417r.png)