How to register a TP-Link cloud account for my TP-Link wireless router to manage it remotely (New Logo)
A TP-Link cloud account, which is also called a TP-Link ID, is used to bind and remotely manage TP-Link routers, cloud cameras, smart plugs and so on.
If you have already registered your email as a TP-Link ID via the kasa APP, the tpCamera APP or https://community.tp-link.com/en/register , just use your TP-Link ID to manage your TP-Link router.
There are two ways to register a TP-Link cloud account: on the web management page or on the Tether APP.
Note
1. This FAQ is suitable for TP-Link wireless router with cloud functions, such as Archer C8 V3, Archer C9 V3/V4 and so on. If your TP-Link router doesn’t support cloud functions, you can neither bind a TP-Link cloud account to it nor manage it remotely although you have signed up.
2. Currently most of the applicable models only support the online upgrade feature, and other cloud functions will be added in the future firmware.
3. As for Archer C5400 V1, only the EU version supports the online upgrade feature. Please check the hardware version on the label at the back of the router.
Method 1: Register on the Tether APP
Please confirm your model is compatible with the Tether APP: https://www.tp-link.com/en/tether/product-list/
Step 1: Download and install the Tether APP on your smartphone from APP Store or Google Play.
Step 2: Connect your smartphone to the Wi-Fi network of your TP-Link router, then run the Tether APP (make sure your smartphone can get internet). Choose “Create a TP- Link ID” to create your TP-Link ID.


Step 3: Type your mailbox in the Email box as your cloud account and create your own password, then check Agree to TP-LINK Privacy Policy & Terms of Use. Click Confirm.

Step 4: You will receive an email for verification. Check your mailbox and open the activation mail, then tap Click to Finish Registration.


Step 5: After activated, please tap Login to login with your registered TP-Link ID and password.
Step 6: Go to More> Manager or go to tools> TP-Link ID

Step 7: Tap Confirm to combine your TP-Link router and TP-Link cloud account together. After that, you will find your TP-Link router showed as a cloud device on the Device page, which means that you can enjoy the cloud functions of your TP-Link router on the Tether APP.


Method 2: register on the web management page
Here takes Archer C8 V3 as an example:
Step 1: Connect your device to Archer C8 wired or wirelessly and make sure your device can get internet. Then open a web browser, type http://tplinkwifi.net in the address bar and login the management page of the router. The password is ‘admin’ by default.

Step 2: Go to Basic, choose TP-LINK Cloud, and click Register Now.
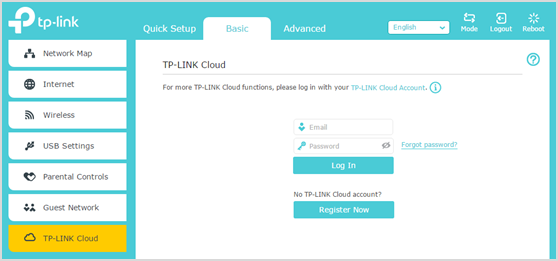
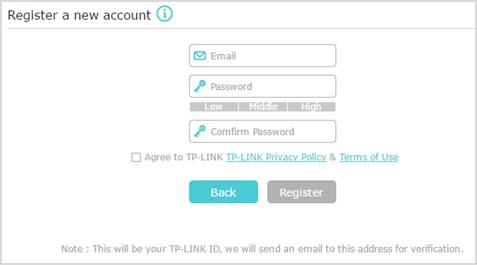
Step 3: Type your mailbox in the Email box as your cloud account and create your own password, then check Agree to TP-LINK Privacy Policy & Terms of Use. After that, just click Register and you will receive an email for verification.
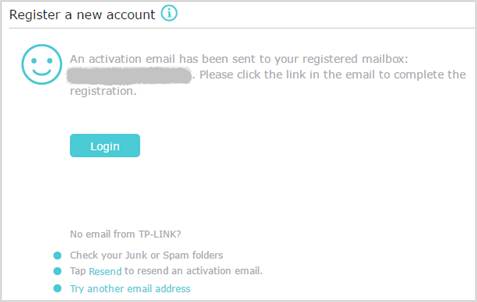
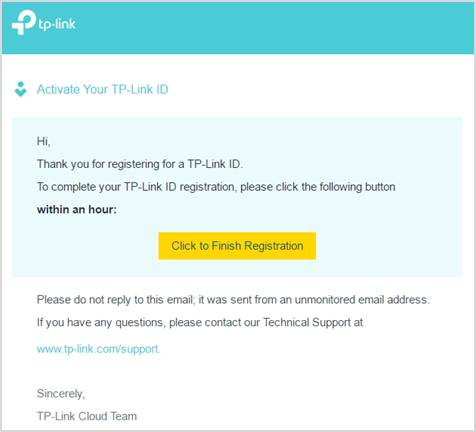
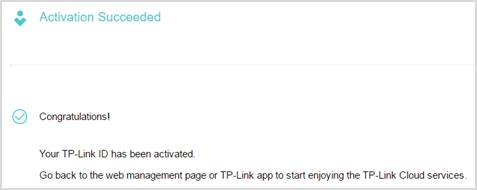
Step 4: Check your mailbox and open the activation mail, then tap Click to Finish Registration.
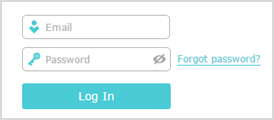
Step 5: Now your cloud account has been successfully registered. Just go back to the management page of the router and login with your TP-Link ID and password to enjoy the cloud services.
Note
The TP-Link ID will be automatically bound to your router after your login.
Get to know more details of each function and configuration please go to Download Center to download the manual of your product.