How to restore L2 lite managed switch to factory default
There are two ways to restore L2 lite managed to factory default, one is to use the web interface, but sometimes you may not be able to log on the web interface. In that case, you should use console to restore it to factory default.
Use serial cable to connect your switch to a computer. Then power off the switch.
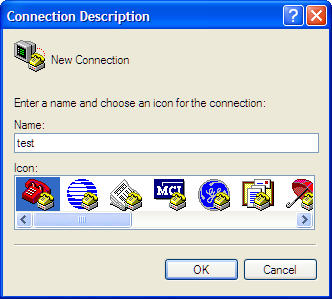
Click Start -> All Programs -> Accessories -> Communications -> Hyper Terminal to run Hyper Terminal. And there will pop up a dialog box as Picture 1 shows. Enter a name, here we use test for example. And click OK.
Picture 1
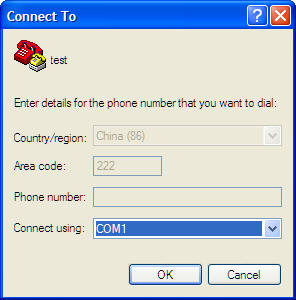
Then you will see Picture 2, just click OK.
Picture 2
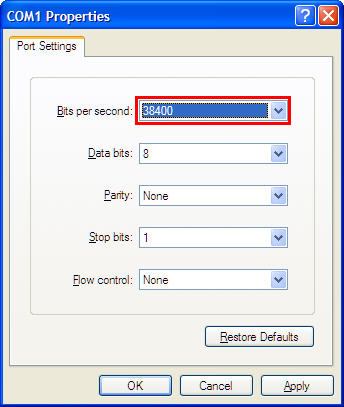
Change Port Settings as Picture 3 shows. Bits per second set to 38400, Data bits set to 8, Parity set to None, Stop bits set to 1 and Flow control also set to None. Then click OK.
Picture 3
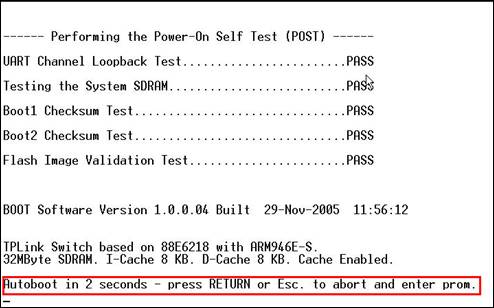
Then power on the switch, press ESC when you see the notification as Picture 4 shows.
Picture 4
Then you will see Picture 5. Please enter 2.
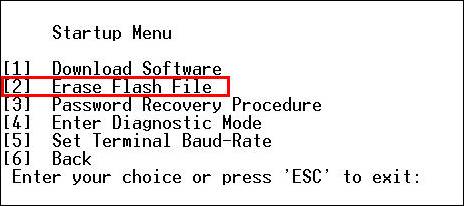
Picture 5
Then you will see Picture 6. Please enter Y. The Flash file name is config.
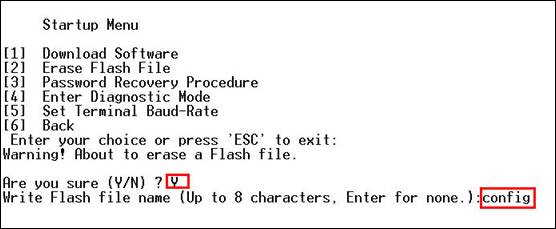
Picture 6
After press Enter on your keyboard, Picture 7 will appear. Press ESC and the switch will reboot automatically.
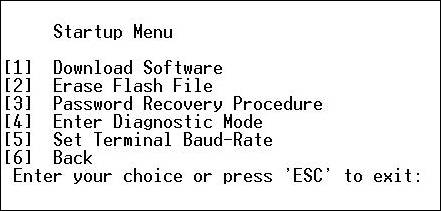
Picture 7
After that, the switch is restored to factory default successfully. Please refer to the user manual to configure your switch.
Caution: Please DO NOT do any other operations, or it may damage your switch.
Is this faq useful?
Your feedback helps improve this site.
TP-Link Community
Still need help? Search for answers, ask questions, and get help from TP-Link experts and other users around the world.


