How to Change the DNS servers on the wireless router and DSL modem router (New UI)
This Guide will show you how to change the DNS address in your TP-Link wireless router on our newest UI.
For Wireless Router (Blue GUI)
Step 1: using any web browser such as IE, Firefox or Google Chrome log into the router.
 -or-
-or- 
Step 2: Log in to the router. The default username and password is “admin”.
Step 3: Click on “Advanced”, then “Network”, then “Internet”.

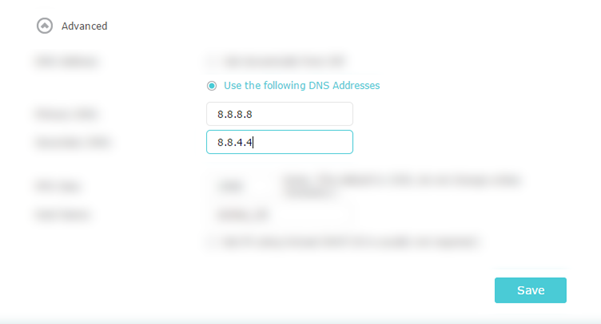
Step 4: Click the drop-down for “Advanced”, then click the radio for “Use the following DNS address”. Input your DNS addresses then click “Save”.

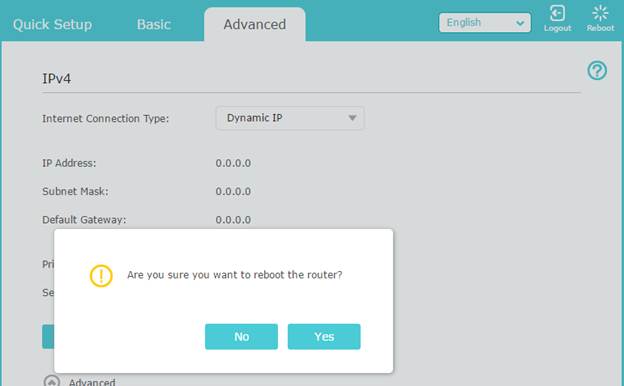
Step 5: Click “Reboot” in the upper right corner, then on the pop up click “Yes”.

For DSL modem router(Take Archer VR600 as an example):
Step1: Login to the web page following the FAQ: How to log into the web-based interface of the AC VDSL/ADSL Modem Router (new logo)?
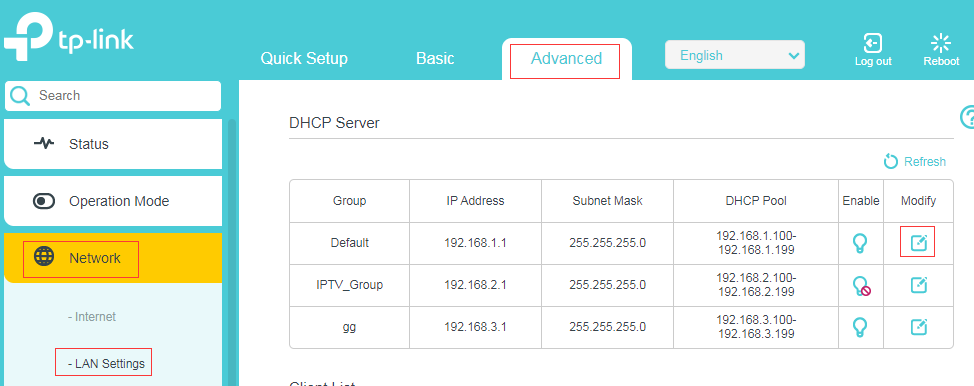
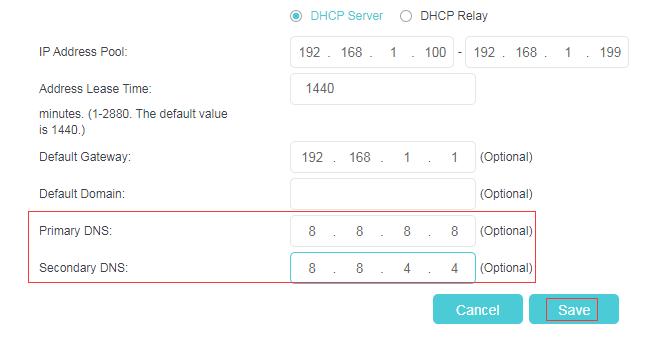
Step 2: Go to Advanced >> Network >> LAN Settings, click on the Modify, then you can change the DNS to one what you need and reboot the modem router.


To get to know more details of each function and configuration please go to Download Center to download the manual of your product.
¿Es útil esta pregunta frecuente?
Sus comentarios nos ayudan a mejorar este sitio.
3.0_A_RGB_normal_1584493572647x.png)

1.0_normal_20210812031127k.png)