How to set up access rules for TP-Link SMB router?
In some cases we would like to set up a blacklist or whitelist to limit the Internet access. For example, sometimes we don’t want the LAN users to use IPsec VPN, and we may want to provide http website access only. In this article, we would guide you how to set up these scenarios by setting up Access Rules.
If you want to block some specified websites, please refer to FAQ 188 (for new GUI) or FAQ827 (for old GUI).
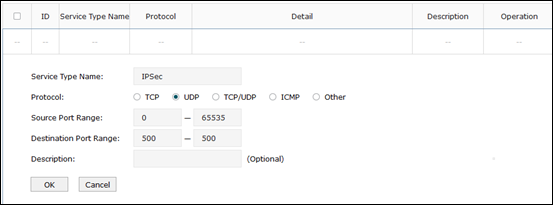
Step 1. Login to web GUI. Go to Preferences--->Service Type. Add UDP port 500 and name it as IPsec or any other words as you like.
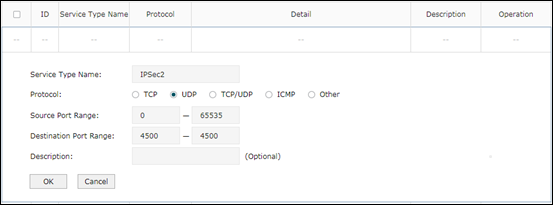
And add UDP port 4500, name it as IPsec2 or any other words as you like.
Now we can see these two entries shown in the Service list.

Step 2. Go to Firewall--->Access Control. Set up the rules as shown below.
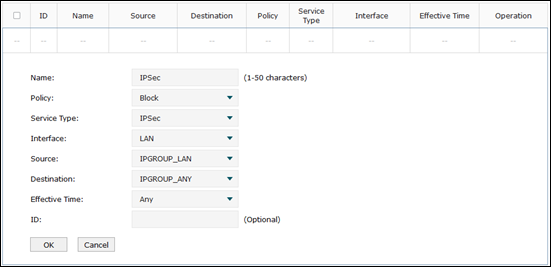
The Interface shows where the packets from. If LAN is selected, this rule will take effect for the packets from LAN to WAN. While the Source and Destination mean the traffic direction. We block the IPSec service from LAN IP to Any IP.
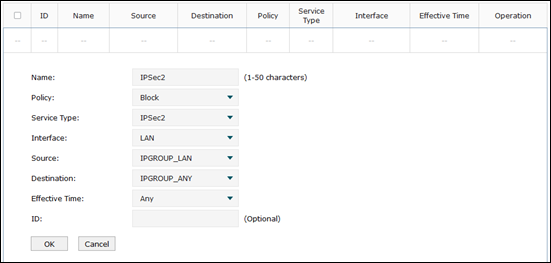
If you want to limit some special IPs, you will need to go to IP Group to set it at the first.
After adding these two rules, the IPSec will be block now.
Login to the Web GUI. Go to Firewall--->Access Control. Set up the following three entries as shown.
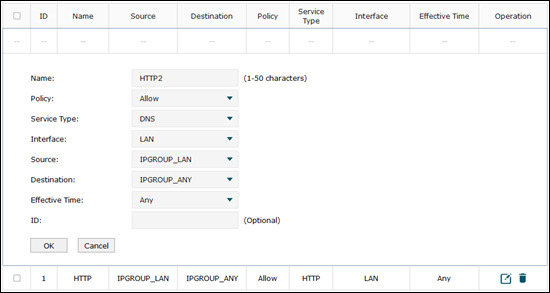
Step 1. We should allow DNS service because DNS service always works together with HTTP service.
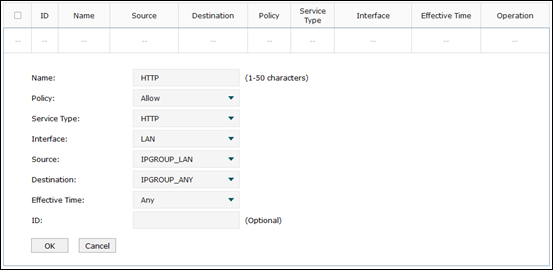
Step 2. We should also allow HTTP service for all the Source and Destination.
Step 3. By default, all services are allowed in the Access Rules. In order to block other services, we need to block All Services in the last.
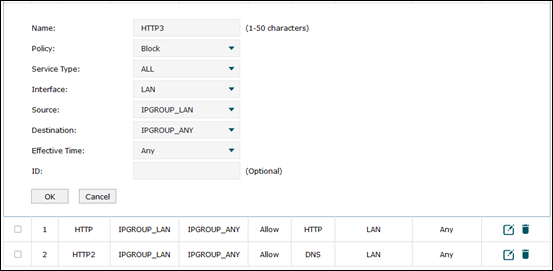
The router will try to match all the rules one by one for each packet. And the ID of the entry means the priority, ID 1 stand for the highest priority. So when we set up whitelist, this block-all rules must be added in the last.
We can see these three entries in the List of Rules. Now all services have been blocked except HTTP and DNS.

If you have a FTP server in you LAN, but for the security considering, you only want one special public IP can access it. You will need the below setting.
Step 1. Add the special IP you allowed into the IP Group. Turn to Preferences---->IP Group---->IP address.
Here we take 10.10.10.9 as an example.

Then setting an IP Group for this IP address. We call it FTPAllowed.

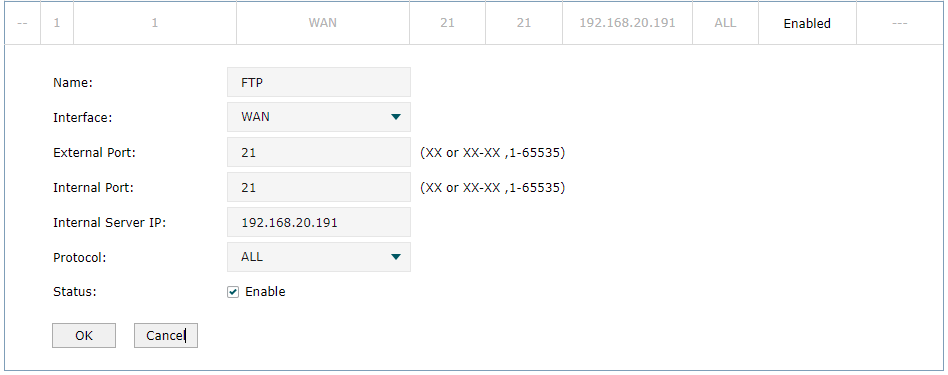
Step 2. Open the port 21 to allow FTP connection. Turn to Transmission---->NAT---->Virtual Servers.
Here, the FTP server is 192.168.20.191 as an example
Step 3. Turn to Firewall---->Access Control. Set up the rules as shown below.
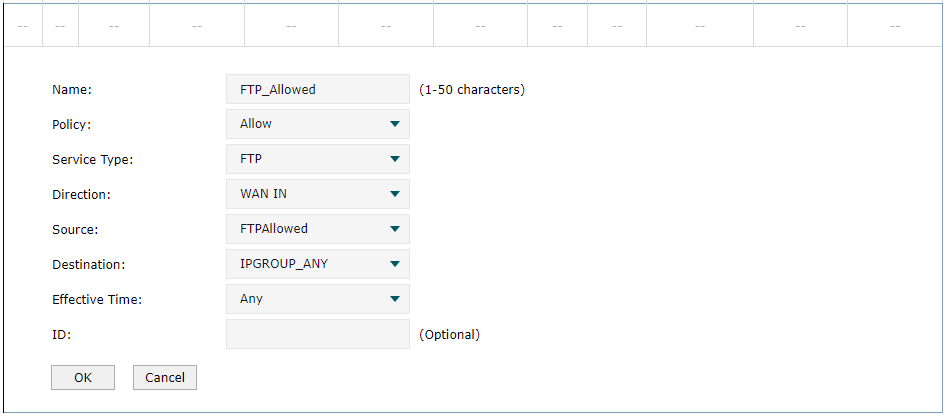
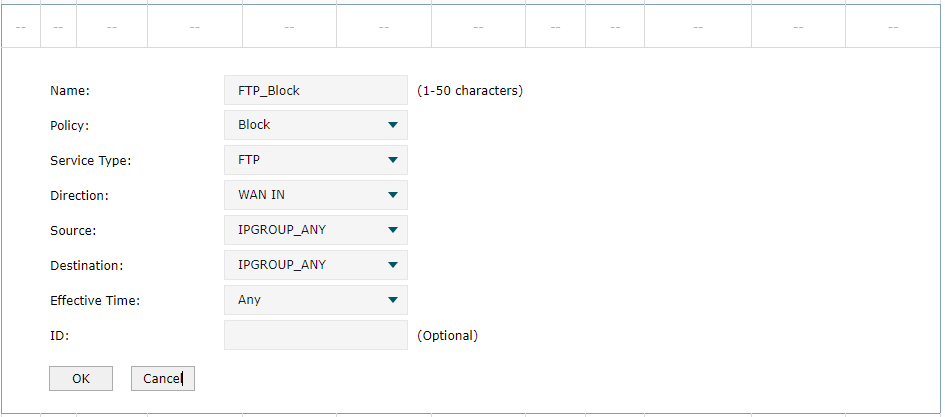

After that, only the 10.10.10.9 can access your FTP Server from WAN.
Este guia foi útil?
A sua resposta ajuda-nos a melhorar o nosso site.


