How to configure Address Reservation on TP-Link wired router
When you specify a reserved IP address for a PC in the LAN, the PC will always receive the same IP address each time when it connects the DHCP server. If there are some PCs in the LAN require permanent IP addresses, please configure Address Reservation on the router for the purpose.
Step 1 Open the web browser and type the IP address of the router (default is 192.168.1.1) into the address bar, then press Enter.
Step 2 Type the username and password in the login page, the default username and password are both admin in lower case.
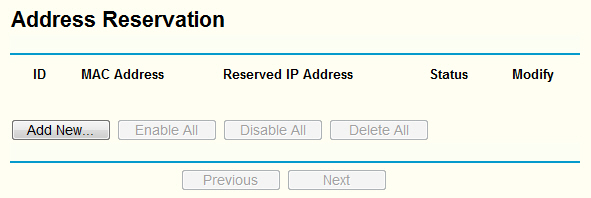
Step 3 Click DHCP->Address Reservation on the left side and click Add New button.

Step 4 Input the MAC address and IP address, select Status as Enabled.

MAC Address: The MAC address of the PC which you want to reserve IP address
Reserved IP Address: The IP address of the PC which will be reserved by the router
Status: The status of this entry is either Enabled or Disabled
NOTE:
1. The format of the MAC Address is XX-XX-XX-XX-XX-XX.
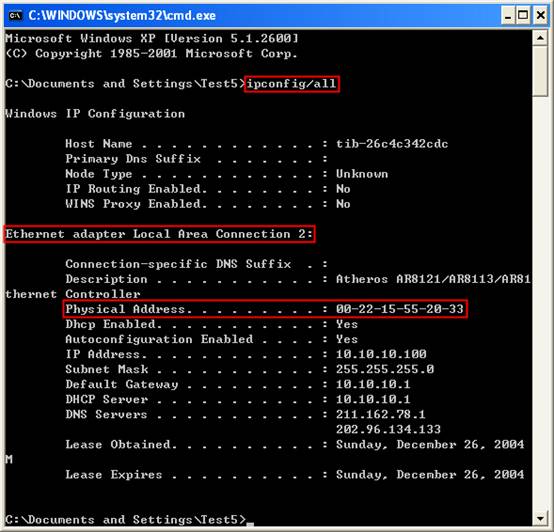
2. If you don’t know the MAC address of your computer, please refer to the following steps to find it.
(1) Click Start->Run, input cmd and press Enter.

(2) Type ipconfig/all at the prompt window, press Enter. It will show the MAC address and other information of this computer.

Step 5 Click Save button to save the settings.
Then the PC whose MAC address is 00-0A-EB-00-23-11 will always receive IP address 192.168.1.100 when it connects to the router.
Get to know more details of each function and configuration please go to Download Center to download the manual of your product.
Este guia foi útil?
A sua resposta ajuda-nos a melhorar o nosso site.