How to Set Access Control of the Internet with Firewall on modem router (self-developed UI)
Note:This article applies to TD-W8968 V1/V2,not TD-W8968 V3 if it’s V2, We will take TD-W8968 V1 as example in this article.The steps are the same for other listed models.
Firewall can be used to control user’s access to the Internet. This FAQ explains how to configure it, by an example given below
Block a computer whose IP is 192.168.1.100 to access the Internet from 00:00 to 06:00
According to the purpose above, some necessary Parameters should be needed and clarified during the whole configuration process. They are:
Rule Type: Block
LAN Host: 192.168.1.100
Target: Internet
Schedule: 00:00~06:00
After having the above information, you can start the configuration on TD-W8968.
Step 1
Login to Modem Router’s configuration page.
Open your web browser and type the LAN IP address of the router in the address bar (the default IP address of TP-Link Modem router is http: //192.168.1.1.), then press Enter.

When you are prompted, enter the router´s username and password (the default username and password are both admin).
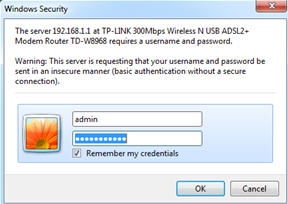
If you cannot open this page, please click here for more instruction.
Step 2
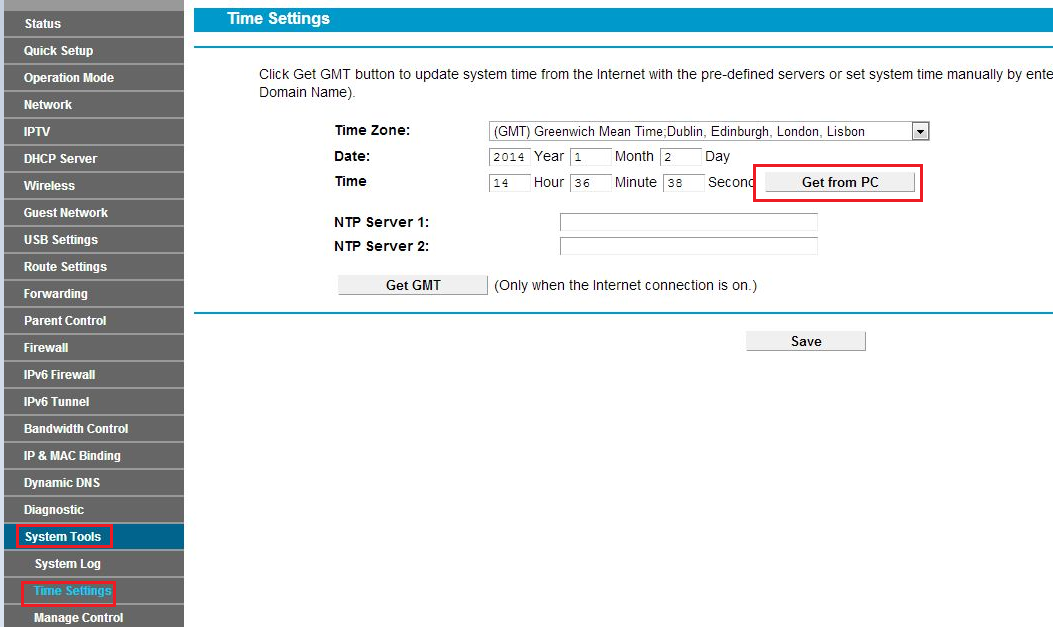
The Firewall settings are based on the modem’s time, rather than PC’s, so firstly we should adjust the modem’s time consisting with the PC’s. Go to System Tools-> Time Settings-> Get from PC-> Save.
Step 3
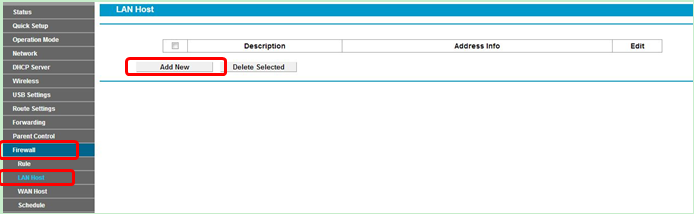
Go to Firewall -> LAN Host and click Add New.
Step 4
Select the IP Address in Mode field, then enter a brief description of the rule you are setting up, here we take LAN as example. And type the IP range or specific one which you want to block in IP Address bar.
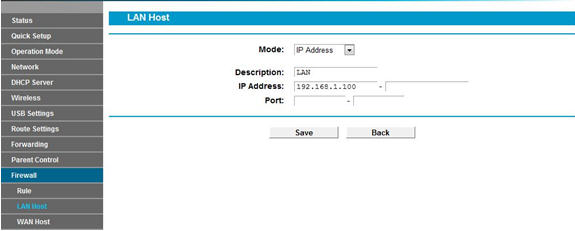
Note: Leave the Port blank.
Step 5
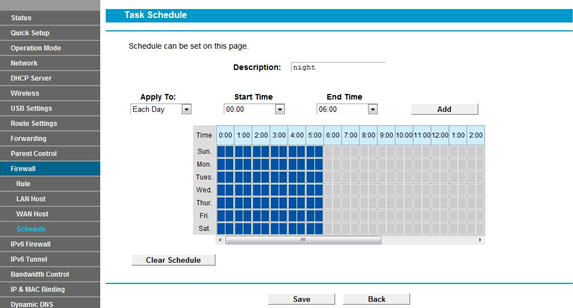
Go to Firewall -> Schedule and click Add New.
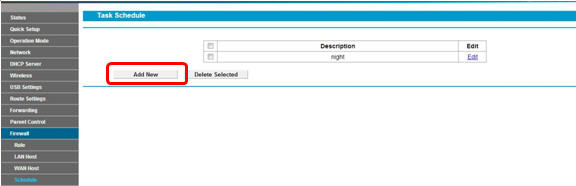
Step 6
Select the Day mode, then enter a brief description of the rule you are setting up. You can select the certain day (s), or choose Each day. What’s more, you can also select the certain time to get onto the Internet, specify the Start Time and Stop Time yourself, here we set the period as 00:00~06:00. And Click Save to save the settings.
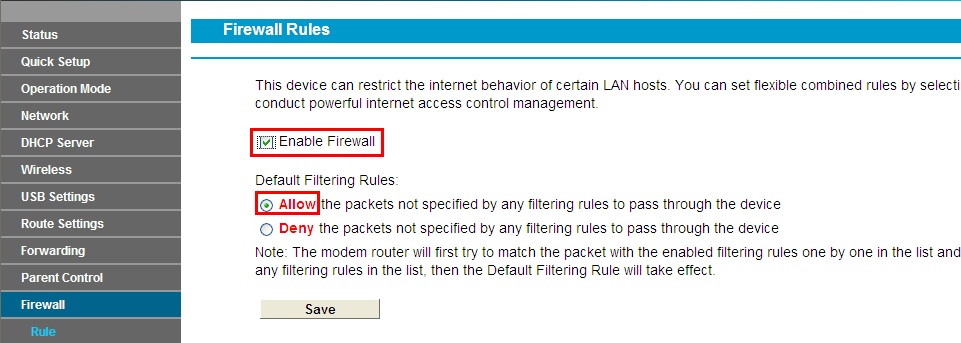
Step 7
Go to Firewall -> Rule select Enable Firewall and tick Allow then click Save.
Step 8
Click Add New.
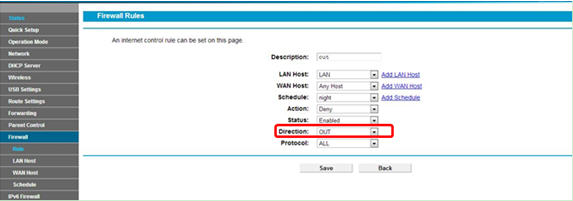
Step 9
a. Type in a name for the rule in the Description.
b. Select a host from the LAN Host drop-down list or choose “Add LAN Host”.
c. Select Any Host from the WAN Host drop-down list.
d. Select a schedule from the Schedule drop-down list or choose “Add Schedule”.
e. In the Action field, select Deny to deny your entry. This means the Internet is denied.( If you choose Allow, that means the Internet is allow to access)
f. In the Status field, select Enabled to enable your entry.
g. In the Direction field, select OUT from the drop-down list for the direction.
h . In the Protocol field, here are four options, All, TCP, UDP, and ICMP. Generally we choose ALL. (You can select a specified option if you know which one to choose).
i. Click Save.
When all done, you can get the settings as below:

Now the computer with IP address: 192.168.1.100 can’t go to the Internet from 0:00 to 6:00 every day.
Get to know more details of each function and configuration please go to Download Center to download the manual of your product.
A fost util acest FAQ?
Părerea ta ne ajută să îmbunătățim acest site.


