How to use PPTP VPN to access your home network on the Archer C3150_V2
PPTP VPN Server is used to create a VPN connection for remote client. To use the VPN feature, you should enable PPTP VPN Server on your router, and configure the PPTP connection on the remote client. Please follow the steps below to set up a PPTP VPN connection.
Step 1. Set up PPTP VPN Server on Your Router
1. Log in to the web-based interface of the router. If you don’t know how to do that, please refer to How do I log into the web-based Utility (Management Page) of TP-Link wireless router?
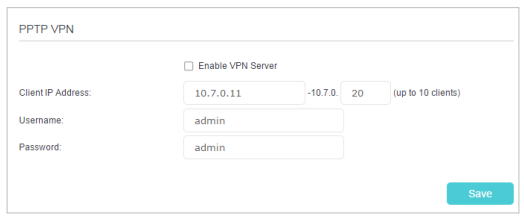
2. Go to Advanced > VPN Server > PPTP VPN, and select Enable VPN Server.

Note: Before you enable VPN Server, we recommend you configure Dynamic DNS Service (recommended) or assign a static IP address for router’s WAN port and synchronize your System Time with Internet.
3. In the Client IP Address filed, enter the range of IP addresses (up to 10 clients) that can be leased to the client by the PPTP VPN server.
4. Enter the Username and Password to authenticate clients to the PPTP VPN server.
5. Click Save.
Step 2. Configure PPTP VPN Connection on Your Remote Client
Remote client can use Windows built-in PPTP software or third-party PPTP software to connect to PPTP Server. Here we use Windows built-in PPTP software as an example.
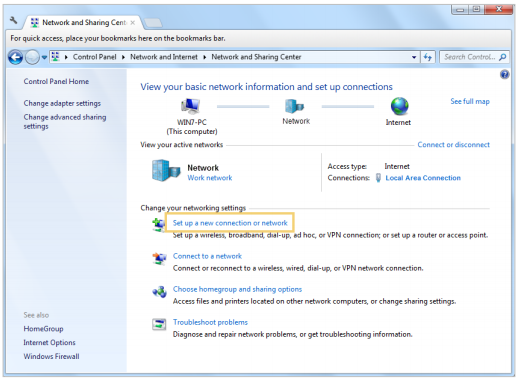
1. Go to Start > Control Panel > Network and Internet > Network and Sharing Center.
2. Select Set up a new connection or network.

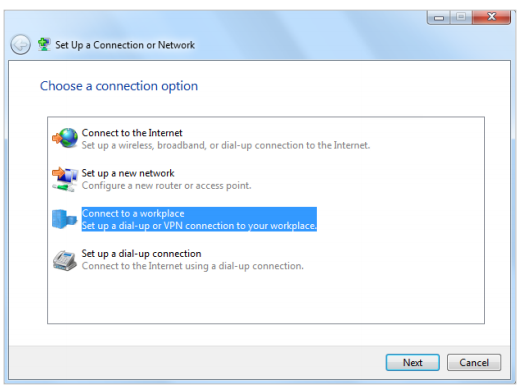
3. Select Connect to a workplace and click Next.

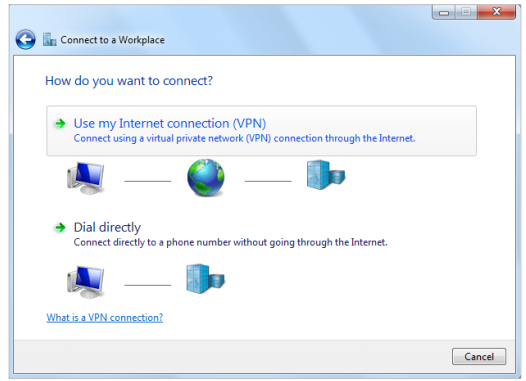
4. Select Use my Internet connection (VPN).

5. Enter the WAN IP address of the router (for example: 218.18.1.73) in the Internet address field. Click Next.

6. Enter the User name and Password, it’s the username and password you have set on your router, and click Connect.

7. The PPTP VPN connection is created and ready to use.

Get to know more details of each function and configuration please go to Download Center to download the manual of your product.
คำถามที่พบบ่อยนี้มีประโยชน์หรือไม่?
ความคิดเห็นของคุณช่วยปรับปรุงเว็บไซต์นี้