How to Use Print Server Function on TP-Link Router?
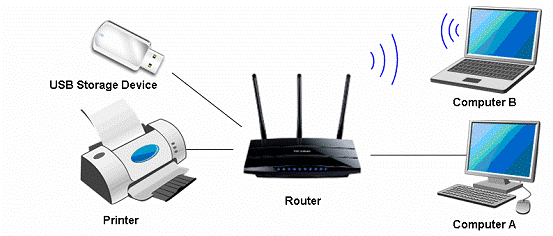
If your printer has Ethernet port or Wi-Fi function please ignore this article, and contact technical support of your printer's company.
Definition: Print server is a function embedded in your Router. It allows you to share your printer with computers that are connected to the Router.
Preparation:
TP-Link Router with USB port which supports print server function
USB printer and USB cable
Computer with Windows XP/ Windows Vista/ Windows 7/ Windows 8/Windows 8.1/Windows 10/Mac
Note:
Make sure you have already installed the printer’s driver on your computer. Otherwise, please install it first.
Any computer in your LAN must first install the software if it wants to share the print server via the Router.
Installation - For Windows Vista, XP, 7, 8, 8.1 &10 (For Mac OS)
Step 1
Download the setup software TP-Link USB Printer Controller utility from our website: www.tp-link.com. Go to Support ->Download Center, find your product model and click Utility on the next page, then you can select the USB Printer Controller Utility and download it.


Step 2
Double-click TP-Link USB Printer Controller Setup.exe you’ve downloaded.
Step3
Click NEXT to start installing the printer share software.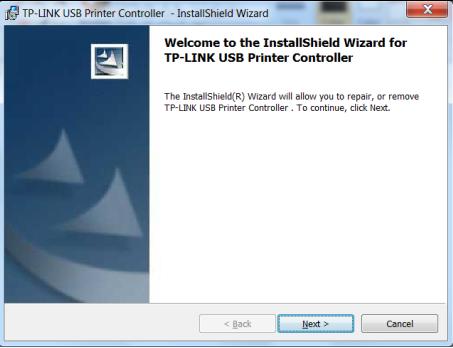
Step 4
Please enter your information in the requested field and then click Next.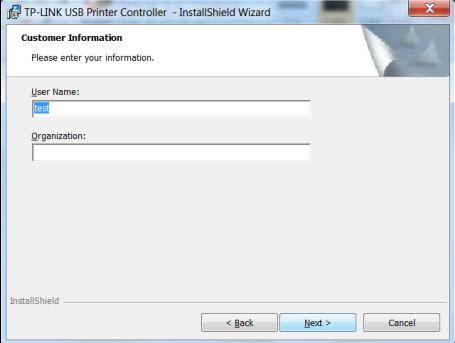
Step 5
Click Change… to select another destination folder, or leave it default and click Next.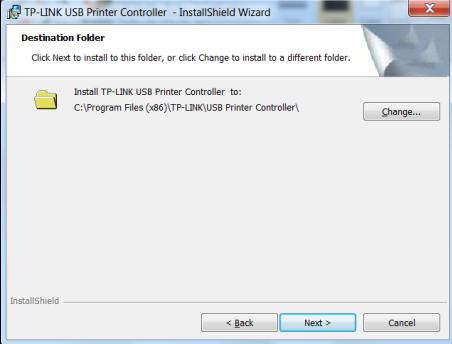
Step 6
Click Install to begin the installation.
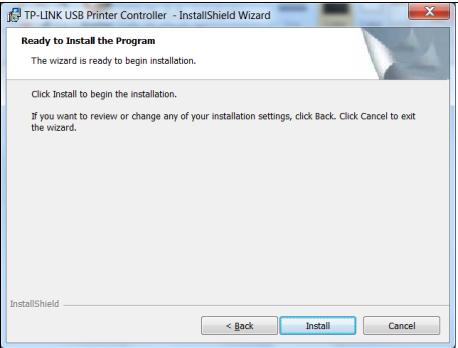
Step 7
Please wait a while, Click Finish to complete and exit the Install Shield Wizard.
Installation - for Mac OS
Step 1
Download the setup software TP-Link UDS Printer Controller Installer.dmg from our website: www.tp-link.com.
Step 2
Double-click the software you’ve downloaded.
Step 3
Double-click the TP-Link UDS Printer Controller Installer.app in the windowthat pops up
Step 4
Click Install to start the installation process.
Step 5
Click Restart to finish the software installation.
Application - For Windows Vista, XP, 7, 8, 8.1 &10 (For MAC OS)
After successful installation, the icon will appear on the desktop of your computer.
Step 1
Double-click the icon To Launch the TP-Link USB Printer Controller
Step 2
Highlight the printer you want to set as auto-connect printer.
Note: If your printer is not displayed,
a. Check the physical connection;
b. Re launch the Printer Controller;
c. Our TP-Link would be compatible with a large proportion of USB printers from most of main brands, like HP, Canon, Epson, Brother, Samsung and Lenovo, etc. If your printer is still not working with our router, it might be the compatibility issue.
Step 3
Click the inverse triangle mark on the Auto-Connect for printing tab to pull down the list, where you can select Set Auto-Connect Printer.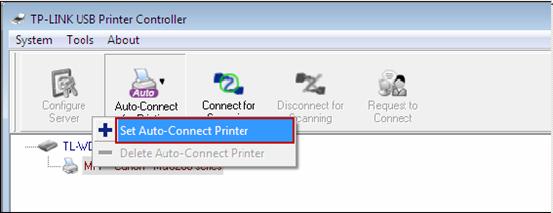
Step 4
Tick the name of the printer you would like to set as auto-connect printer, and then click Apply.

Application - for Mac OS
Step 1
Double-click the icon to launch the USB Printer Controller
Step 2
Highlight your printer.

Step 3
Click the tab Auto-Connect for printing to pull down a list, whereyou can select Set Auto-Connect Printer.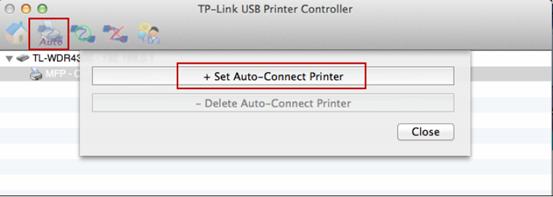
Step 4
Select the printer you would like to set as auto-connect printer, and then click the Apply button.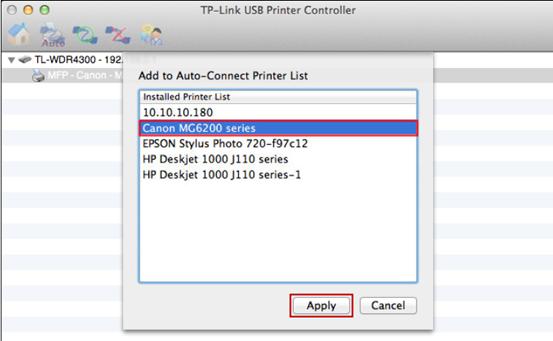
After successful setting, you will see the printer marked as Auto-Connect Printer. You can execute your printing tasks automatically.
Bu SSS faydalı mı?
Your feedback helps improve this site.


