How do I secure/protect my wireless network by using WPA-PSK/WPA2-PSK on TP-Link Wireless 11N Router?
|
Step 1
Open the web browser and type http://tplinkwifi.net or the IP address of the router (default is http://192.168.0.1 or http://192.168.1.1) into the address bar and then Press Enter.
 Step 2
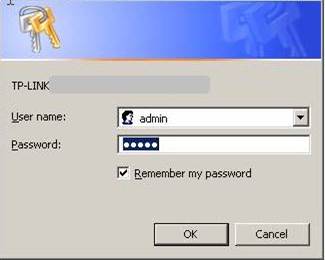
Type the username and password in the login page, the default username and password are both admin.
 Step 3
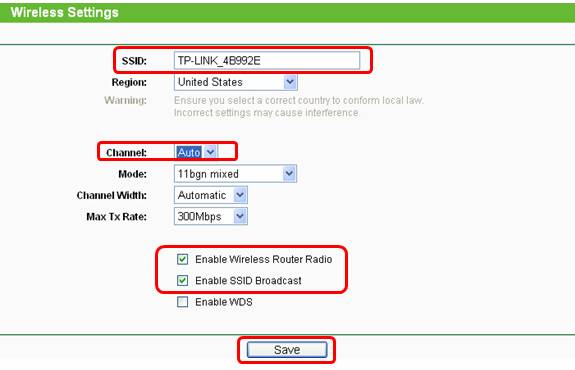
Select Wireless->Wireless Settings on the left side menu to open the wireless setting page.
 SSID: Set a new name for your wireless network.
Channel: It is better to be located to 1, 6 or 11 than Auto.
"Enable Wireless Router Radio" and "Enable SSID Broadcast" should be both ticked.
For dual band wireless routers, you can configure the 2.4GHz and 5GHz wireless separately.
 Step 4
Click Save to save your settings.
Note: After clicking on Save button, you will see a tip (red line) at the bottom of the page. But actually there is no need to reboot at here and we will reboot the router at the end of the configurations in Step 7.
 Step 5
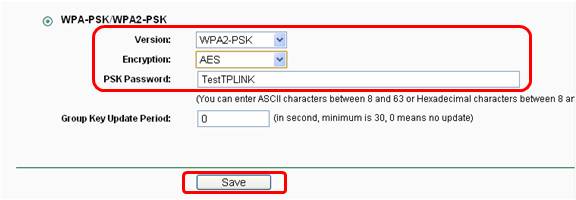
Select Wireless->Wireless Security on the left side menuand check WPA-PSK/WPA2-PSK or WPA/WPA2 Personal.
 Version: WPA-PSK or WPA2-PSK
Encryption: TKIP or AES
PSK Password: make up your WIFI password, also called Wireless Network Key.(the length of PSK Password is between 8 and 63 characters)
For dual band wireless routers, you can configure the security of 2.4GHz and 5GHz wireless separately.
 Step 6
Click Save to save your settings.
Note: For dual band router, you can configure different wireless network name and wireless security for different frequency.
Step 7
Select Systems Tools ->Reboot on the left side menu. Reboot the router to make all the settings take effect.
 Get to know more details of each function and configuration please go to Download Center to download the manual of your product.
|