Getting started with an Omada Controller
Contents
Getting Started with an Omada Controller
Set Up the Omada Cloud-Based Controller
Set Up the Omada Hardware Controller
Set Up the Omada Software Controller
Objective
This article introduces setting up Omada devices with an Omada Controller.
Requirements
- Omada Cloud-Based Controller / Hardware Controller / Software Controller
Introduction
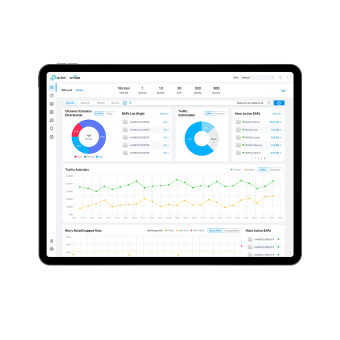
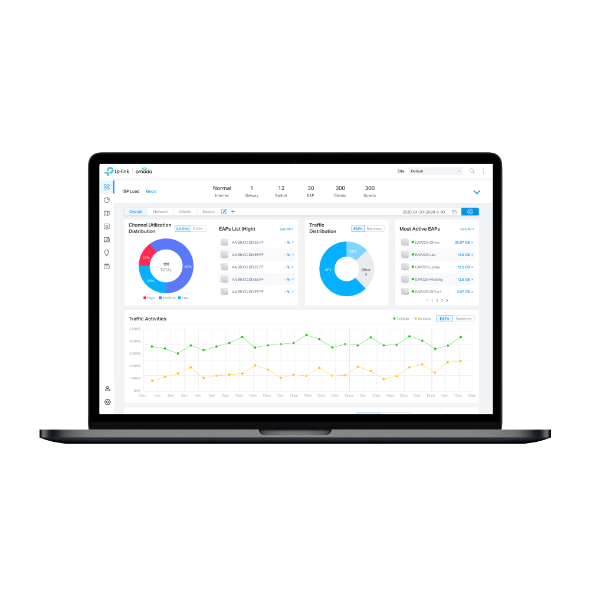
The Omada Controller serves as the command center and management platform at the core of the Omada network. It offers a unified approach to configuring your networks comprising Omada devices, including APs, Switches, and Gateways. This streamlines the process of setting up and managing your Omada network.
There are three types of Omada Controllers: Cloud-Based, Hardware, and Software. Though different in form, they share a similar browser-based management interface for network management. Consequently, they have nearly the same initial setup steps, including building your network topology, deploying your controller, and logging in to the controller.
If you are new to the Omada Controller solution, we recommend you watch the following video to learn how to choose an Omada Controller and its management interface.
How to Choose an Omada Controller
Getting Started with an Omada Controller
Based on the type of Omada Controller you choose, you can refer to the following guides to start setting up Omada devices with an Omada Controller.
Set Up the Omada Cloud-Based Controller
The Omada Cloud-Based Controller (CBC) is on the Omada Cloud server, offering subscription-based licensing with tiered pricing options. The Omada CBC solution allows you to configure and manage your Omada devices via the Omada Cloud Service without purchasing an additional Hardware Controller or installing the Software Controller on the host. For more information about the Omada CBC, refer to this FAQ: General Questions about the Omada Cloud-Based Controller.
The Omada CBC can be registered and set up via a web browser. After completing the initial setup process, you can also manage the Omada CBC via the Omada app. Check out the following setup video for setting up the Omada CBC via a web browser.
How to Register and Set up a Cloud-based Controller
Setup Overview
Step 1: Log in to the Omada Cloud Portal: https://omada.tplinkcloud.com.
Step 2: Register an Omada Cloud-Based Controller.
Step 3: Complete the Omada Setup Wizard to set up your controller.
Step 4: Launch the controller to adopt and manage your Omada devices.
Set Up the Omada Hardware Controller
Omada Hardware Controllers, such as OC200 and OC300, are dedicated management devices pre-installed with the Omada Software Controller. Purchase the device, and the built-in Software Controller is ready to use.
The Omada Hardware Controller can be set up using either the Omada app or a Web browser. Once the initial setup is complete, you can configure and manage your Omada devices through your preferred app or browser choice.
Using the Omada App (via your mobile device)
Refer to the following setup video for setting up the Omada Hardware Controller (OC200 is used as an example) via the Omada app locally and remotely.
How to configure an Omada Hardware Controller via the Omada App
Setup Overview
Step 1. Connect the Omada Hardware Controller to your network.
Step 2. Download and install the TP-Link Omada app on your mobile device.
Step 3. Add the Omada Hardware Controller via local access or cloud access.
Step 4. Complete the Omada Setup Wizard to set up your controller.
Step 5. Launch the controller to adopt and manage your Omada devices.
Using a Web Browser
Refer to the following setup video for setting up the Omada Hardware Controller (OC200 is used as an example) via a web browser locally and remotely.
How to configure Omada Hardware Controller via a Web Browser
Setup Overview
Step 1. Connect the Omada Hardware Controller to your network.
Step 2. Connect a laptop to the same subnet as your Omada Hardware Controller.
Step 3. Add the Omada Hardware Controller via local access or cloud access.
Step 4. Complete the Omada Setup Wizard to set up your controller.
Step 5. Launch the controller to adopt and manage your Omada devices.
Set Up the Omada Software Controller
The Omada Software Controller can be hosted on Windows or Linux systems within your network. However, this is only advisable for experienced network administrators, as it requires a significant degree of attention.
You must manually set up your network to ensure effective communication between the Controller host and Omada devices. Success may depend on your ability to work through different third-party software, firewalls, and other networking devices. Consequently, it is not a suitable solution for all users.
Check out the installation guides below to install the Omada Software Controller on your Windows or Linux host.
Installation on a Windows Host
Refer to the following setup video to install and set up the Omada Software Controller (Windows OS).
How to Install and Set Up the Omada Software Controller
Notes:
1. The Controller requires Java 64bit eight or above. Ensure that the Java Runtime Environment (JRE) is installed on your system.
2. Enable required ports for the Omada Software Controller on any local firewalls or antivirus software. Check out Which ports Omada Controllers and Omada Discovery Utility use. (Controller 5.0.15 and above) for more details.
3. Check out What I should do if I fail to install the Omada Software Controller if you are experiencing setup issues.
Installation on a Linux Host
Check out the following guide to install and set up the Omada Software Controller (Linux OS).
How to install the Omada Software Controller on Linux
Notes:
1. The Controller requires Java 64-bit eight or above and MongoDB 3.0-7.0. Ensure that the Java Runtime Environment (JRE) and MongoDB are both installed on your system.
2. Enable required ports for the Omada Software Controller on any local firewalls or antivirus software. Check out Which ports Omada Controllers and Omada Discovery Utility use. (Controller 5.0.15 and above) for more details.
3. Check out What I should do if I fail to install the Omada Software Controller if you are experiencing setup issues.
After the installation, launch the controller on your laptop to complete the Omada Setup Wizard to set up your controller. Like the Omada Hardware Controller, once the initial setup is complete, you can configure and manage your Omada devices via the Omada app or a Web browser.
Is this faq useful?
Your feedback helps improve this site.
TP-Link Community
Still need help? Search for answers, ask questions, and get help from TP-Link experts and other users around the world.


