How to configure DHCP Address Reservation on TD-8840T(V4),TD-W8968(V1/V2),TD-W8970/8980/9970/9980,Archer D2/D5/D7/D9
This Article Applies to:
When you specify a reserved IP address for a PC in the LAN, the PC will always receive the same IP address each time when it connects the DHCP server.
Preparation: Check Ethernet adapter’s MAC address of the computer.
Step 1
Click on windows key  + R key on the keyboard at the same time.
+ R key on the keyboard at the same time.Step 2
Type “cmd” in the box, and then press OK.
Step 3
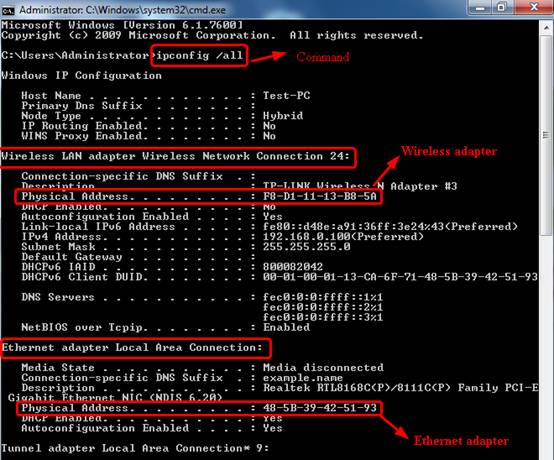
On the popping up black window, type command “ipconfig /all” and press Enter. It will show all current network adapters’ MAC address of this computer.
For example, MAC address of this computer’s Ethernet adapter : 48-5B-39-42-51-93 (please write it down for later use)
For MAC OS please refer to:
Step 4
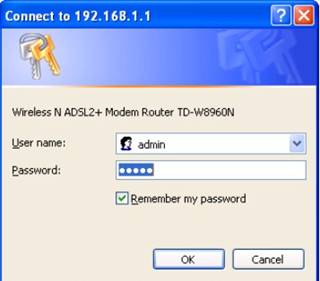
Open the web browser and type in http://192.168.1.1 in the address bar and press Enter. The Username and Password are both “admin”.

Step 5
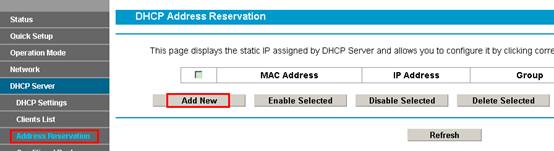
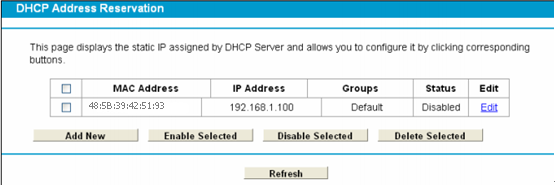
Choose menu “DHCP Server”--“Address Reservation”, you can view and add a reserved address for clients via the next screen .
To Reserve an IP address:
1. Click the Add New button. Then the following picture will pop up.
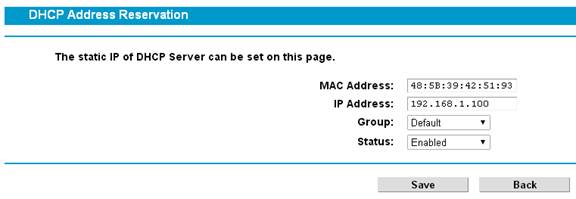
2. Enter the MAC address (in XX:XX:XX:XX:XX:XX format, here we take 48:5B:39:42:51:93 as an example ) and IP address (here we take 192.168.1.100 as an example) of the computer for which you want to reserve an IP address.
3. Click the Save button.
To modify or delete an existing entry:
1. Click the Edit in the entry you want to modify. If you want to delete the entry, click the Delete.
2. Modify the information.
3. Click the Save button.
Click the Enable/Disable Selected button to make selected entries enabled/disabled.
Click the Delete Selected button to selected entries
After Address Reservation is done, the specified IP Address will be assigned to the targeted device prior to others.
Get to know more details of each function and configuration please go to Download Center to download the manual of your product.
Câu hỏi thường gặp này có hữu ích không?
Phản hồi của bạn giúp cải thiện trang web này.
