How to set up Wake-on-LAN on wireless router
What is Wake-on-LAN?
Wake-on-LAN (WoL) is an Ethernet or Token ring computer networking standard that allows a computer to be turned on or awakened by a network message. The message is usually sent by a program executed on other devices. It is also possible to initiate the message from another network by using subnet directed broadcasts or a WOL gateway service.
Hardware requirements
The mainboard and wired network adapter must support Wake-on-LAN feature.
Software requirements
WakeOnLanGui,LanHelper for Windows or RemoteBoot for IOS.
Here we take RemoteBoot as an example.
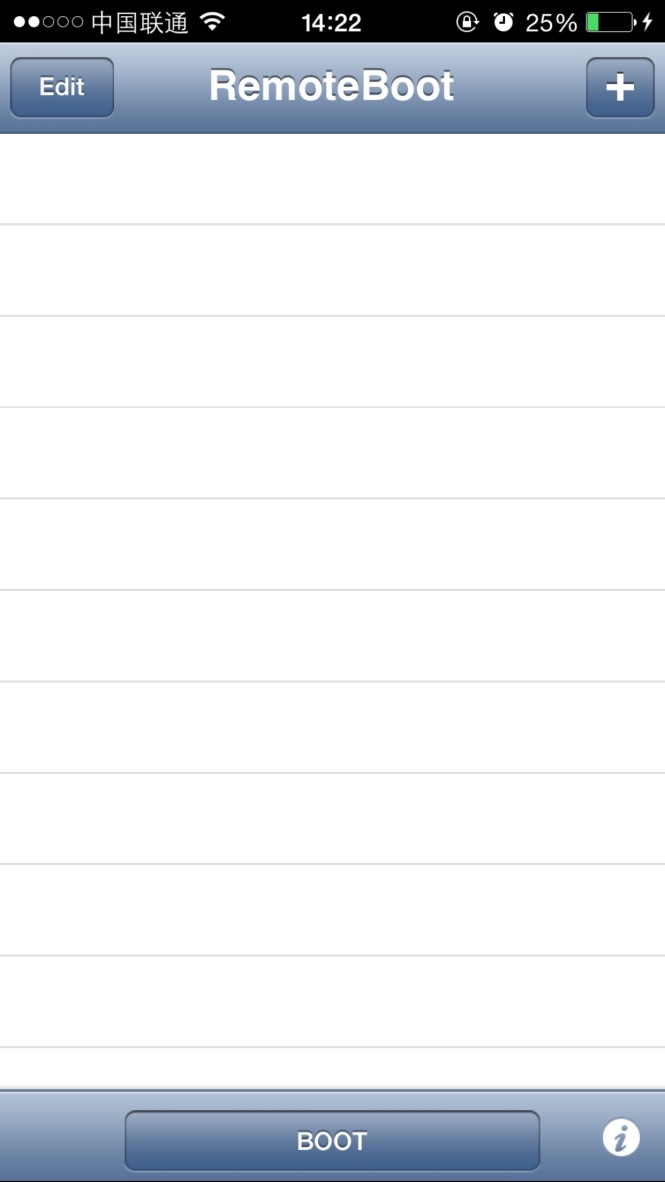
Set up steps:
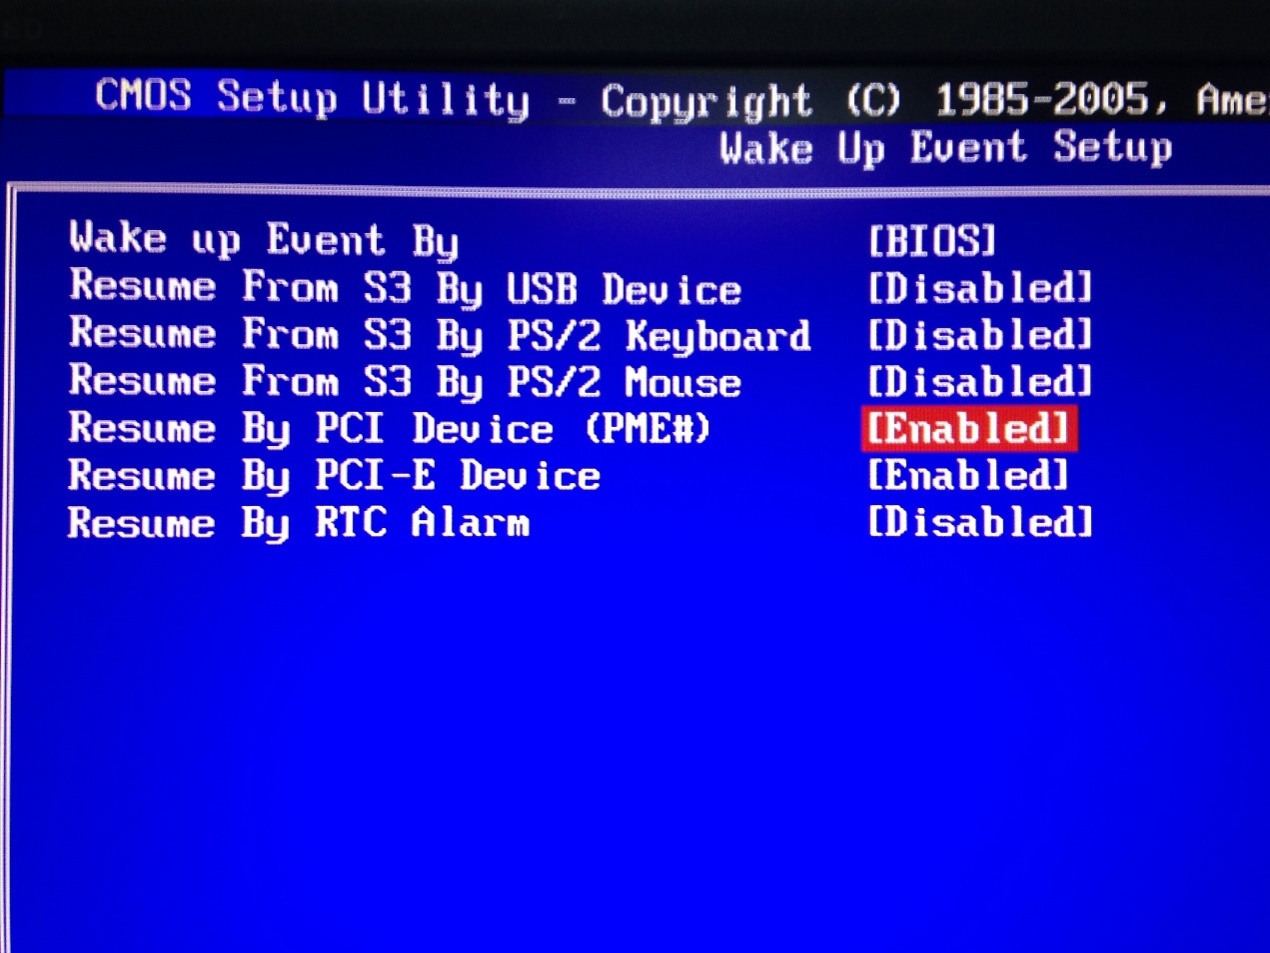
1. Enter BIOS when start up the computer. Then enable ‘Resume by PCI Device’ and ‘Resume by PCI-E Device’. Usually this option is in power management menu.
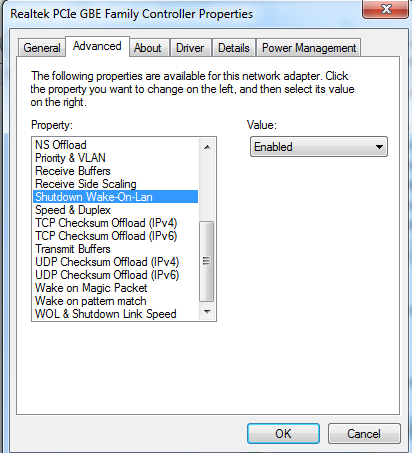
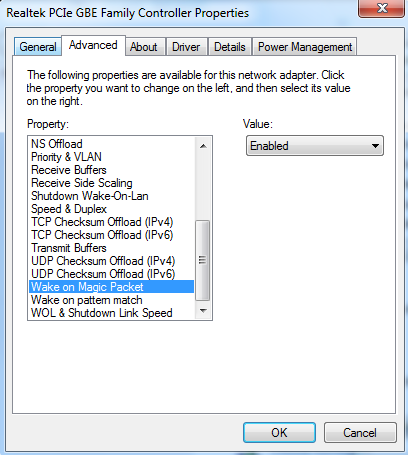
2. Turn on the computer and go to Control Panel--Network and Internet--Network and Sharing Center--Local area connection--Properties--Configure--Advanced. Then Enable ShutDown Wake-On-Lan, Wake on Magic Packet and Wake on pattem match.
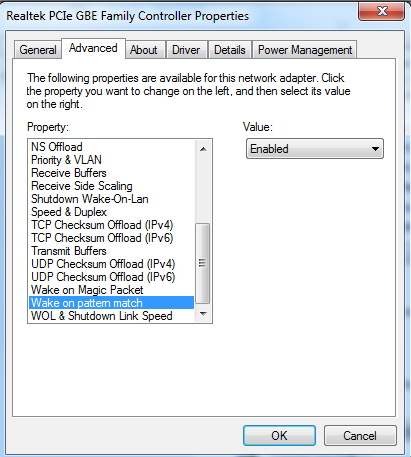
After the settings are done on the computer, we need to do some setting on our Router.
Wake up a PC on WAN side
1.Check MAC address and IP address of the computer need Wake-on-LAN. We call it PC 1 here.
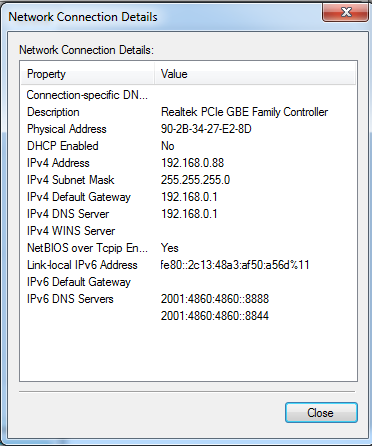
2.Set IP&MAC binding of PC 1 on our router and enable IP&MAC binding function.
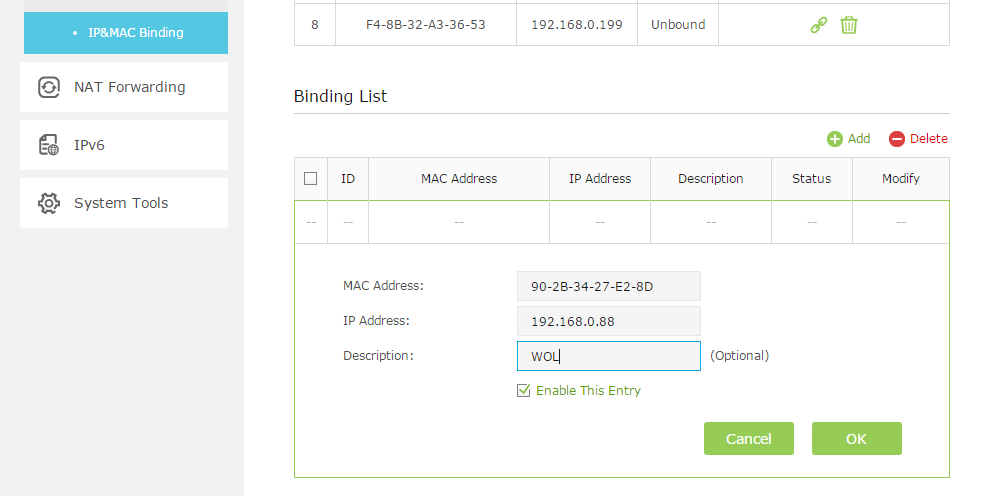
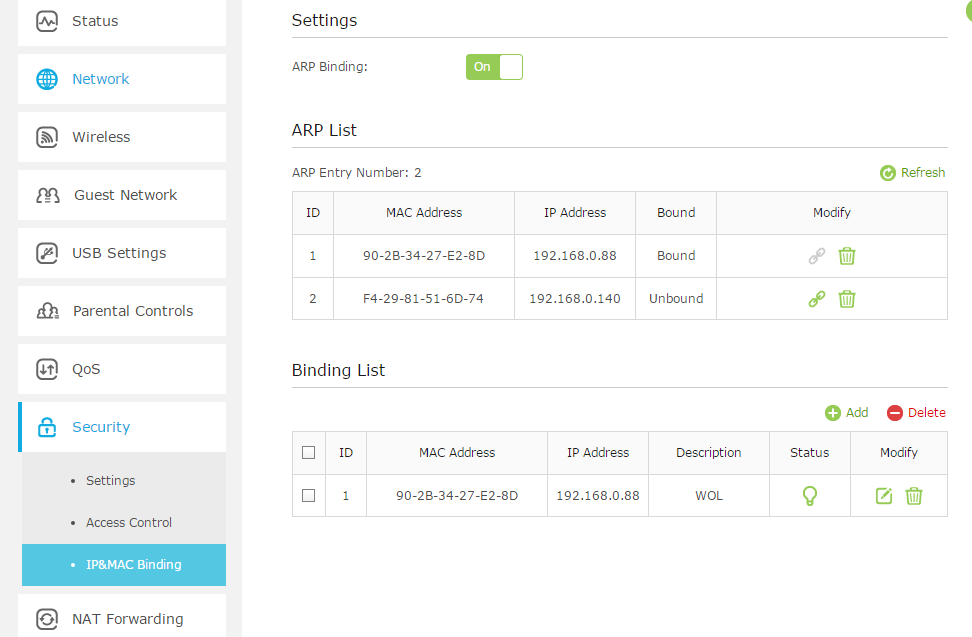
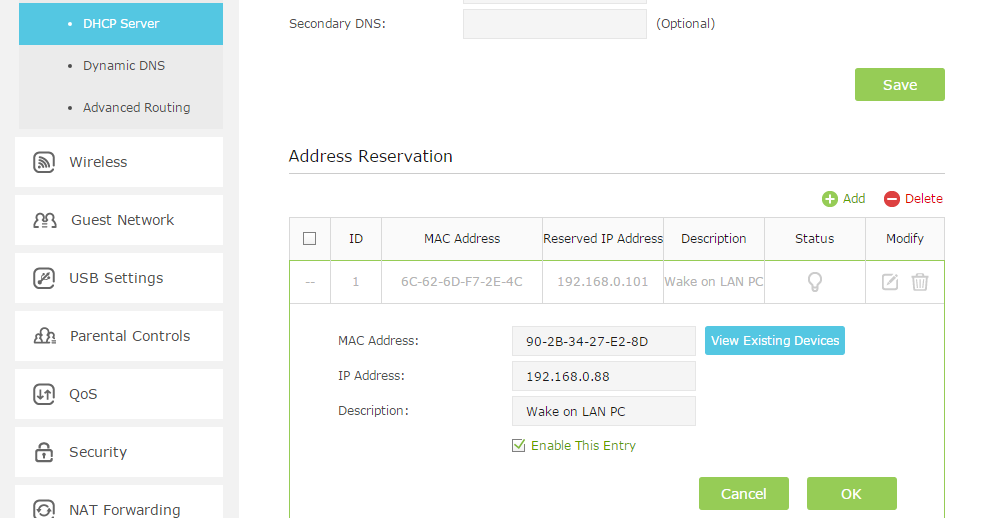
3. Set Address reservation for PC 1 on our router.
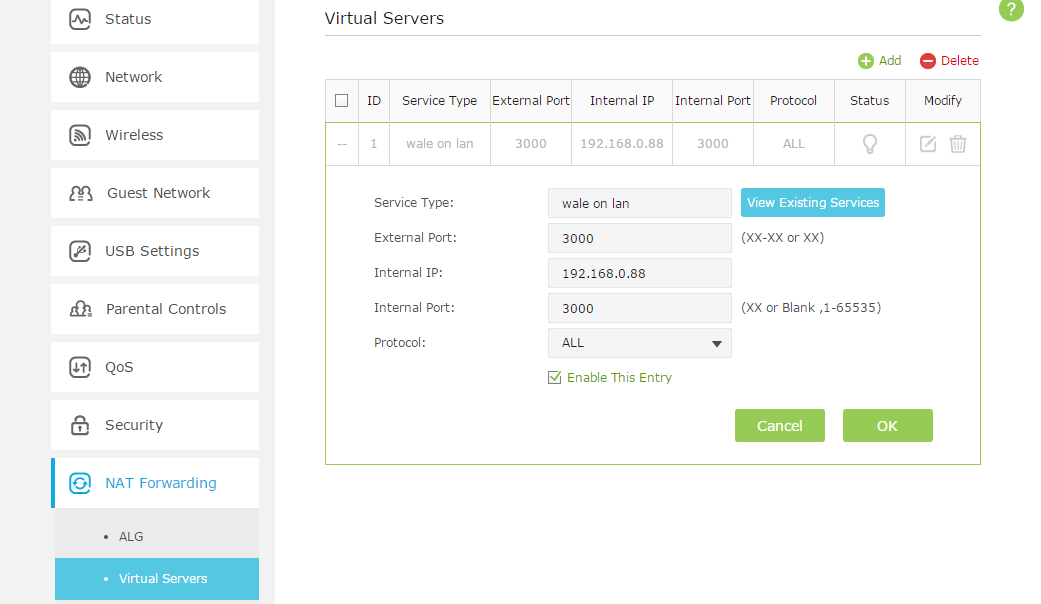
4. Open a port for PC 1 by port forwarding function such as virtual server. Here we open port number 3000.
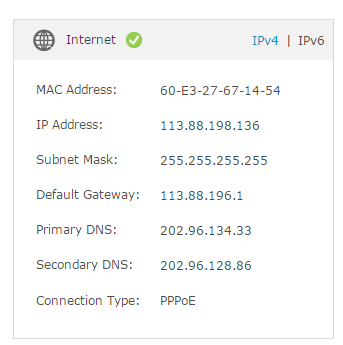
5. Now we check the WAN IP address of the Router PC 1 connected. Here the WAN IP is 113.88.198.136 .
Note:
The WAN IP address is a dynamic IP usually and it may change at any time. In this case, you may try to set up the DDNS (Dynamic Domain Name Server) on the router following the FAQ. On the RemoteBoot app, the IP will be a domain name you registered with DDNS instead of the WAN IP.
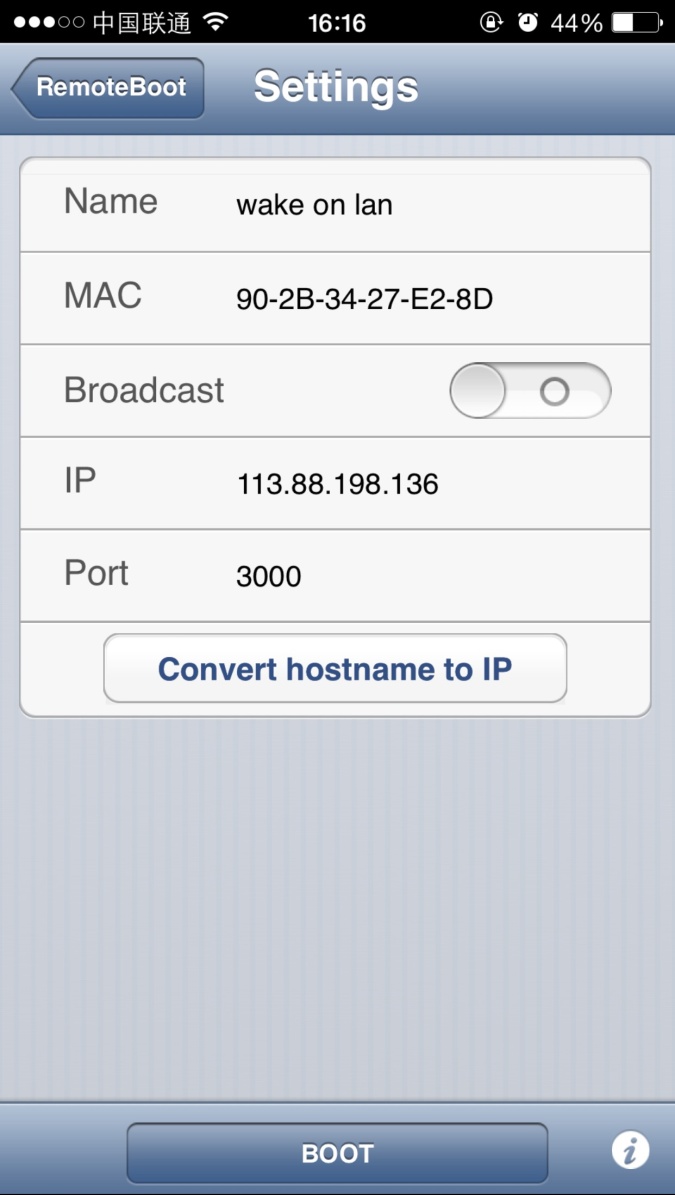
6. Run RemoteBoot app on iPhone from the WAN side. Then fill in the information like below and click BOOT. You can see PC 1 will start up after you click it.
Is this faq useful?
Your feedback helps improve this site.
TP-Link Community
Still need help? Search for answers, ask questions, and get help from TP-Link experts and other users around the world.

-1.0-A_normal_1584496536672l.png)