How to configure my 11N Range Extender via Web GUI (new logo)
Before start:
1. Factory Reset Your Extender. With the extender powered on, use a pin to press the RESET button (pinhole) until all the LEDs flash once.

2. Ensure the correct Wi-Fi password of your main router. Forget router Wi-Fi on your mobile phone and manually input the Wi-Fi password to verify the router’s Wi-Fi password is correct. ( Phone Settings > Wi-Fi >tap router's Wi-Fi SSID to forget network or Long press wifi name to delete the Wi-Fi profile). Or check the Wi-Fi password on the router Wireless settings management page.
Here takes TL-WA820RE as a demonstration:
1. Log into the Web GUI of the range extender. If you don’t know how to do that, please refer to How to log into the Web GUI of my 11N Range Extender (new logo)?
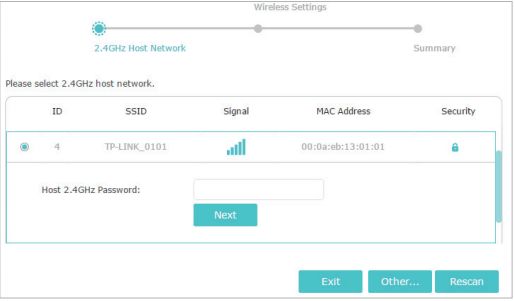
2. Select your host router’s 2.4GHz SSID (network name), enter the password (NOT the password you just created for the login of web management page), and click Next.

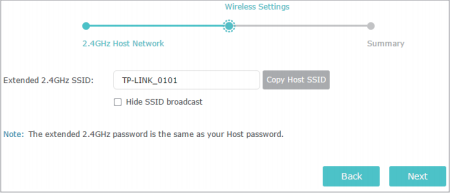
3. Either keep the default SSID (network name) or customize it for the 2.4GHz extended network, and then click Next.

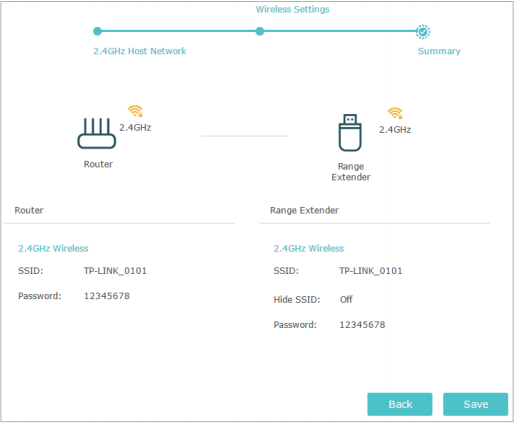
4. Verify your wireless settings and click Save.

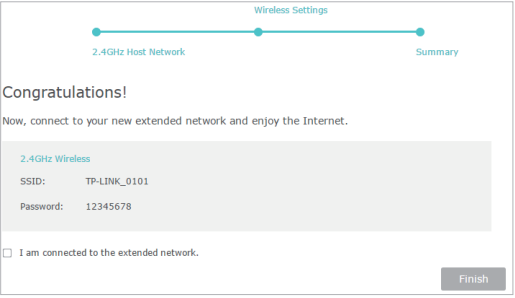
5. Enjoy! Connect to the extended network and enjoy the internet. The extended network shares the same wireless password as those of your host network, but may have different network names if you have customized the SSID during the configuration.

Get to know more details of each function and configuration please go to Download Center to download the manual of your product.
Is this faq useful?
Your feedback helps improve this site.
TP-Link Community
Still need help? Search for answers, ask questions, and get help from TP-Link experts and other users around the world.