How to check detailed client information and change the icon & name of your client via Tether App
Case 1 For Wi-Fi 6/6E/7 Router, Wi-Fi 7 Range Extender
For example: Archer AX72/AXE95/BE800/BE900, RE800BE, Etc.
Step 1: Launch the Tether app, and tap Local Device > Clients> the target client (you want to learn about) to open its details page.
*Cannot find it? Just click here.
Step 2: See what detailed information you can know about your client.
You can see Name, Connection, Joined time, IP Address, MAC Address, Total Traffic Usage of your client directly in this page.

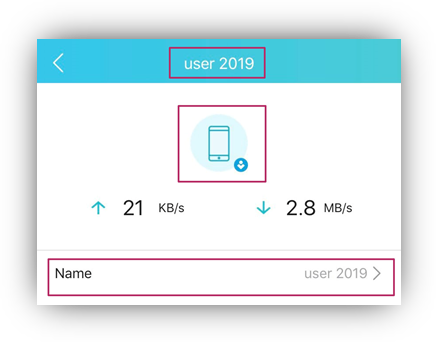
Step 3: Tap the Name of your client, then you can edit icon & name.


Case 2 For other models
For example: Archer A8/C54/C5400/VR900/MR600, RE500/TL-WA854RE, Etc.
Step 1: Launch the Tether app, and tap Local Device > Clients> the target client (you want to learn about) to open its details page.
*Cannot find it? Just click here.
Step 2: See what detailed information you can know about your client.
You can see Name, Connection, Joined time, IP Address, MAC Address, Total Traffic Usage of your client directly in this page.

- Change the name of your client: try to tap the Name of your client, then you can edit it! Remember to Save it after editing.
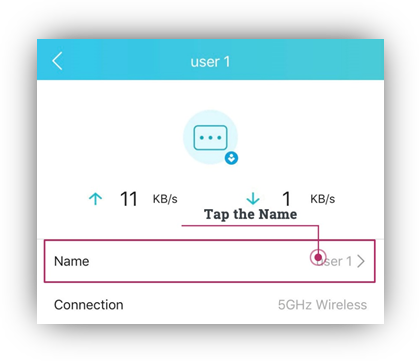
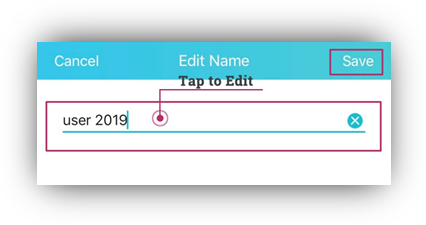
- Change the Icon of your client: if you have too many clients, it may be a little bit hard for you to find one of them quickly. Don’t worry, different icons for common equipment are here to help you. Tap the Icon, then it will show you the options. Choose one and Save your changes.
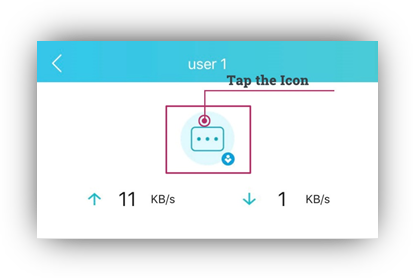
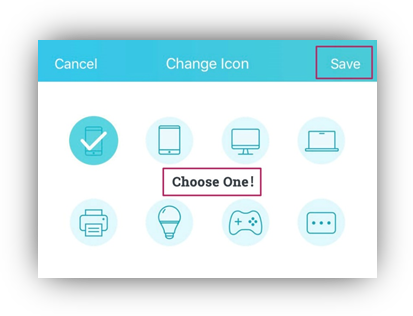
Finally, the Name and Icon are set as you like!
Get to know more details of each function and configuration please go to Download Center to download the manual of your product.
Is this faq useful?
Your feedback helps improve this site.
TP-Link Community
Still need help? Search for answers, ask questions, and get help from TP-Link experts and other users around the world.