How to remove the existing wireless network profile on Windows 8
Removing wireless network profile may become necessary when you try to connect to a wireless network after you changed its password (without renaming it), so that it can identify the new one.
Solution 1
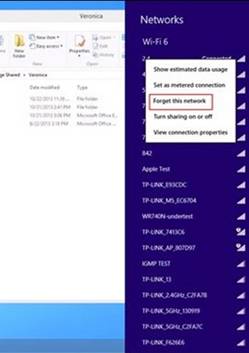
Step1 Click on the Wi-Fi icon at the right-hand corner in the task tray, and it will bring out all the available wireless signals;
![]()
Step 2 Right click on the existing wireless network name and select forget this network;

Step 3 Reconnect to the wireless network.
Solution 2
Step 1 You can also bring out all the wireless networks by a way of control panel;
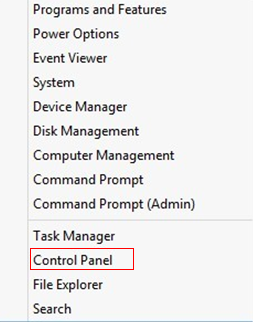
Press ‘Windows key +X’, and click on Control Panel:

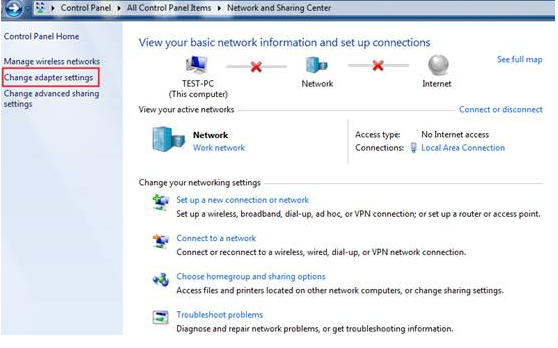
Step 2 Then click on Network and InternetàNetwork and Sharing CenteràChange Adapter Settings (on the left):

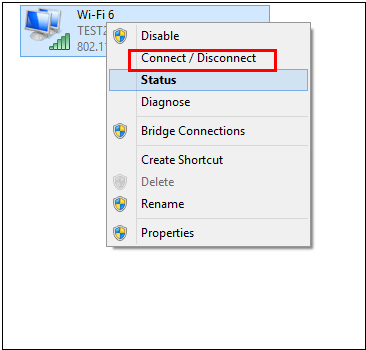
Step 3 Right click on Wi-Fi icon and locate on Connect/Disconnect, then you will see the existing wireless network:

Step 4 Remove the existing profile as mentioned in Solution 1.
Step 5 Reconnect to the wireless network.
Is this faq useful?
Your feedback helps improve this site.
TP-Link Community
Still need help? Search for answers, ask questions, and get help from TP-Link experts and other users around the world.